Sheet3, Drawing view8, Detail view b (1 : 1) – Future Automation EAD User Manual
Page 4: Drawing view10, Future automation ead
Advertising
B
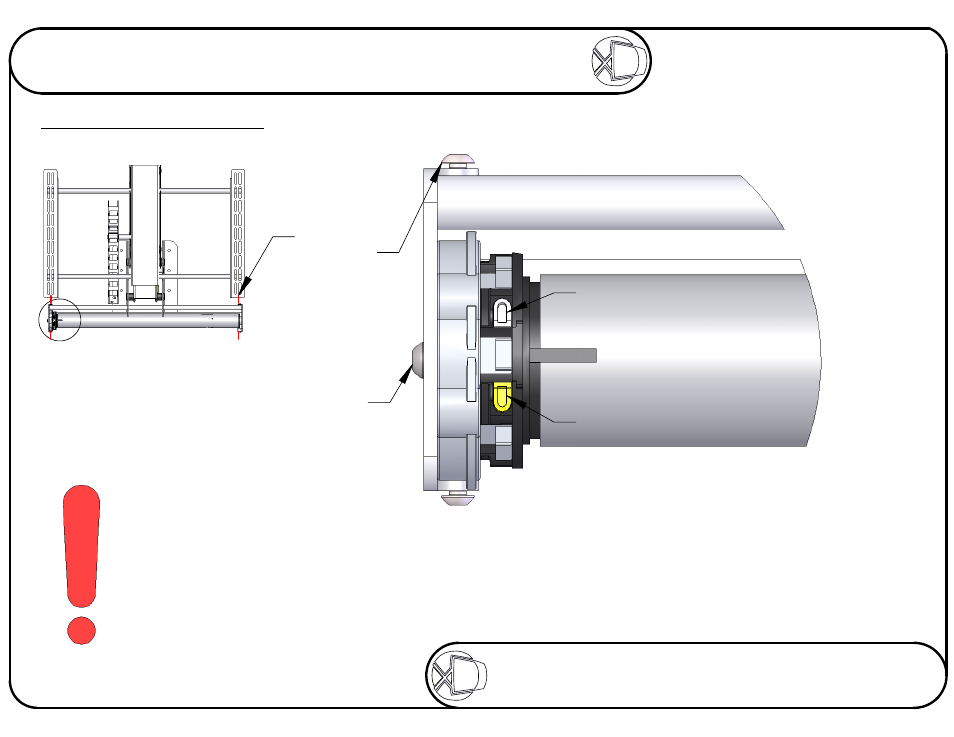
TOP BUTTON: IN STOP
BOTTOM DOWN: OUT STOP
DETAIL B
Any queries, please
contact Jack or Tony
at Future Automation
01438 833577
IN SWITCH
OUT SWITCH
DO NOT REMOVE
THIS SCREW
The EAD comes set to its maximum
drop. Do not try to adjust it past
it's factory setting.
When the buttons are clicked out they are set. To adjust the positions push the buttons so they are clicked in,
use the remote to get mechanism in the new positions. Press stop on the remote in the desired position and
set by pressing the corresponding motor switch so it clicks out. The new position is now set.
X4 COVER
BOLTS
Sheet 4 of 8
ISSUE: 003
www.futureautomation.co.uk
FUTUREAUTOMATION
EAD
Electric Advance & Drop
Instructions Sheet
Adjusting Mechanism Limits
Advertising