14 thermostat installation – United States Stove Company 5040 User Manual
Page 16
14
THERMOSTAT INSTALLATION
OPTIONAL THERMOSTAT
A thermostat may help you maintain a constant house temperature automati-
cally. A millivolt thermostat is required. A fixed wall mount or
US Stove’s
hand
held model can be used. The control panel can be set up two ways to operate
your stove in thermostat mode.
THERMOSTAT INSTALLATION
•
A MILLIVOLT THERMOSTAT IS REQUIRED.
• Unplug stove from power outlet.
• Remove control board from stove.
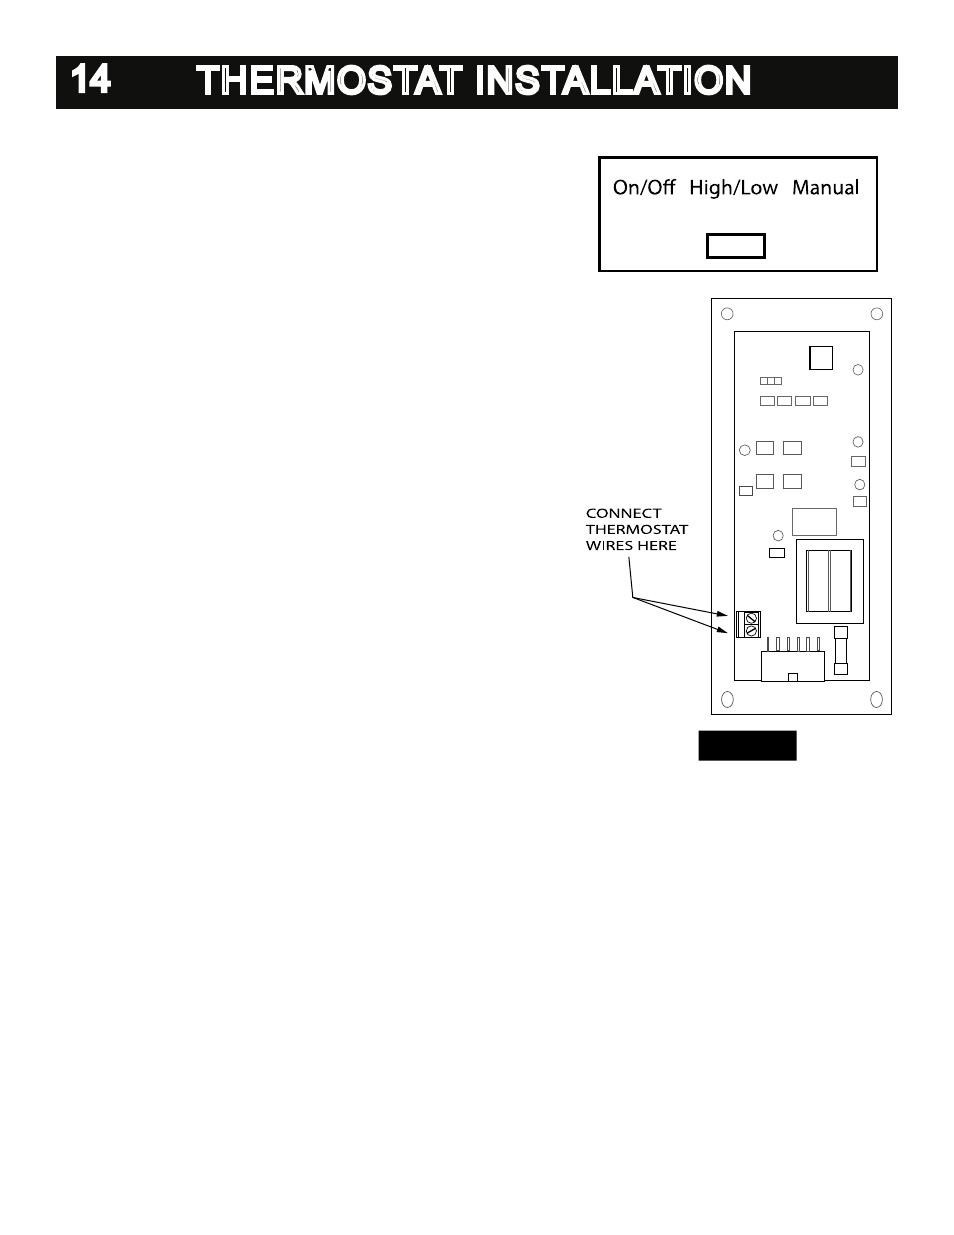
• The two thermostat wires connect to the terminal block on the lower left
side of the back of the control board.
(See figure 24)
• Insert the wires in the terminal side and tighten the two screws.
MODES
TO SWITCH BETWEEN ANY OF THE THREE MODES THE STOVE MUST
BE SHUT OFF, THE NEW MODE SELECTED, AND THE STOVE RESTART-
ED.
MANUAL MODE
•
USE THIS MODE EXCLUSIVELY IF YOU DO NOT CONNECT AN OP-
TIONAL THERMOSTAT
• In this mode the stove will operate only from the control panel as detailed
in the
“OPERATION” section of this owner’s manual.
HIGH/LOW THERMOSTAT MODE
•
USE THIS MODE ONLY IF YOU CONNECT A THERMOSTAT
• When engaged in this mode the stove will automatically switch between
two settings. When warm enough, it will switch to the #1 or low setting.
The room air blower will also slow to its lowest speed.
• The Heat Level Advance setting on the bar graph will stay where it was
initially set. When the house cools below the thermostat setting, the stove
will switch to the feed rate of the heat level advance setting.
ON/OFF THERMOSTAT MODE
•
USE THIS MODE ONLY IF YOU CONNECT A THERMOSTAT
• In this mode when the home is warm enough the stove will shut off. The
fans will continue to run until the stove cools.
• When the home cools below the thermostat setting, the stove will auto-
matically restart and run at the last feed rate setting.
NOTE: When in “high/low” or “on/off” thermostat mode –
• Do not operate the stove higher than the #3 setting.
• Set damper control rod approximately ¼” to ½” out. This will vary depend-
ing on elevation and weather conditions. Observe stoves operation and
adjust damper as necessary.
FIGURE 24