Vectronics VEC-1402K User Manual
Page 10
VEC-1402K Instruction Manual
2 Meter Pre-Amp Kit
8
STEP-BY-STEP ASSEMBLY
Before assembling your kit, please take time to read and understand the VEC kit
warranty printed on the inside cover of this manual. Also, read through the
assembly instructions to make sure the kit does not exceed your skill level. Once
you begin construction, your kit will be non-returnable. Finally, if you haven't
already done so, please verify that all parts listed in the inventory are included.
If anything is missing or broken, refer to the warranty instructions for replacing
missing or damaged parts.
Note that part designators, such as R1, C3, etc., appear on a silk-screened legend
on the component-mounting side of the printed circuit board. This corresponds
with the parts placement page in the manual. All parts will be inserted on the
silk-screen side of the board.
Except for Q1, none of the parts used in this preamp are polarized, so it makes
no difference which way the part is inserted into the board. If you orient
capacitors so their values face the board edges, you'll be able to read them easily
when the kit is finished.
If you have last-minute questions about tools and materials needed to build your
kit, please refer back to the section tilted "Before You Begin". If you're ready to
begin now, let's get started! The directions use two sets of check boxes. Check
one when a step is complete and use the other for double-checking your work
before operation.
! ! 1. Locate capacitor C1 (56pF). This part may be marked with the 3-digit
numerical code "560"--or "56", its actual value in pF.
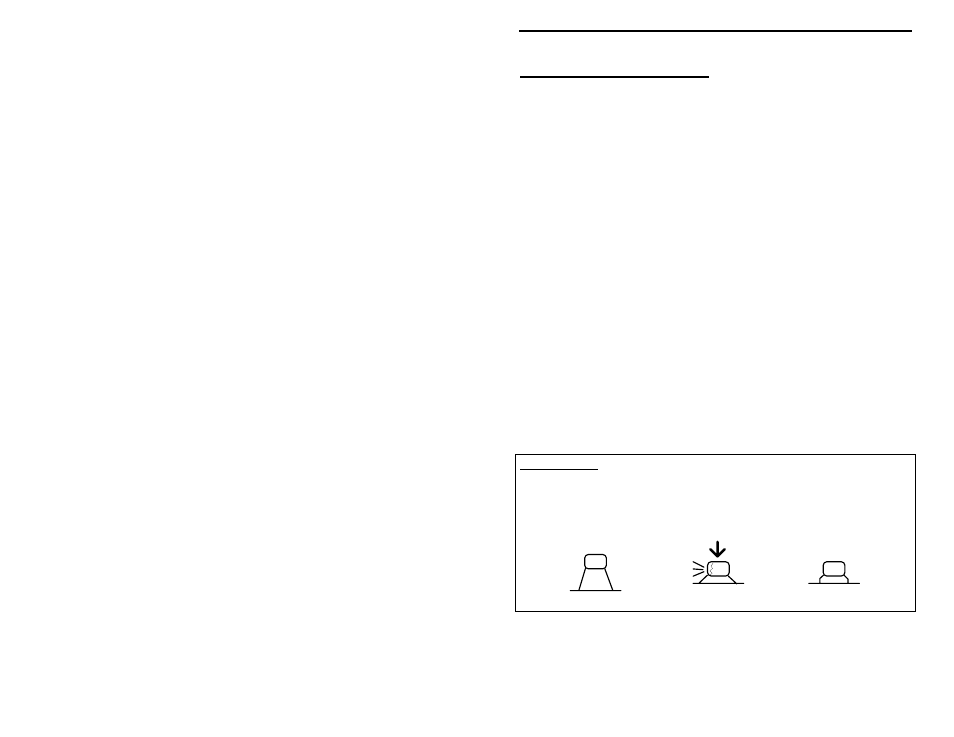
Important Note: A multilayer cap is similar to a surface-mount "chip" capacitor,
except that it has a lead spot-welded onto each end of the capacitor body.
Multilayers have superior operating characteristics, but the lead welds may fail if
the device is over-stressed. For this reason, never use force to seat a multilayer
cap into the PC board. If the spacing isn't right, pre-form the leads to the correct
spacing before installation!
Incorrect
Ooops!
Correct