Commlink 5 technical guide, Troubleshooting the com port number, 15 operator interface – Auto-Zone Control Systems CommLink 5 Technical Guide, Installation Instructions for the CommLink 5 Communications Interface (Version 01G) User Manual
Page 15: Changing the usb com port number
CommLink 5 Technical Guide
15
Operator Interface
Troubleshooting the COM Port Number
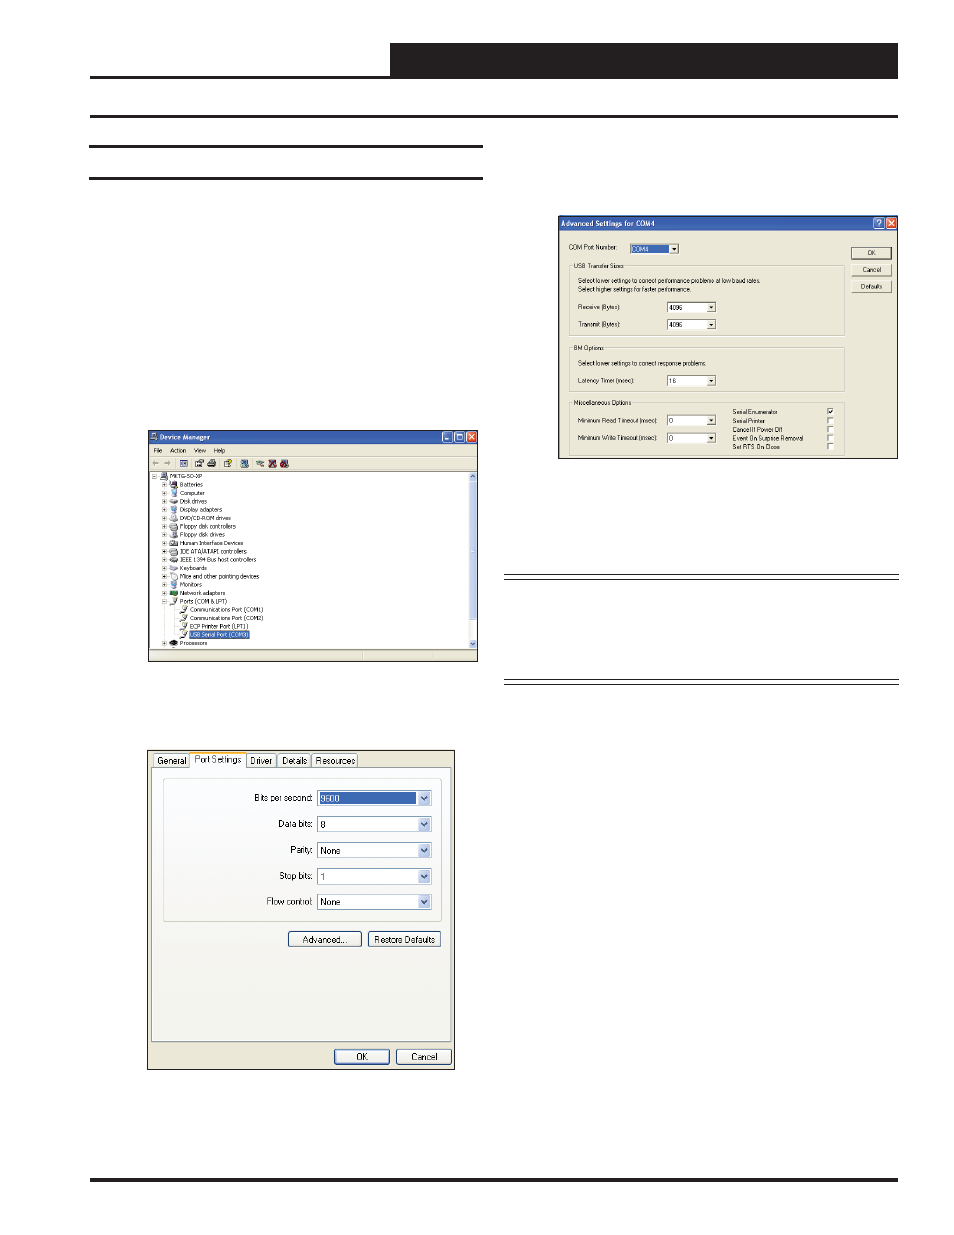
4. To assign a port number less than 10, click on
<Advanced>
.
The Advanced Settings Window
will appear.
5. In the COM Port Number drop box, select which COM
port you wish to use. Make sure you select a COM port
number that is not currently in use (you can see the ports
in use in the Device Manager Window). Select a port
number that is less than 10.
NOTE:
Windows
®
will assign a port number to every device
that has ever been installed on your computer. So if
there are no available ports below 10, choose a port
number less than 10 for a device listed that you know
you are not currently using.
6. Once you select the correct COM port number, click
<OK>
and close any windows opened in the process
of changing the port number. Make note of this number
because you will need it for your Prism 2 setup.
Changing the USB COM Port Number
When the CommLink 5 is fi rst plugged in, it will be assigned a
COM port number to be used for communicating with the Prism 2
software. If the port number is 10 or greater, it needs to be changed
to a value less than 10 to be recognized by Prism 2.
1. Click
<start>
, click
<Control Panel>
, click
<System>
, click the
<Hardware>
tab, and then click
<Device Manager>
to get to the Device
Manager Window.
2. Click on the plus sign next to Ports to see all of the COM
ports.
3. Right-click on “USB Serial Port (COM#)” and select
<Properties>.
In the Properties Window, select the
<Port Settings>
tab.