Setting up your ovation – Baby Lock Ovation (BLES8) Instruction and Reference Guide User Manual
Page 10
O
I
Main Switch
I
I
O
O
O
V
E
R
V
I
E
W
8
Setting Up Your Ovation
1. Remove machine from box
After removing the packing materials from the
box, gently lift your Baby Lock serger by grasping
the handle provided on the top of the machine.
Place the machine on a serger sewing table or
any sturdy level surface that provides ample work
area to the left. Place the foot control in a pedal
stay, if desired, and place it under the sewing
table.
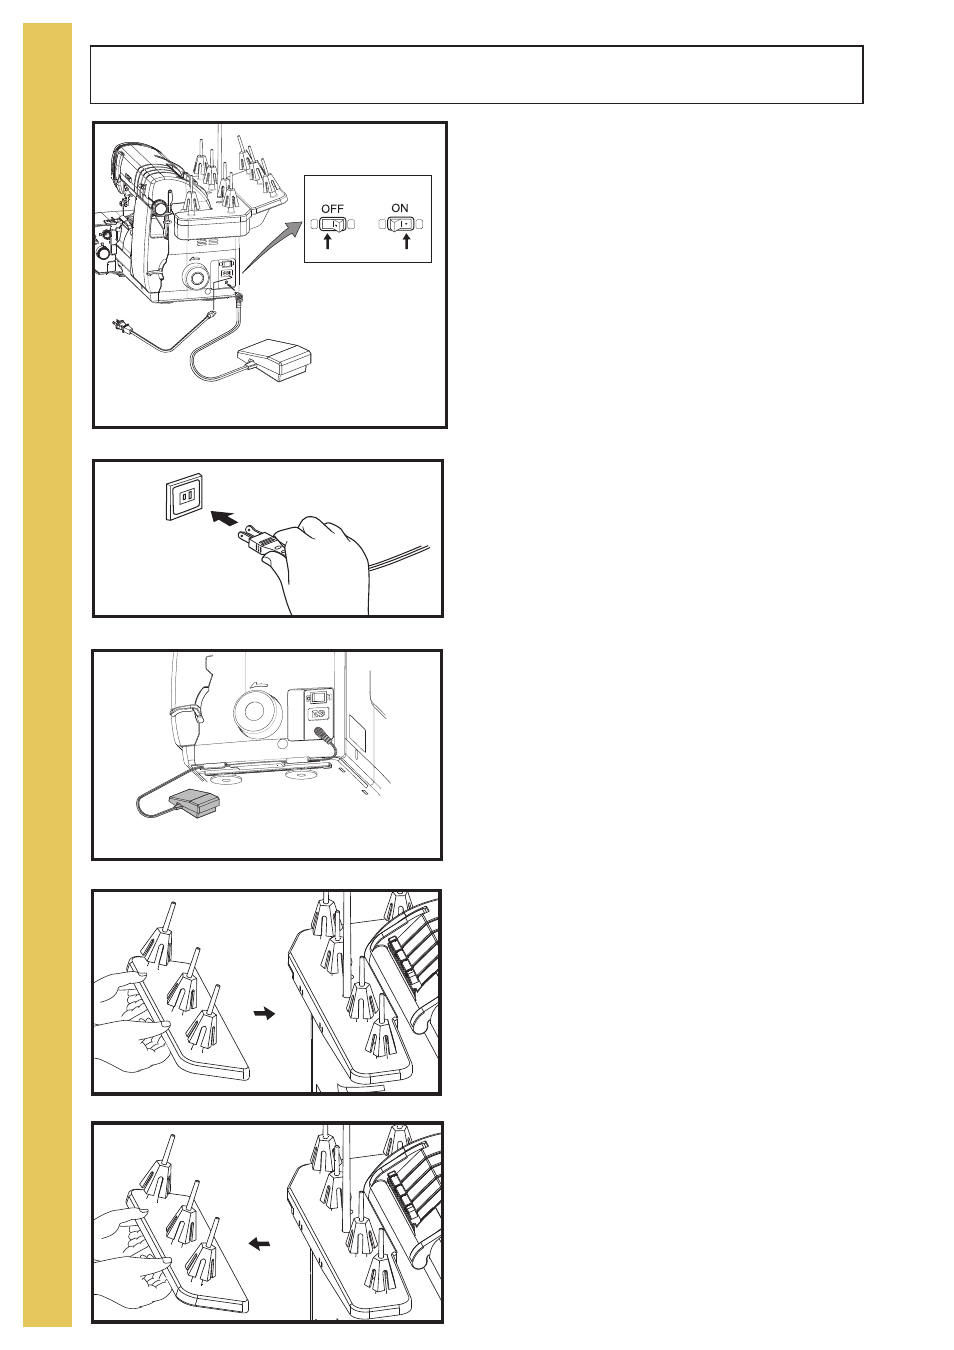
2. Plug in the machine
Before connecting the power supply, make sure
the voltage and frequency shown on the machine
conforms to your electrical power.
With the overlock machine turned off, insert the
foot control jack and the power cord plug into
their appointed connectors. (fig. A) Then plug
the power cord into an electrical wall outlet.
Always make sure the power is off when the
machine is not in use. (fig. A) Available foot
control: Model YC-485EC or 4C-333C.
3. Polarized plug
This appliance has a polarized plug (one blade
wider than the other). To reduce the risk of elec-
tric shock, this plug is intended to fit in a polarized
outlet only one way. (fig. B) If the plug does not fit
fully in the outlet, reverse the plug. If it still does
not fit, contact a qualified electrician to install the
proper outlet. Do not modify the plug in any way.
4. Foot controller
The sewing speed of the machine is determined
by the amount of pressure applied to the foot
controller. When not in use, do not place anything
on the foot controller, or the machine could start
inadvertently and the controller or motor could
burn out.
Lay the foot control cord along the inside of the
channel located on the bottom right side of the
overlock machine. (fig. C)
5. Extension thread stand
To insert the extension thread stand:
Place the pegs into the slots on the back of the
main thread stand.
Push the extension thread stand into the main
thread stand until it snaps into place. (fig. D)
To remove:
Using both hands squeeze together the upper
section of the stand support braces that are
located just underneath the stand while gently
raising it up and out to release from the main
thread stand.
A
E
D
B
C