Thread flatlock - narrow – Baby Lock Ovation (BLES8) Instruction and Reference Guide User Manual
Page 39
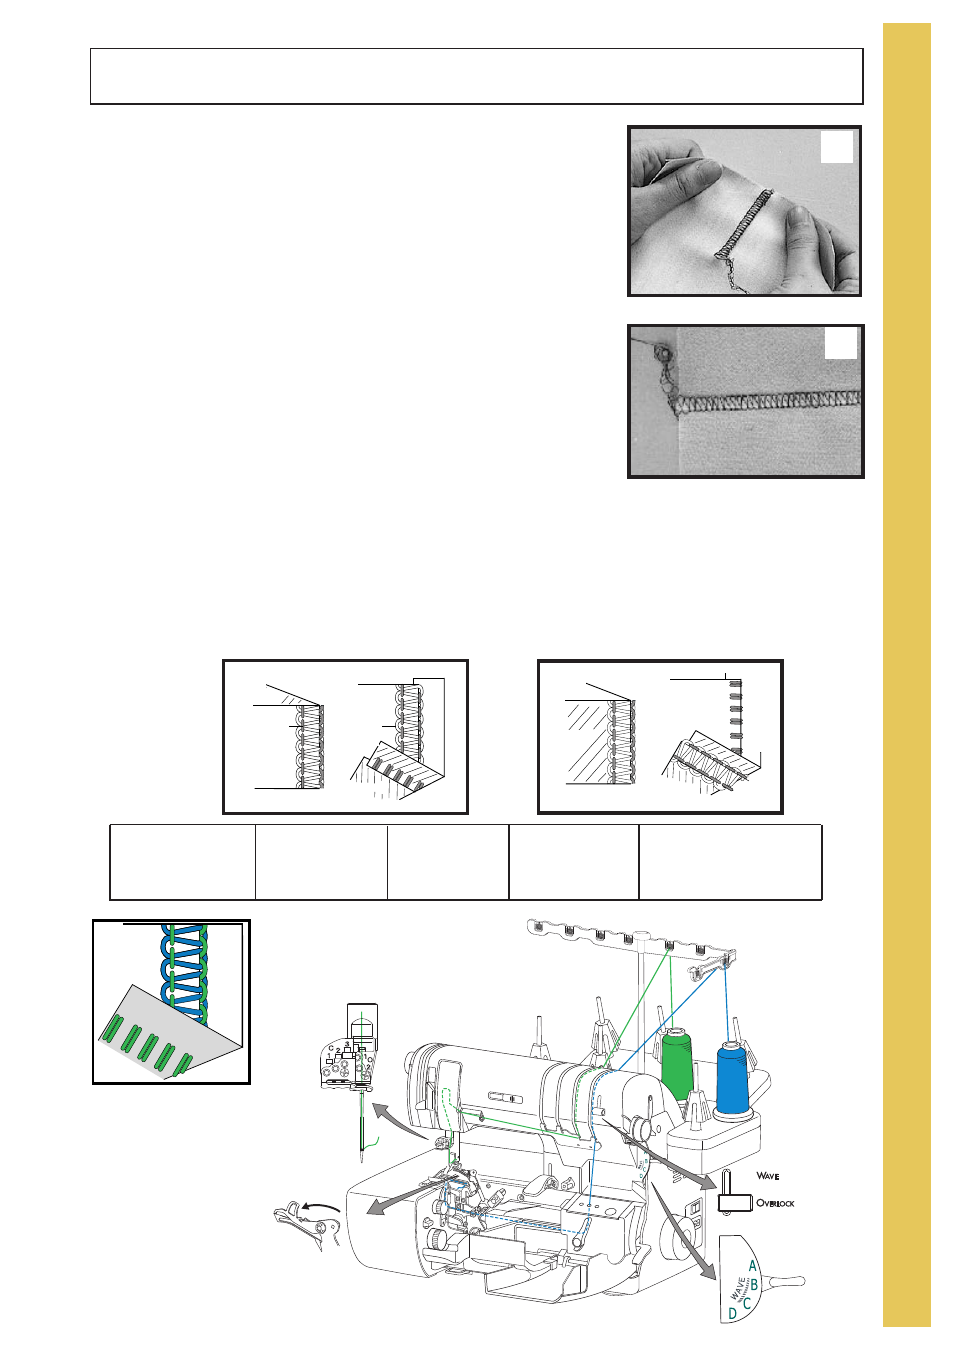
Sew a 2-thread flatlock seam then pull the two fabric layers apart
until the seam lies flat. (fig. A)
Because the threads show on the outside as well as the inside of
the garment or project, the flatlock seam is often considered a
decorative application. (fig. B)
For 2-thread flatlock - narrow
1. Engage the threading lever in threading position.
2. Place needle thread on "OVERLOCK NEEDLE 2" spool pin and
slip the thread through the "O-2" telescopic antennae thread
guide directly above the spool.
3. Snap needle thread into the upper looper pretension thread
guide on top of the machine, then go down the upper looper
thread path in the front of the machine. Go left with the needle
thread toward the hooked thread guide on front of the machine.
Then take the needle thread through the normal needle thread
paths (see illustration below).
4. Engage the subsidiary looper (following step 3 on page 35).
5. Thread the lower looper as shown in the illustration below.
6. Engage the threading lever in the serging position.
Before serging, decide which stitch pattern you want to have on the outside of the garment.
For "loops" (lower looper thread) to show, place fabric wrong sides together for sewing the seam.
(fig. C)
To produce the "ladder" (needle thread) on the outside, place the fabric right sides together. (fig. D)
Move the stitch selector lever to "B" and follow the suggested settings and the threading diagram
below.
O
V
E
R
L
O
C
K
S
T
I
T
C
H
E
S
E
X
P
R
E
S
S
37
2-Thread Flatlock - Narrow
A
C-1
C-2
C-3
O-1
O-2
UL
C
D
Loop
Wrong
side
Wrong
Side
Right
Side
Right
Side
Needle
Thread
Looper
Thread
Ladder
Wrong
Side
Wrong
Side
Right
Side
Right
Side
B
NEEDLES
O-2
LENGTH
2-4
WIDTH
3.5
STITCH
SELECTOR
B
WAVE/OVERLOCK
SELECTOR
OVERLOCK
∧
∨