Maintenance – Beisler 2111-4 User Manual
Page 42
Short Seam Automat 2110-4 / 2111-4 Working Instructions
- C 42 -
Beisler Automated Sewing Equipment
C.5
Maintenance
C.5.5 Machine set-up
After any works to the main clamp, the clamping pressure
and the alignment of the clamp rail to the needle must be
checked.
Clamp rail clamping pressure adjustment:
1. Check to see if the main clamp exerts pressure to the
sewing piece evenly along the entire length of the rail
by lining up a piece of fabric to the insertion position
and lowering the main clamp.
2. Check clamping pressure by trying to pull the sewing
piece out of the clamp at several locations along the
clamp rail.
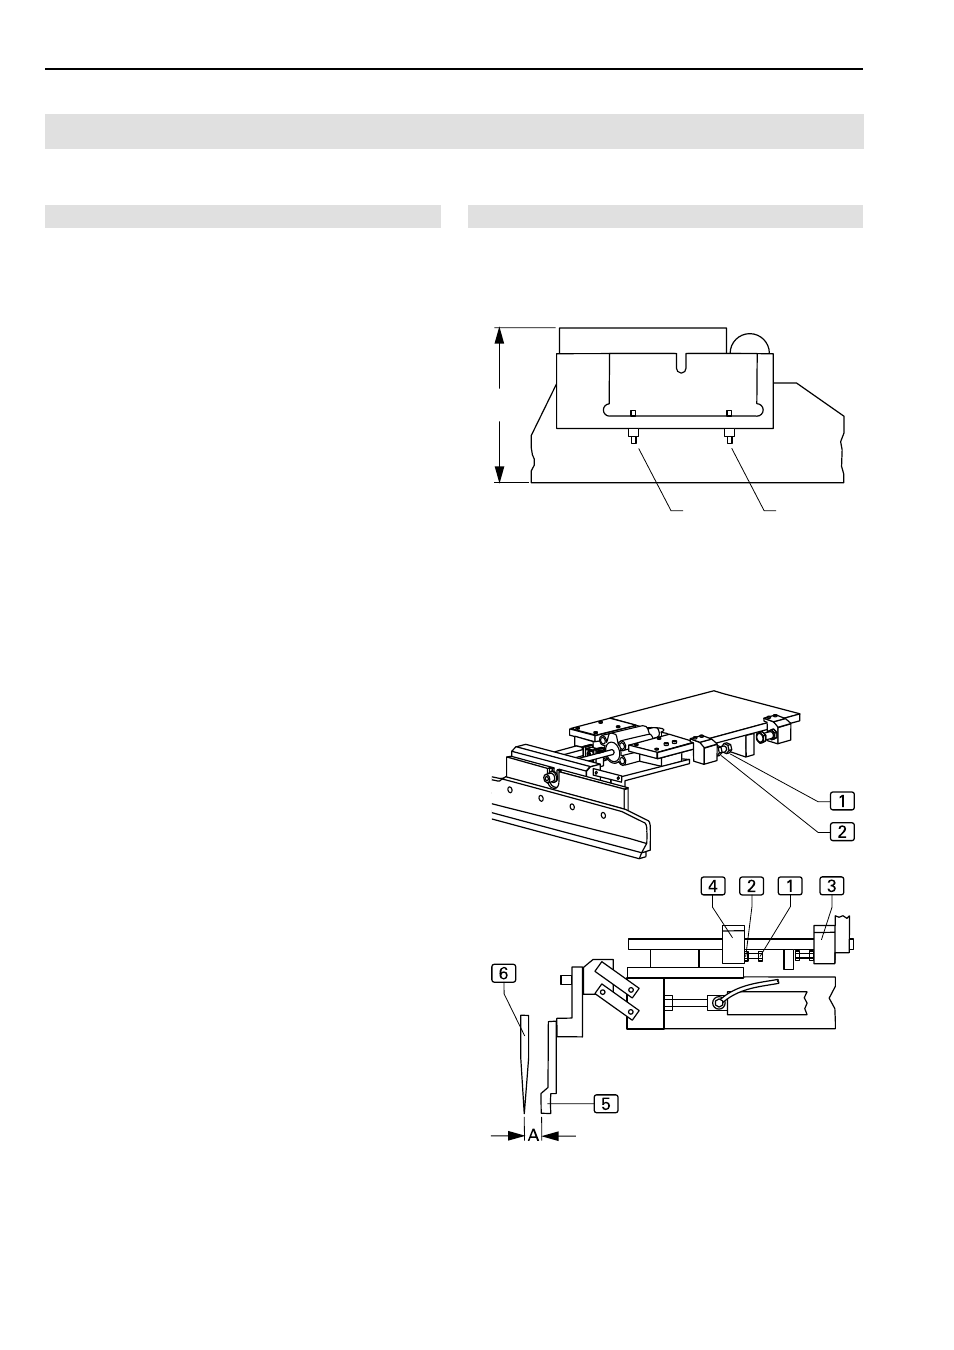
3. Fig. 10: If clamping pressure is irregular or insufficient,
remove clamp rail and adjust pressure using the two
adjustment screws
1 on the inner side of the clamp
rail.
Tightening the adjustment screws will increase pres-
sure of clamp rail to working plate as the overall height
H of the main clamp increases.
4. Repeat adjustment and recheck with lowered main
clamp until clamping pressure is distributed evenly alo-
ng the entire length of the clamp rail.
Adjustment of clamp slide disengagement positi-
on:
The disengagement position of the clamp slide is adjusted
for the front and rear stop point at the pedestal.
The front stop point
4 determines how far the clamp slide
will approach the needle of the sewing head, the rear stop
point
3 determines how far the clamp slide will return to
its start position.
Front stop point adjustment:
1. Lower main clamp.
2. Depressurize the machine. Disconnect compressed air
supply hose from on-site compressed air supply sy-
stem.
3. Move main clamp by hand below sewing head and lo-
wer needle using handwheel.
4. Fig. 11: Distance A between clamp rail
5 and needle
6 must be 1 mm.
5. Loosen lock nut
2 of stop screw 1 at the pedestal
and rotate stop screw to the desired position.
6. Check distance A .
7. Tighten stop screw lock nut.
Fig. 10/11
Fig. 10
Fig. 11
1
1
H