Installation instructions for freestanding toilets – Blu Bathworks LF1062 User Manual
Page 5
2014-01
1 866 907 0122 blubathworks.com
®
4
Installation Instructions for Freestanding Toilets
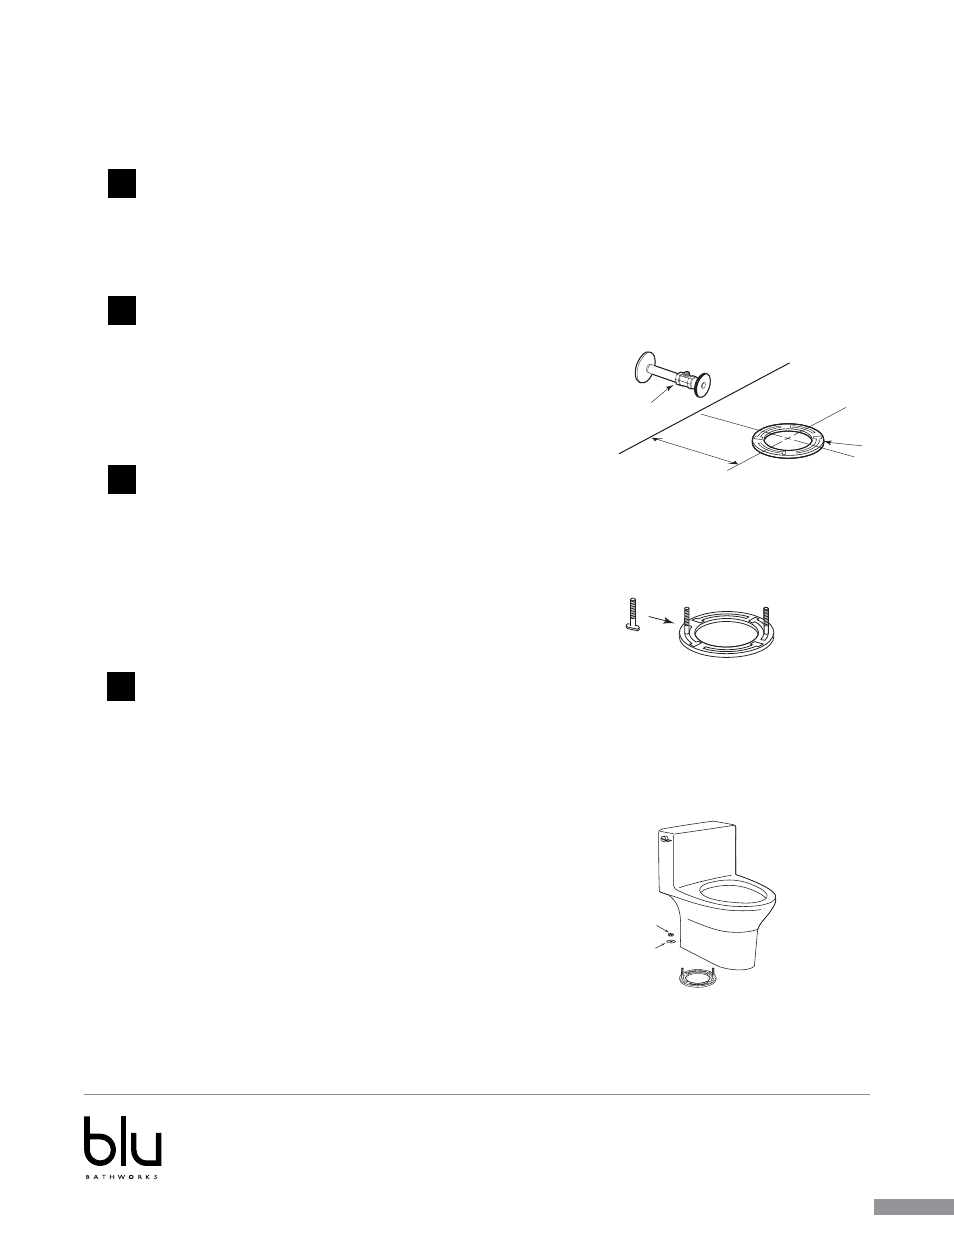
Nut
Washer
4
Finished Wall
C/L
‘RI’
Closet
Flange
Supply
Valve
Piping Check & Rough-In
Remove Existing Toilet (if necessary)
Installing Toilet Mounting Bolts
Toilet Bowl Installation
1
2
3
In order for your new Blu toilet to fit correctly, the distance between the finished wall to the center of the closet flange must
be at least 12”. This measurement is called the rough-In. The water supply must be approximately 8” or 10” to the left
(facing the bowl) from the center line of the closet flange and approximately 4½” above the floor.
•
Turn off water supply. Flush the toilet, remove any remaining water
from tank and bowl.
•
Disconnect water connector. Remove tank and bowl.
•
Remove old wax seal and mounting bolts.
•
Mounting surface must be clean and level before new toilet is installed
•
Clean any debris out of the closet flange and then install new
mounting bolts (not supplied) into the slots of the closet flange
(see Fig. 2).
•
The head of the bolt should be inserted into the slot with its
threads facing upward (see Fig. 2).
•
Carefully turn the toilet upside down onto some padding.
•
Firmly press a new bowl wax ring (not supplied) onto the circular
recess around the toilet bowl’s horn (see Fig. 3).
•
Turn the toilet upright and gently lower into position over the closet
flange.
•
With toilet properly aligned, press firmly on both sides of toilet rim to
set the bowl wax ring.
•
Insert the washer and thread nuts onto the bolts and hand tighten.
•
Then tighten the bolts an additional ½ turn.
•
Install caps on washers (if necessarary). Smooth off the bead of
sealant around the base & remove excess sealant.
Fig. 1
Fig. 2
Fig. 3
WARNING: DO NOT OVERTIGHTEN. Overtightening may cause
damage to china or plastic parts.