Campomatic C64VSGRI User Manual
Page 5
SECTION 3 INSTALLATION OF OVEN
• Before connecting your appliance, please check local connection conditions
(electricity) suitability to type of appliance.Your Appliance is set for electricity.
• When placing your appliance, the appliance should be at the same level as the
counter level. Position the appliance at the same level as the counter level by
adjusting the feet if required.
• The sidewalls where the appliance is located should be made from durable
materials resistance to heat. A space of 70 cm from upper
upward
should be left.
• Appliance can not be connected to a hood. Connection must be done
according to valid assembly and connection instructions. Please pay a special
attention to ventilation requirement. The distance between appliance and hood
must be at least as the distance described in hoods User’s Manual.
• Oven can be installed between two furniture element. (Class 2/1). Appliance
can be placed near a furniture element which has a taller side than oven.
Horizontal distance to a high cupboard or wall must be at least 300 mm. There
can be only a semi-heighted furniture element paced at the other side of
appliance. Hanged furniture elements can only be assembled at a height that is
not an opportunity for working process.
The shortest vertical distance to appliance must be at least 650 mm.
• Operations which can only be made with a tool on appliance must be done by
an authorised service technician.
• Please look at Figure 2 for locating oven.
Figure 2
650
mm
850
mm
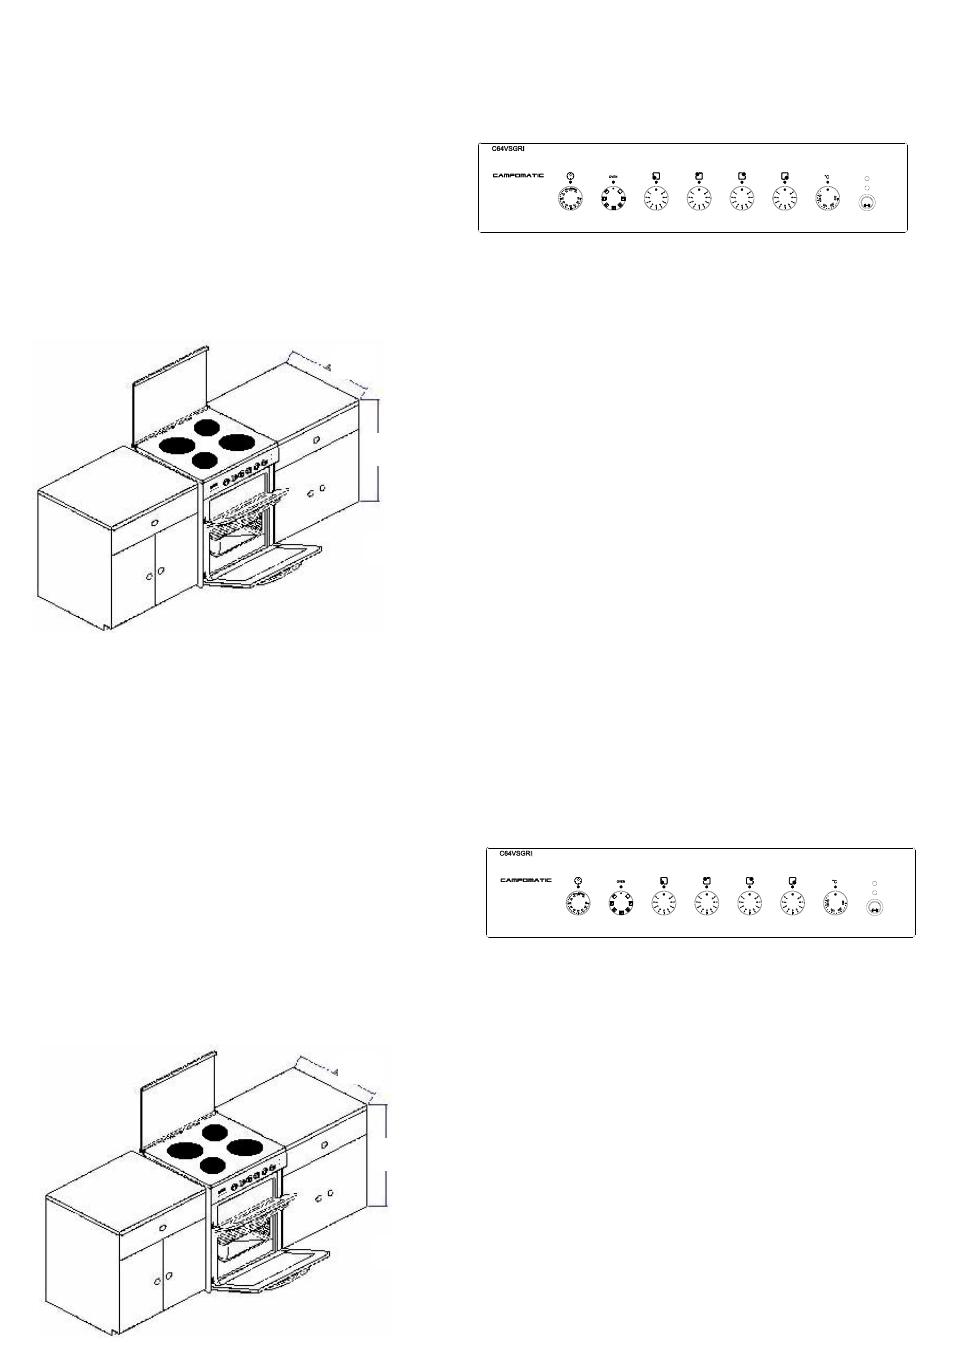
Figure 3 Control Panels
-4-
SECTION 4 INTRODUCTION of Control Panel &
USAGE of CERAMIC COOKER
You can find control buttons in Figure:5 With these control buttons
power of each heating element can be adjustable. Buttons can turn
clockwise or opposite to clockwise directions. Please bring the control
button to required cooking position and do not forget big numbers on button
print means high heat outlet. For first cooking, it recommended to use
highest cooking position.
User Instructions :
Before start cleaning cooker be sure that electrical connection is cut
off. Please do not use rough pots can scratch the surface of cooker. Before
using cooking pots, pay attention that their base is dry and clean. Base
diameter of cooking pots must be same as cooking surface of cooker. Base
of cooking pot must be a little concave in cold condition. When this concave
base heated, its contact with cooker surface increases by expantion; so
maximum heat transfer from cooker to pot provided. Best base thickness
for enamelled pots is 2-3 mm. For sandwich type stainless steel pots 4-6
mm base thickness is recommended. To test whether pot base has right
shape or not, you can do this easy test whne it is cold as follows : Let pot
base stay contacted to smooth side of desk in right, pass it on between
some paper tape. ( For enamelled pot 5-10 pieces of paper tape, for
stainless steel pot 2-5 pieces of tape are recommended.)
SECTION 3 INSTALLATION OF OVEN
• Before connecting your appliance, please check local connection conditions
(electricity) suitability to type of appliance.Your Appliance is set for electricity.
• When placing your appliance, the appliance should be at the same level as the
counter level. Position the appliance at the same level as the counter level by
adjusting the feet if required.
• The sidewalls where the appliance is located should be made from durable
materials resistance to heat. A space of 70 cm from upper
upward
should be left.
• Appliance can not be connected to a hood. Connection must be done
according to valid assembly and connection instructions. Please pay a special
attention to ventilation requirement. The distance between appliance and hood
must be at least as the distance described in hoods User’s Manual.
• Oven can be installed between two furniture element. (Class 2/1). Appliance
can be placed near a furniture element which has a taller side than oven.
Horizontal distance to a high cupboard or wall must be at least 300 mm. There
can be only a semi-heighted furniture element paced at the other side of
appliance. Hanged furniture elements can only be assembled at a height that is
not an opportunity for working process.
The shortest vertical distance to appliance must be at least 650 mm.
• Operations which can only be made with a tool on appliance must be done by
an authorised service technician.
• Please look at Figure 2 for locating oven.
Figure 2
650
mm
850
mm
Figure 3 Control Panels
-4-
SECTION 4 INTRODUCTION of Control Panel &
USAGE of CERAMIC COOKER
You can find control buttons in Figure:5 With these control buttons
power of each heating element can be adjustable. Buttons can turn
clockwise or opposite to clockwise directions. Please bring the control
button to required cooking position and do not forget big numbers on button
print means high heat outlet. For first cooking, it recommended to use
highest cooking position.
User Instructions :
Before start cleaning cooker be sure that electrical connection is cut
off. Please do not use rough pots can scratch the surface of cooker. Before
using cooking pots, pay attention that their base is dry and clean. Base
diameter of cooking pots must be same as cooking surface of cooker. Base
of cooking pot must be a little concave in cold condition. When this concave
base heated, its contact with cooker surface increases by expantion; so
maximum heat transfer from cooker to pot provided. Best base thickness
for enamelled pots is 2-3 mm. For sandwich type stainless steel pots 4-6
mm base thickness is recommended. To test whether pot base has right
shape or not, you can do this easy test whne it is cold as follows : Let pot
base stay contacted to smooth side of desk in right, pass it on between
some paper tape. ( For enamelled pot 5-10 pieces of paper tape, for
stainless steel pot 2-5 pieces of tape are recommended.)
cooking
cooking