CHIAYO IrDA-9000 User Manual
Page 7
ISO 9001|ISO 14001|OHSAS 18001
-6-
UHF
belt-pack transmitter(SM-9000 IrDA)
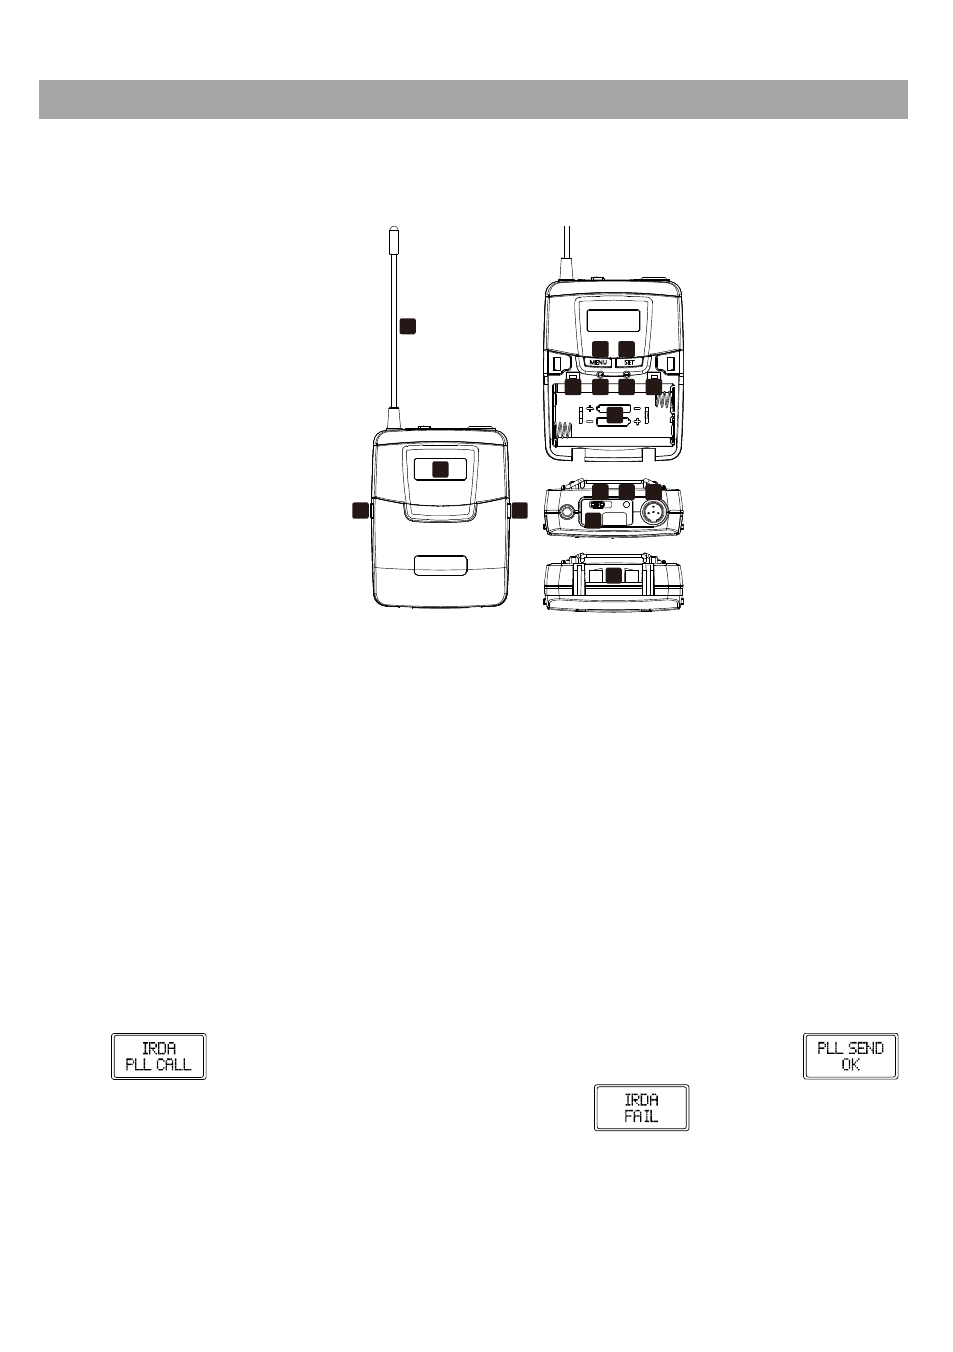
Parts and functions
1. Antenna
2. LCD
3. Cover release button
4. Power switch
5. IrDA synchronizing button
6. Menu button
7. Setting button
8. High-impedance gain control (GT)
9. Low-impedance gain control (MT)
10. Battery compartment
11. Audio mute switch
12. Battery power LED
13. IrDA sensor area
14. Mini XLR connector
15. Charging contacts
Battery installation & indicator
This transmitter requires 2 x AA batteries to operate.
To install, remove the battery cover and slide the batteries according to the correct polarity into
the battery compartment & replace the battery cover.
Note: Batteries contain a corrosive acid that may leak and damage the transmitter when stored
for a long period. Batteries should be removed from the transmitter if it is not to be used for a
prolong period of about 4 weeks or more.
When the transmitter is switched ON a red LED (2) will blink once to indicate the batteries
installed are in good condition. If the LED remains illuminated, it means the batteries are
weak and a replacement is required.
Channel synchronizing of the receiver and transmitter
1. For a trouble-free synchronization, please limit the distance between the receiver and
transmitter to within 30cm.
2. Align both sensor areas
3.
To change the receiver’s channel, please press the synchronizing button of the transmitter
and
will appear on the LCD. If the receiver
’s channel is synchronized,
will appear. Otherwise, please try again if the LCD shows
.
4. To change the transmitter
’s channel, please press the synchronizing button of the receiver.
The receiver will transmit synchronizing signal to the transmitter and change its channel.
1
2
3
3
9
7
8
4
5
6
10
11 12
13
14
15