5 installation, 6 rh-8 installation – Cloud Electronics SS16 User Manual
Page 4
Sub Station 16-R: Installation and operation manual
3
5 Installation
The Cloud Sub Station 16-R is suitable for mounting in a standard 19” equipment rack where it
will occupy two units of rack space. The Sub Station 16-R is 170mm deep, but a depth of
235mm should be allowed to clear the rear panel connectors. When possible, avoid positioning
the unit in close proximity to magnetic fields or equipment operating at a high temperature. The
Sub Station 16-R operates from an external plug-top transformer and a provision should be
made to plug this into a suitably positioned power socket. The Sub Station 16-R is fitted with an
RJ45 socket for each remote control unit; terminate using eight core category 5 cable (4 pair
Cat 5).
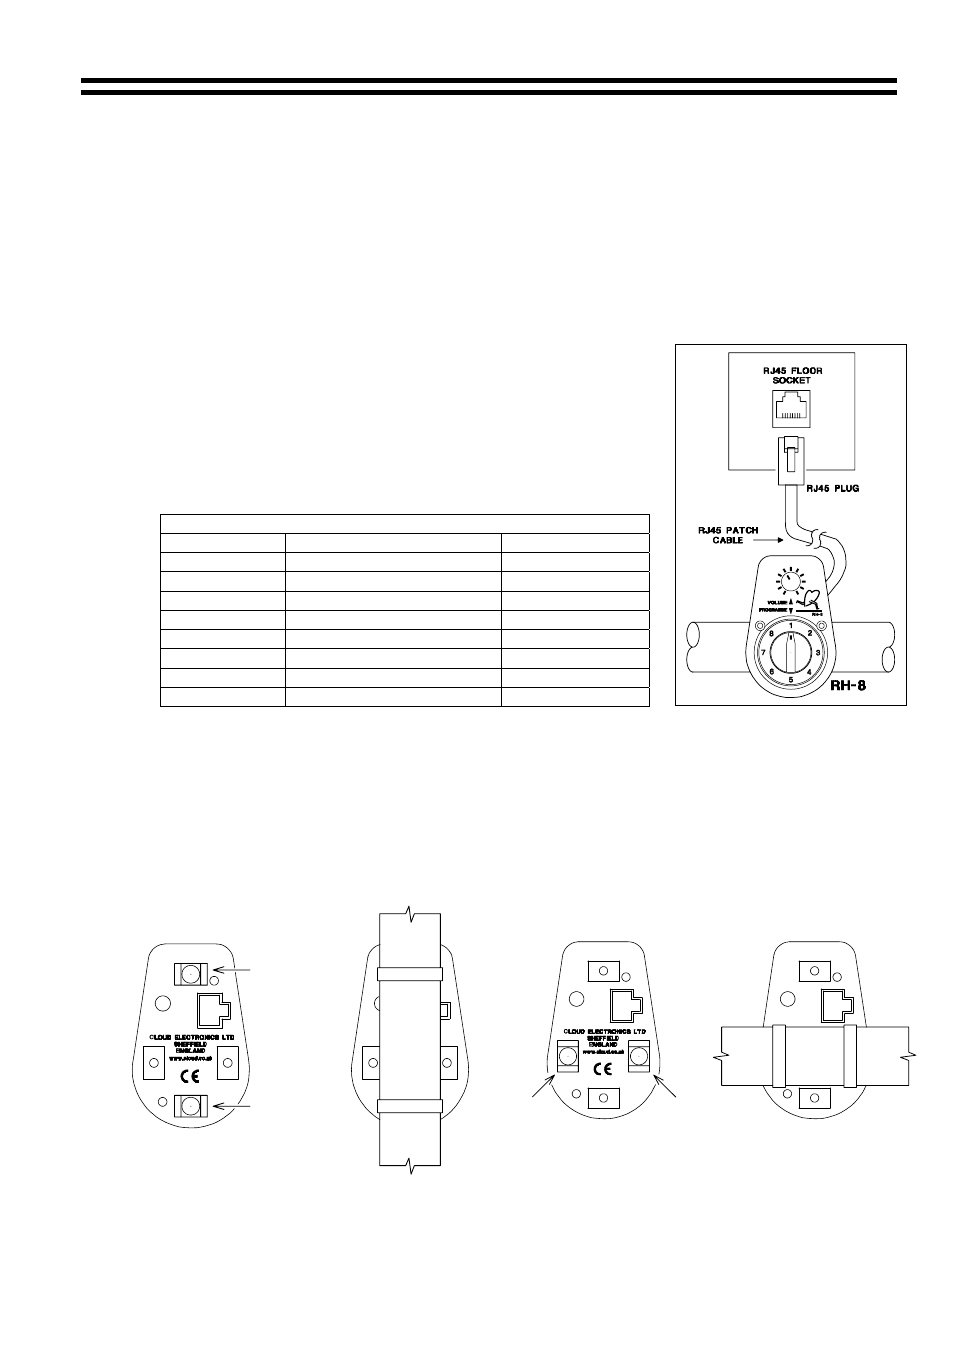
6 RH-8
Installation
When installing the RH-8 we suggest that an RJ45 data socket is
floor mounted adjacent to each one. Wire each data socket
individually back to the equipment rack pin to pin using CAT 5
cable. The RH-8 is fitted with an RJ45 compatible data socket
and supplied with a 3m patch cord to link to the floor mounted
data socket; this approach simplifies maintenance. The Sub
Station 16-R is fitted with an RJ45 socket for each remote control
unit.
FIT
BRACKET
HERE
FIT
BRACKET
HERE
FIT
BRACKET
HERE
FIT
BRACKET
HERE
Cable Information for Wiring the RH-8 to a Floor Socket
RH-8 (RJ45)
Sub Station 16-R (RJ45)
CAT 5*
Pin 8
Pin 8
Brown/White
Pin 7
Pin 7
White/Brown
Pin 6
Pin 6
Green/White
Pin 5
Pin 5
White/Blue
Pin 4
Pin 4
Blue/White
Pin 3
Pin 3
White/Green
Pin 2
Pin 2
Orange/White
Pin 1
Pin 1
White/Orange
*The CAT 5 colour is described as the dominant colour first with the tracer second
The RH-8 comes supplied with mounting accessories; allowing it to be mounted onto the frame
of an exercise machine or fixed to a flat surface such as a wall or bulkhead. When the RH-8 is
mounted onto the framework, two small nylon brackets should be fastened to the body of the
moulding using the nylon rivets provided. With the brackets in place, loop a nylon tie through
each of the two brackets and use these to securely fasten the RH-8 to the frame. To prevent
rotation on smooth surfaces, we suggest that self-amalgamating electrical insulating tape is
wound around the tube before the ties are fitted. The nylon brackets can be fitted in two
positions to suit the exercise machine.
16-07-02 V2.1