Removing the engine oil – DR Power Walk-behind 12.5 Premier User Manual
Page 16
16
PREMIER
DR
®
FIELD AND BRUSH MOWER
Removing the Engine Oil
Supplies Needed:
SAE 30 Oil
Oil Drain Container (at least 50 oz. capacity)
Manually:
1. Remove the Oil Filler Cap (see “Adding Oil and Gasoline” in Chapter 2) and
position a suitable oil drain container under the machine near the Oil Drain
Valve.
NOTE: If needed, a Hose that came in your machine product package can be
inserted over the end of the Oil Drain Valve to help direct the Oil.
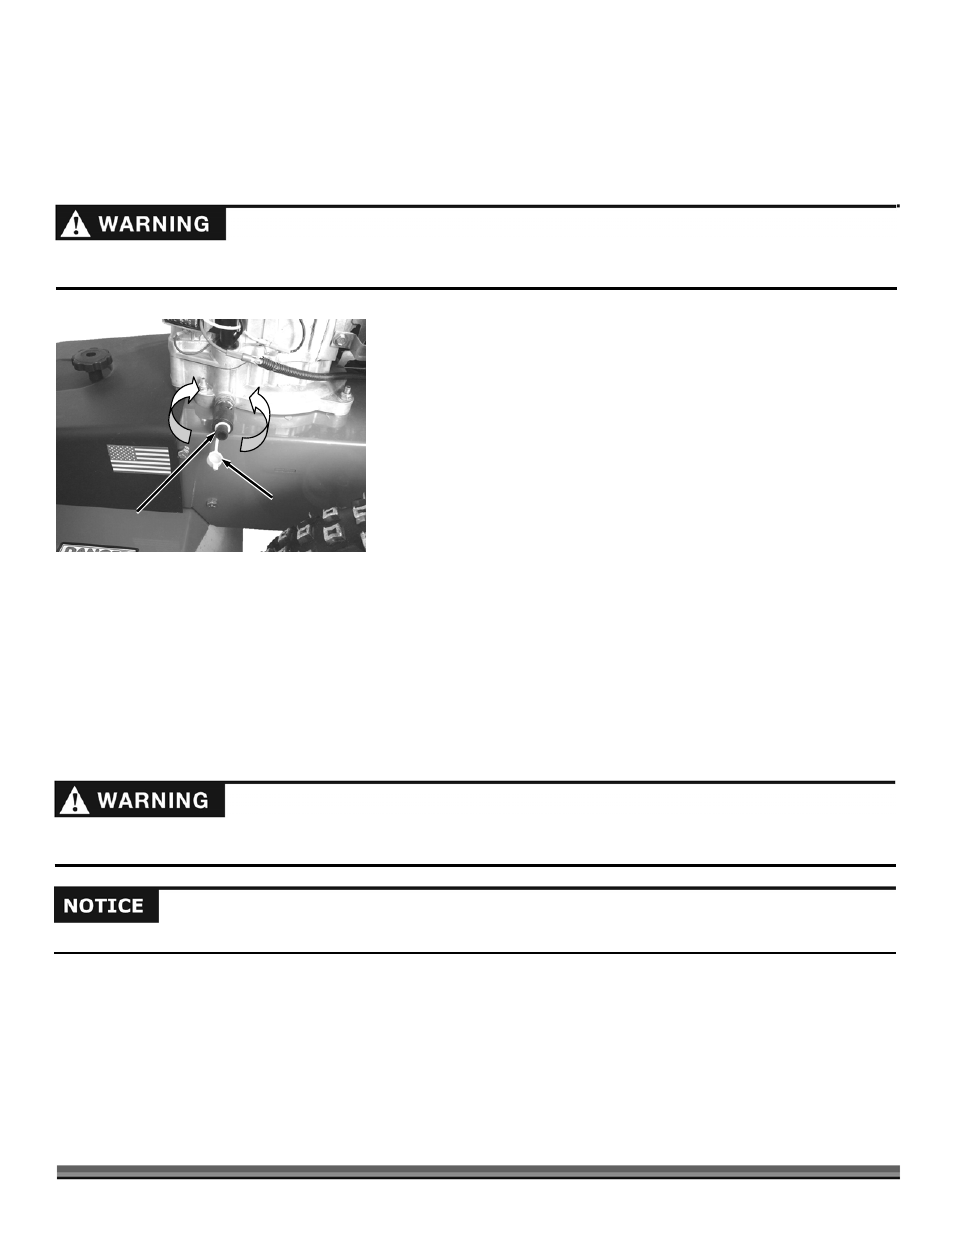
2. Open the Cap on the Oil Drain Valve (Figure 8) and as you push in the Oil
Drain Valve, turn it counterclockwise then pull it out for draining.
3. When the Oil is completely drained, push the Oil Drain Valve in and turn
clockwise until it locks into position.
4. Push the Cap fully onto the Oil drain Valve.
5. Replace the oil by following the instructions “Adding Oil and Gasoline” in
Chapter 2.
Alternate Method:
1. Remove the Oil Fill Cap and vacuum the oil from the engine through the Oil Fill Tube using a vacuum oil drainer.
2. Replace the oil by following the instructions “Adding Oil and Gasoline” in Chapter 2.
NOTE: If you are not reusing the oil, be sure to use environmentally safe disposal procedures in the disposing of the used oil.
Removing and Replacing the Belts
To Replace the Blade Belt
Tools and Supplies Needed:
9/16" Wrench
Gloves
Use only DR belts on your machine. They have been thoroughly tested and proven for many hours of use
Shut down the engine, remove the spark plug wire and wait 5 minutes before performing any maintenance procedure or
inspection on the Mower.
Open
Close
Figure 8
Oil Drain
Valve
Cap
Shut down the engine, remove the spark plug wire and wait 5 minutes before performing any maintenance procedure or inspection
on the Mower.