Removing and replacing the drive chain – DR Power Scout 8.25 (September 2005 - December 2006) User Manual
Page 32
28 DR
®
SCOUT
FIELD and BRUSH MOWER
Tools Needed:
•
1/2" wrench or socket (chain cover)
•
9/16" wrench or socket (shift lever)
•
Flat-head screwdriver
•
Needle Nose Pliers
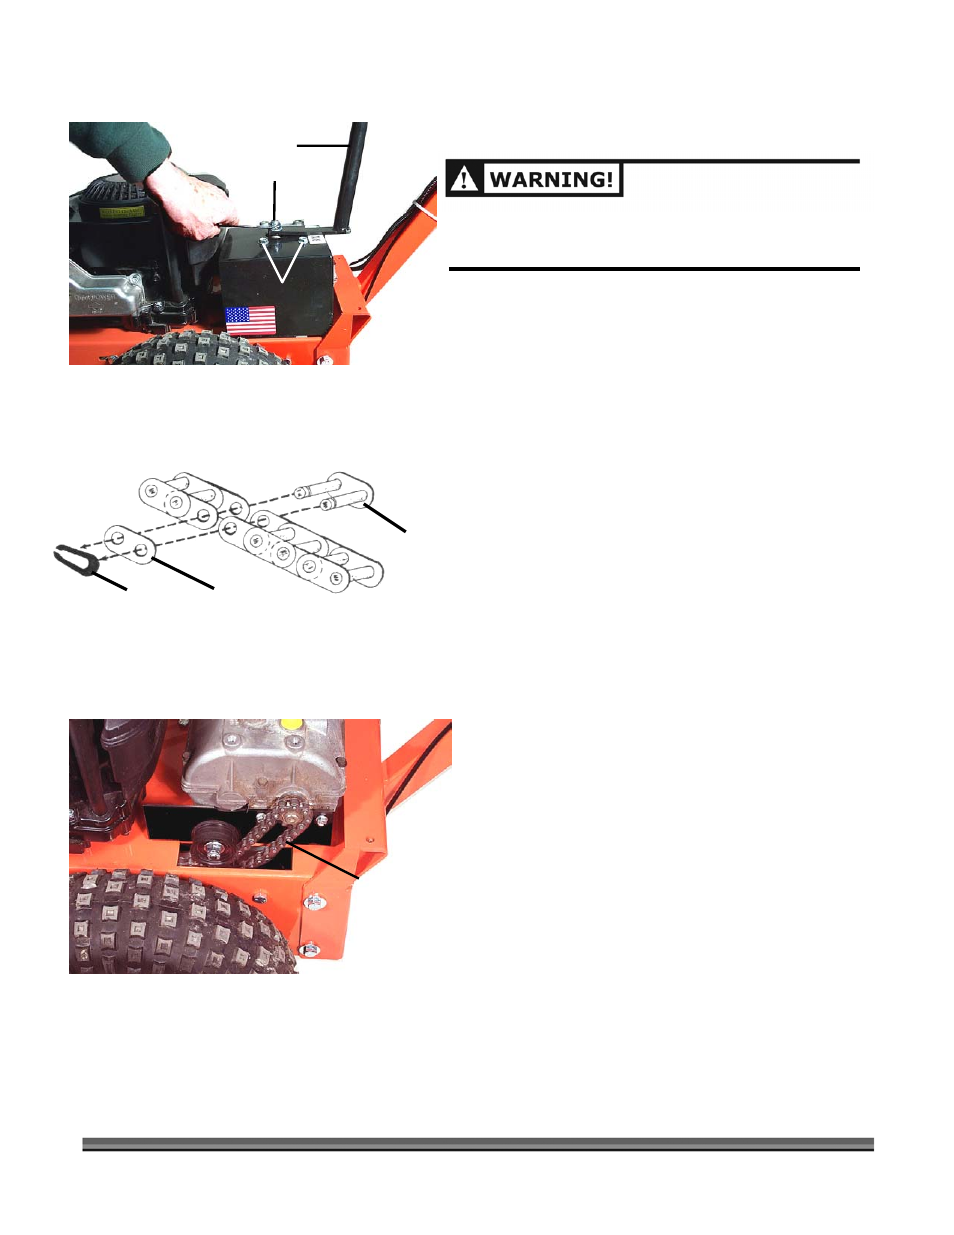
1. Place the gearshift lever in (N) NEUTRAL and
remove the Chain Cover by removing the Shift Lever
attaching Nut, Shift Lever and then the two (2)
Chain Cover Screws (Figure 18).
2. Locate (by rotating the drive sprocket) and remove
the Master Chain Link (Figure 19). First remove the
Lock Clip by spreading the clip with the screwdriver
and at the same time, slide the Lock Clip back off
the Master Link pins with the Needle Nose Pliers.
Next, remove the Side Plate, and then remove the
Master Chain Link.
3. Slowly feed the Chain out.
4. Install and route the new Chain (Figure 20).
5. Add the Master Chain Link (Figure 19) in the reverse
order of step 2.
6. Replace the Chain Cover and tighten the Screws.
7. Replace the Shift Lever and tighten the Nut.
Removing and Replacing the Drive Chain
BEFORE PERFORMING ANY MAINTENANCE PROCEDURE,
STOP THE ENGINE AND
DISCONNECT THE SPARK PLUG
WIRE.
Figure 19
Lock Clip
Master Link
Side Plate
Drive Chain Routing
Chain Cover Screws
Shift Lever Nut
Shift Lever
Figure 18
Figure 20