Replacing the drive belt – DR Power Tow-Behind Yard Trimmer User Manual
Page 18
18
DR
®
6.25 TOW-BEHIND TRIMMER/MOWER
Replacing the Drive Belt
Tools needed:
3/8" Wrench
Two 9/16" Wrenches
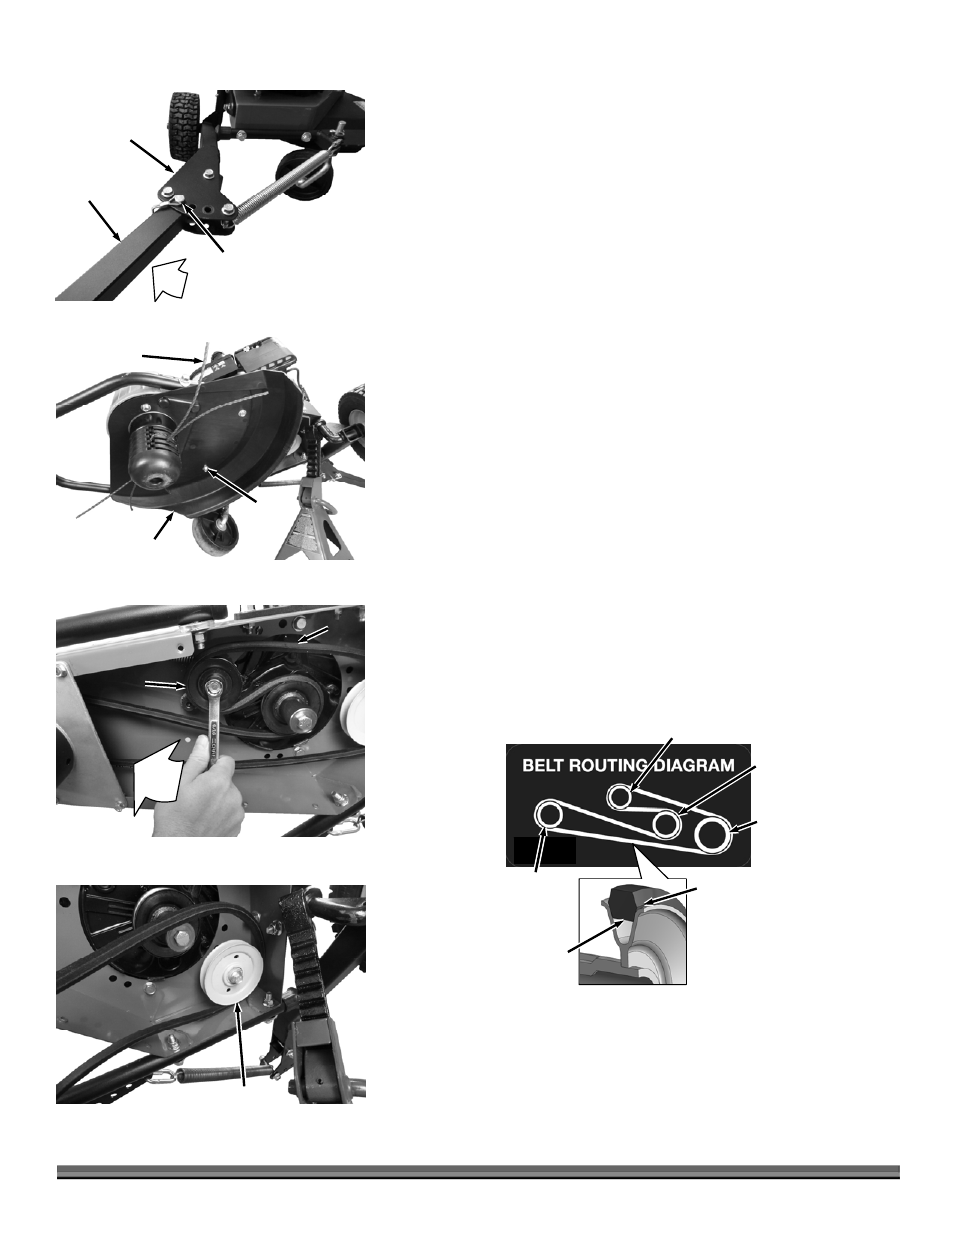
1. Set the Tow-Bar offset to the furthest offset position by removing the Snap
Safety Pin and rotating the Tow Bar to the far right (Figure 32). Reinstall the
Snap Safety Pin through the holes in the Tow Bar and Swivel frame.
2. Lift the right side of the machine up and support it with a Jack stand (Figure
33).
3. Remove the Trimmer Cord from the Head.
4. Remove the four Trimmer Guard Bolts using a 3/8" Wrench and remove the
Guard.
Note: In the next step, the Wrench is only used to rotate the Idler Arm to loosen Belt
tension, not to loosen the hardware.
5. Use a 9/16" Wrench on the hardware and pull the Tensioner Pulley back to
release the Belt from the Pulley (Figure 34).
6. Use two 9/16" Wrenches to loosen the Idler Pulley enough so the Belt to be
released from the Pulley (Figure 35). Remove the Belt from the machine.
7. Install a new by following the steps in reverse order.
Note: When positioning the new Belt, make sure that it is not twisted and the
“flat” is facing inside the Pulley with the raised “rib” facing up toward the Frame
and the other side facing down toward the ground (Figure 36).
Trimmer
Head Pulley
Figure 36
Flat area
inside Pulley
Grooves
Raised “Rib”
Here
Idler
Pulley
Engine
Pulley
Tensioner Pulley
Idler Pulley
Figure 35
Swivel
Frame
Figure 32
Snap Safety
Pin
Tow Bar
Tensioner
Pulley
Figure 34
Belt
Trimmer
Guard
Figure 33
Bolts 4
Places
Trimmer Cord