DR Power Tow-Behind Vacuum Hose (Pre-August 2010) User Manual
Page 10
7 DR
®
LEAF and LAWN VACUUM Optional Accessories
Premier model: (Kit No. 18795)
Figure 8
Figure 9
Pre-formed Edge
Outer Panel
Inner Panel
Slide
Side Spacer
Shown with Top removed
Spacer Tube
Pre-formed Notch
1. Remove the Rear Panel of the Collector Box by releasing
the six (6) Flexible Latches and lift it off the pins
protruding on the top corners.
2. Install the supplied Bagger Spacers inside the Collector
Box by first releasing the Flexible Latches holding down
the Centrifugal Separator (top).
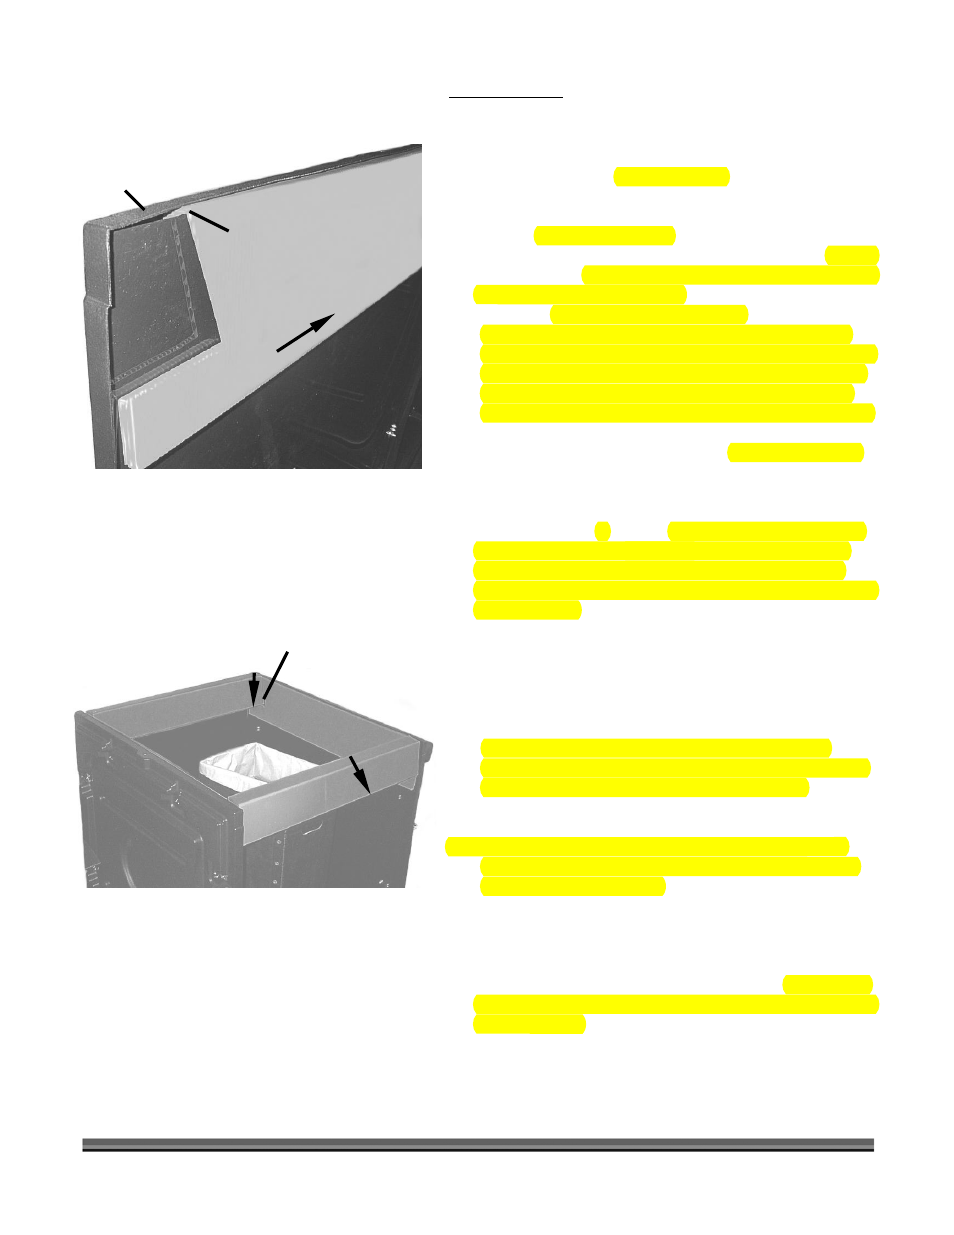
3. Install a side Bagger Spacer on the left Side Panel of the
Collector Box by inserting the formed edge of the Spacer
in between the inner and outer wall of the left Side Panel
of the Collector Box (Figure 8).
Tip: Raise the Centrifugal Separator (top) just enough and
start at the back of the Collector Box left Side Panel,
hooking the formed edge of the Bagger Spacer over the
inner panel and in between the Outer Panel and Inner
Panel, and sliding the Spacer along toward the front
until the support is completely inside the Collector Box
(Figure 8).
4. Repeat this procedure for installing a side Bagger Spacer
on the right Side Panel.
5. Install a Bagger Spacer Tube in the front of the Collector
Box by raising the Centrifugal Separator (top) just
enough to insert it into the Pre-Formed Notches in the
left and right Bagger Spacers. Note the shape of the
Spacer Tube; it will only go in one way. The outside
surface of the Spacer Tube must be perpendicular to the
Top (Figure 9).
6. Form the individual Leaf Bag Holders into boxes. Fold
down the corners of the Bag Holder to stiffen the
assembly (Figure 7). Insert a biodegradable leaf bag or
30 gal. Heavy-Duty trash bag (supplied by the user) into
each box, folding the top of the bag (Figure 6) over the
top edge of the box.
Tip: When using a lighter weight trash bag, insert the
Bagger Box inside the trash bag to hold the bag down.
Slide the Bagger Box out of the bag when full.
7. Place the six (6) boxes into the Collector Box starting at
the front and working toward the rear.
Tip: Installation is easier if the outside boxes are placed
first in each row, followed by inserting the center box
between them (Figure 6).
8. Install a Bagger Spacer Tube at the rear of the Collector
Box by raising the Centrifugal Separator (top) just
enough to insert it into the Pre-Formed Notches in the
left and right Bagger Spacers. Again, note the shape of
the Spacer Tube; it will only go in one way. The outside
surface of the Spacer Tube must be perpendicular to the
Top (Figure 8).
9. Re-hook
the
Centrifugal
Separator (top) Latches and
replace the Rear Panel by re-hanging it on the pins
protruding on the top corners, and then re-hook the six
(6) Flexible Latches.
Rear
Perpendicular surface
facing out
Side Spacer
Front