DR Power Tow-Behind Vacuum Hose (Pre-August 2010) User Manual
Page 9
CALL TOLL FREE 1-800-DR-OWNER 6
Installing and Using the Optional Bagging Accessory
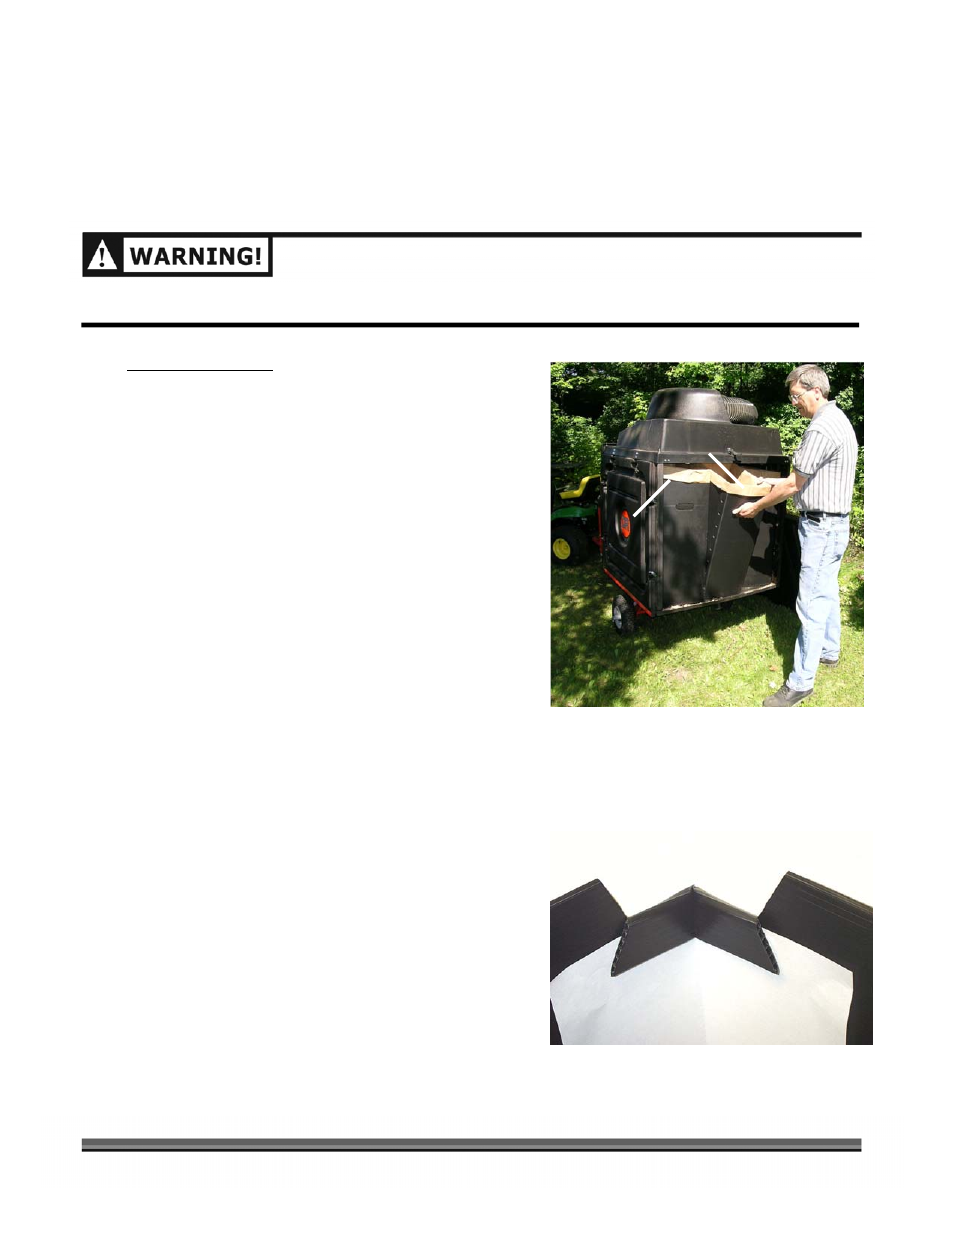
The DR LEAF and LAWN VACUUM can utilize nine (9) Bagger Box Inserts in the Commercial model (6 for
the Premier) that fit into the Collector Box for ease of bagging leaves and grass (Figure 6). For proper
bagging operation, you MUST install all boxes in the Collector Box.
BEFORE PERFORMING THIS PROCEDURE, STOP THE BLOWER ENGINE AND DISCONNECT THE SPARK
PLUG WIRE.
Commercial model: (Kit No. 18796)
1. Remove the Rear Panel of the Collector Box by
releasing the six (6) Flexible Latches and lift it off the
pins protruding on the top corners.
2. Form the nine (9) individual cardboard leaf bag
holders into boxes. Fold down the corners of the Bag
Holder to stiffen the assembly (Figure 7). Insert a
biodegradable leaf bag or 30 gal. Heavy-Duty trash
bag (supplied by the user) into each box, folding the
top of the bag over the top edge of the box (Figure 6).
Tip: When using a lighter weight trash bag, insert the
Bagger Box inside the trash bag to hold the bag
down. Slide the Bagger Box out of the bag when full.
3. Place the nine (9) boxes into the Collector Box starting
at the front and working toward the rear.
Tip: Installation is easier if the outside boxes are placed
first in each row, followed by inserting the center box
between them (Figure 6).
4. Replace the Rear Panel by re-hanging it on the pins protruding on the top corners and re-hook the six
(6) Flexible Latches.
Figure 6
9-Individual
Bagger Boxes*
Fold Bag Over
Edge of Box
Insert Center Box Last
*6 for the Premier model
Figure 7
Corner Folded Down
Inside Bagger Box