DR Power 18 HP (June 2004 - Present) User Manual
Page 12
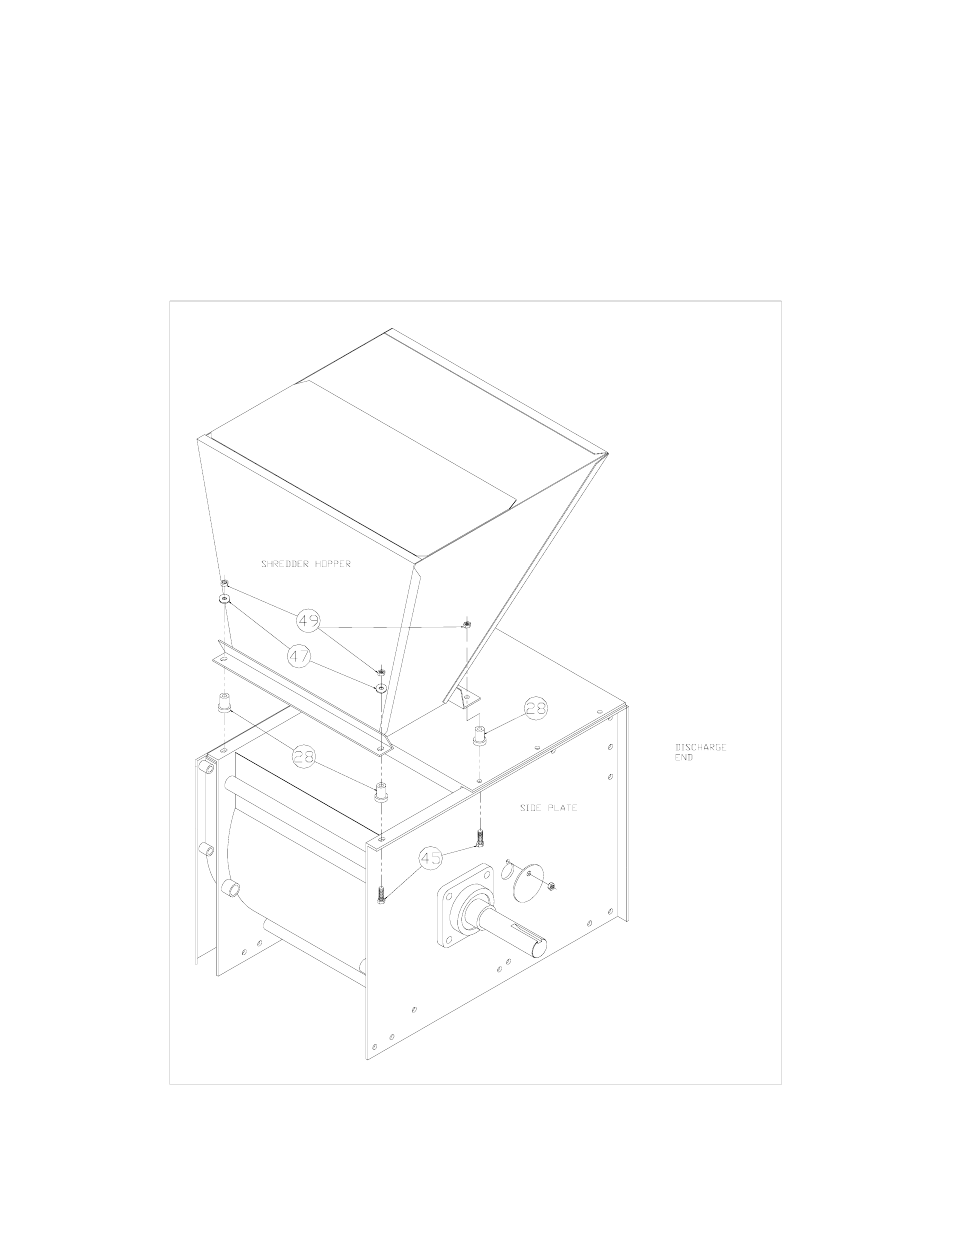
STEP III – ATTACHING THE SHREDDER HOPPER
• To attach the shredder hopper, push the four vibration dampeners (item #28) up into the mount holes on the
hopper.
• With the vibration dampeners in the hopper mount holes from step 1, place the hopper on top of the unit.
NOTE: the slanted side of the hopper faces the discharge end of the shredder/chipper. Align the holes in the
side plates with the vibration dampeners.
• Push the four bolts (item #45) up through the side plates and thread them into each vibration dampener until
one or two threads appear. Place flatwashers (item #47) on the two vibration dampeners on the flat side of the
hopper. Do not use washers on the slanted side of the hopper. Put the locknuts (item #49) in place on top of
the bolts coming up through the vibration dampeners. Hold the locknut with a wrench and tighten the bolt until
two threads are completely through the nut. DO NOT OVER TIGHTEN AS THIS WILL DAMAGE THE
VIBRATION DAMPENER AND POSSIBLY LEAD TO FURTHER DAMAGE TO YOUR MACHINE.
12