DR Power Towable Backhoe User Manual
Page 22
22
DR
®
TOWABLE BACKHOE
Changing the Hydraulic Fluid
Tools and Supplies needed:
•
7/8" Wrench
•
1-1/2" Wrench
•
Safety Glasses
•
Clean Waste Fluid Container
•
Clean Rags
1.
Position the Backhoe as level as possible and place a Waste Fluid Container
under the area you will be working. Your container must be large enough to
hold up to 8.5 gallons of fluid from the Tank.
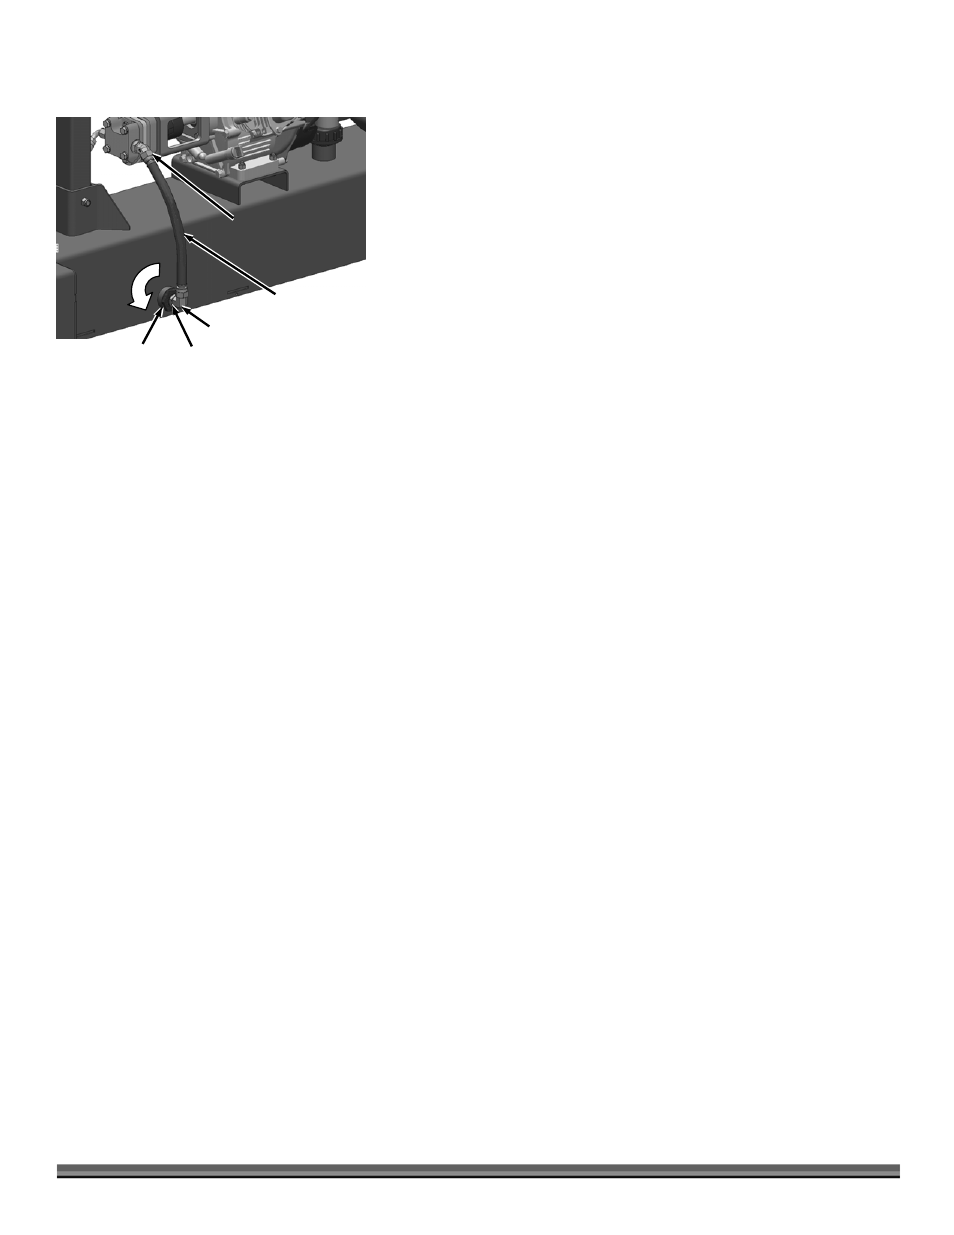
2.
Remove Hydraulic Fluid Fill Cap.
3.
Disconnect the Upper Hose Fitting of the Tank-Pump Hydraulic Hose with a
7/8" Wrench (Figure 36).
4.
Rotate the Elbow by loosening the Locknut with a 7/8" Wrench and turning
the Elbow and the Hose counterclockwise until the Hose can be inserted
into the Waste Fluid Container and let the Hydraulic Fluid drain until it
stops.
5.
When the Tank is empty, continue turning the Elbow and Hose until it is
removed from the Strainer.
6.
Remove the Strainer from the Tank with a 1-1/2" Wrench and wipe off any
debris with a clean Rag.
7.
Install a new Hydraulic Fluid Filter as described in the previous section.
8.
Replace the Strainer, Elbow and Hose Assembly and tighten securely.
9.
Remove the Hydraulic Tank Fill Cap/Dipstick and fill the Hydraulic Tank with
the recommended type and quantity of hydraulic fluid until the level reaches
the fluid full measurement on the Dipstick (Figure 35).
TIP: Check the Fluid level by removing the Hydraulic Fluid Filler Cap and wiping
the steel rod of the Dipstick with a clean Rag or Paper Towel. Reinsert and
tighten the Cap to the proper position (1-3/4" from the bottom of the Cap to the
top of the Tank) (New Figure 35). Remove the Cap and lay the Steel Rod onto a
dry Paper Towel or Rag and a wet mark will show the Fluid level.
Upper
Hose
Fitting
Figure 36
Elbow
Hydraulic
Tank
Tank-Pump
Hydraulic
Hose
Locknut
Strainer