Solid shelving, Traditional solid shelving assembly – Elfa Melamine shelves used together with Hang Standards User Manual
Page 2
www.elfa.com
Sida 13 av 13
Solid shelving
Traditional solid shelving assembly
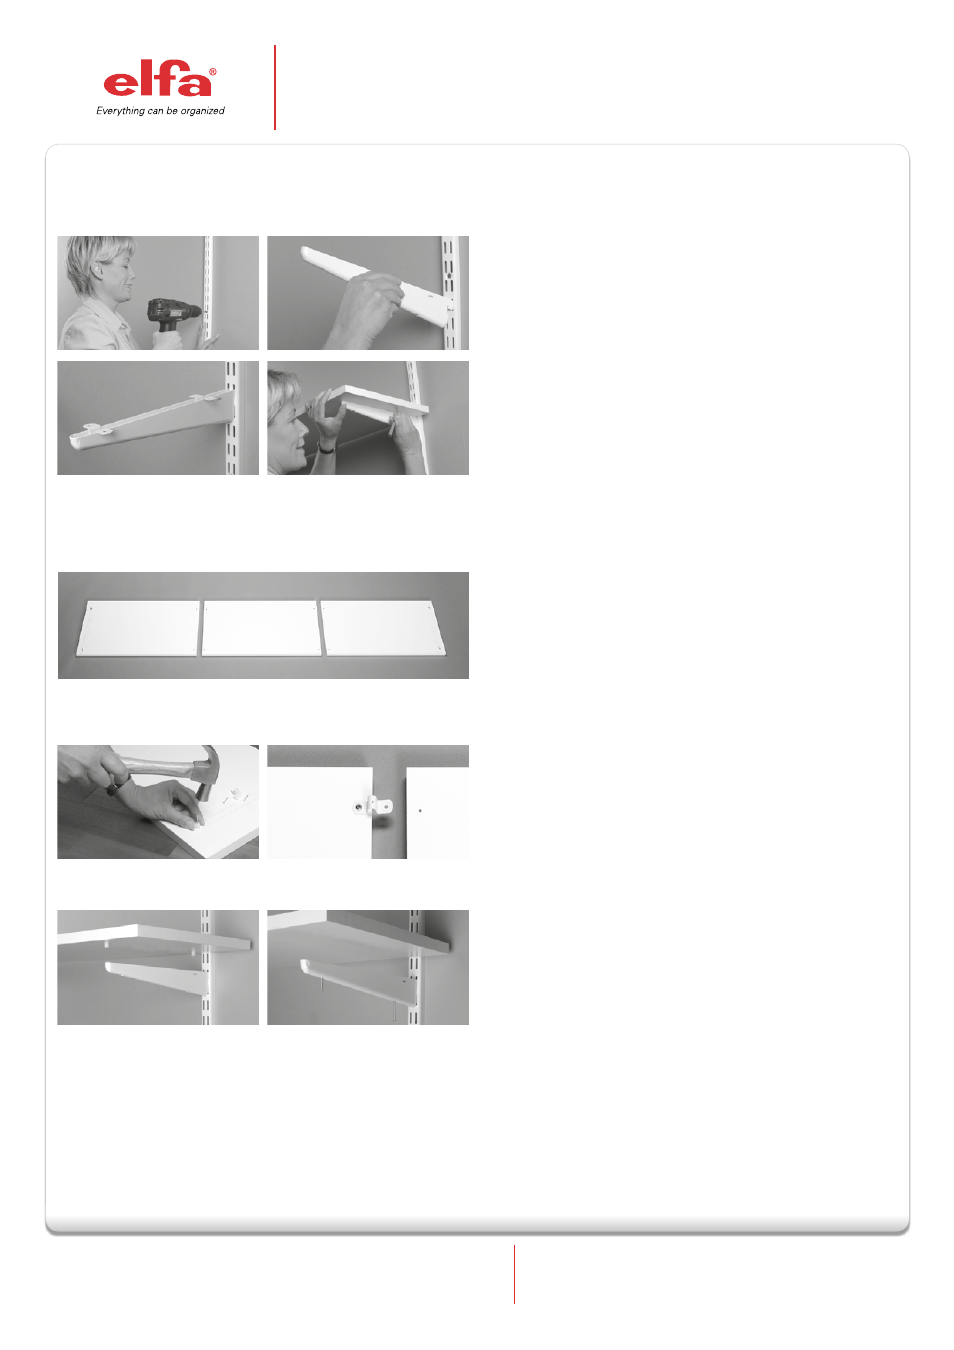
Fig A.
Fig C.
Fig E.
Fig B.
Fig D.
Fig F.
Fig H.
Fig I.
Fig G.
Shelf joiners attached to one shelf.
Shelf pins.
Shelf screws.
Shelf joiners.
Step 6 Install shelf pins by placing one as close as
possible to the front of the bracket outline, by gently
tapping into place. Place a second shelf pin at the
back of the bracket outline 1/2”/10 mm from the back
of the shelf and tap into place. Repeat for all shelves
requiring shelf pins (Fig. F).
If joining shelves, use a 1/8”/3mm drill bit to drill
holes for each screw marked for the shelf joiners.
Begin with the first shelf on the row and use
1/2”/10 mm screws to attach one side of each shelf
soiner to a shelf. Do not attach the other side of the
shelf joiner to the next shelf at this time (Fig. G).
If using shelf screws, take a bracket out of a wall-
band to use as a guide. Place the bracket over each
bracket outline on the shelf and use an awl (or simi-
lar pointed tool) to punch a mark for screws through
each hole in the bracket. Be sure to keep the awl
straight. Remove the bracket and use a 1/8”/3 mm
drill bit to drill a hole at each punch mark.
Step 7 Place the shelf on the brackets by putting the
front shelf pin(s) into the bracket. Gently push the
back of the shelf into position. The front shelf pin(s)
will push against the front of the bracket holding it in
place (Fig. H).
If joining shelves, position the shelf on the brack-
et by putting the front shelf joiner into the bracket.
Gently push the back of the shelf into position. The
front shelf joiner will push against the front of the
bracket holding it in place (Fig. H). Place the next shelf
in the row over the bracket and shelf joiner. Continue
until you have all shelves on the row in place. Align
the holes in the shelves with the corresponding
shelf joiner holes and insert the 1/2”/10 mm screws.
Tighten each screw.
If using shelf screws, place the shelf on the bracket
and align the holes in the shelf with the correspon-
ding shelf bracket holes. Insert a 1-1/4”/30 mm
screw in the front hole and a 2”/50 mm screw in the
back hole of each bracket tighten each screw (Fig. I).
Note: A combination of the above methods may be
used to attach shelves to brackets.
Step 8 After installing the row of shelving closest
to the middle, repeat for each row of shelves. Start
at the top and work down to allow for easier access
when inserting hardware into the bottoms of the
shelves.
Elfa Lumi AB
Elfagatan 5, 593 87 Västervik
Tel: +46 392-389 10 Fax: +46 392-361 25. E-mail: [email protected]