FiberPlex TIS-8632 User Manual
Page 11
Page 9
Inserting a Module
1)
Attach an ESD‐preventative wrist or ankle strap,
following its instructions for use.
2)
Disconnect and remove all interface cables
from SFP Module.
3)
If the SFP Module has a Bail Clasp,
close the Bail Clasp before inserting
the SFP Module.
4)
With the gold finger connector on the
bottom and the label on the top, line
up the SFP Module with the empty cage
and slide it in making sure that it is completely inserted and seated in the cage.
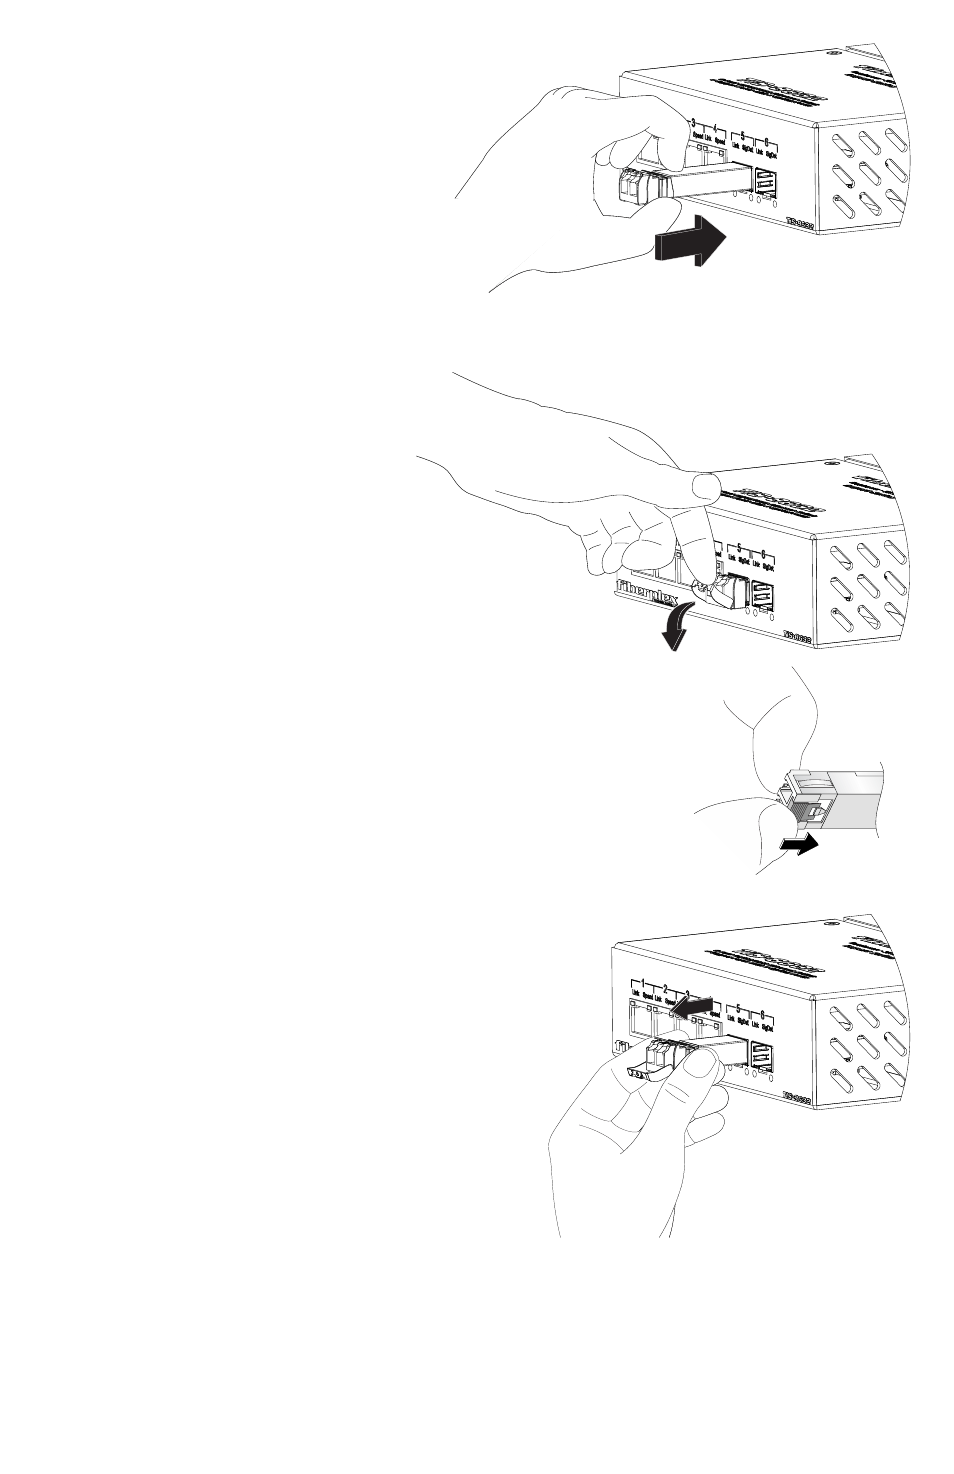
Removing a Module
1)
Attach an ESD‐preventative wrist
or ankle strap, following its
instructions for use.
2)
Disconnect and remove all interface cables from
SFP Module.
3)
Release the latching mechanism.
Bail Clasp – Open the bail clasp on the SFP Module
with your finger in a downward direction.
Actuator Button – Gently press the actuator up (or in)
while pulling the body of the SFP Module to release the
SFP Module from the cage.
Mylar Tab – Pull the tab gently in a straight outward
motion until it disengages from the port. Make sure the
tab is not twisted when pulling as it may become
disconnected from the SFP Module.
Slide Tab ‐ With your thumb, push the slide tab on the
bottom front of the SFP module in the direction of the
equipment to disengage the module from the line card
port. If you pull on the SFP module without disengaging the tab, you
can damage the SFP module.
4)
Grasp the SFP Module between your thumb and index
finger and carefully remove it from the port
5)
Place the SFP Module on an antistatic mat, or
immediately place it in a static shielding bag or container