Flowserve V-370 R3 Edward Valves User Manual
Page 6
EDWARD UNIVALVE USER INSTRUCTIONS ENGLISH 12-13
6
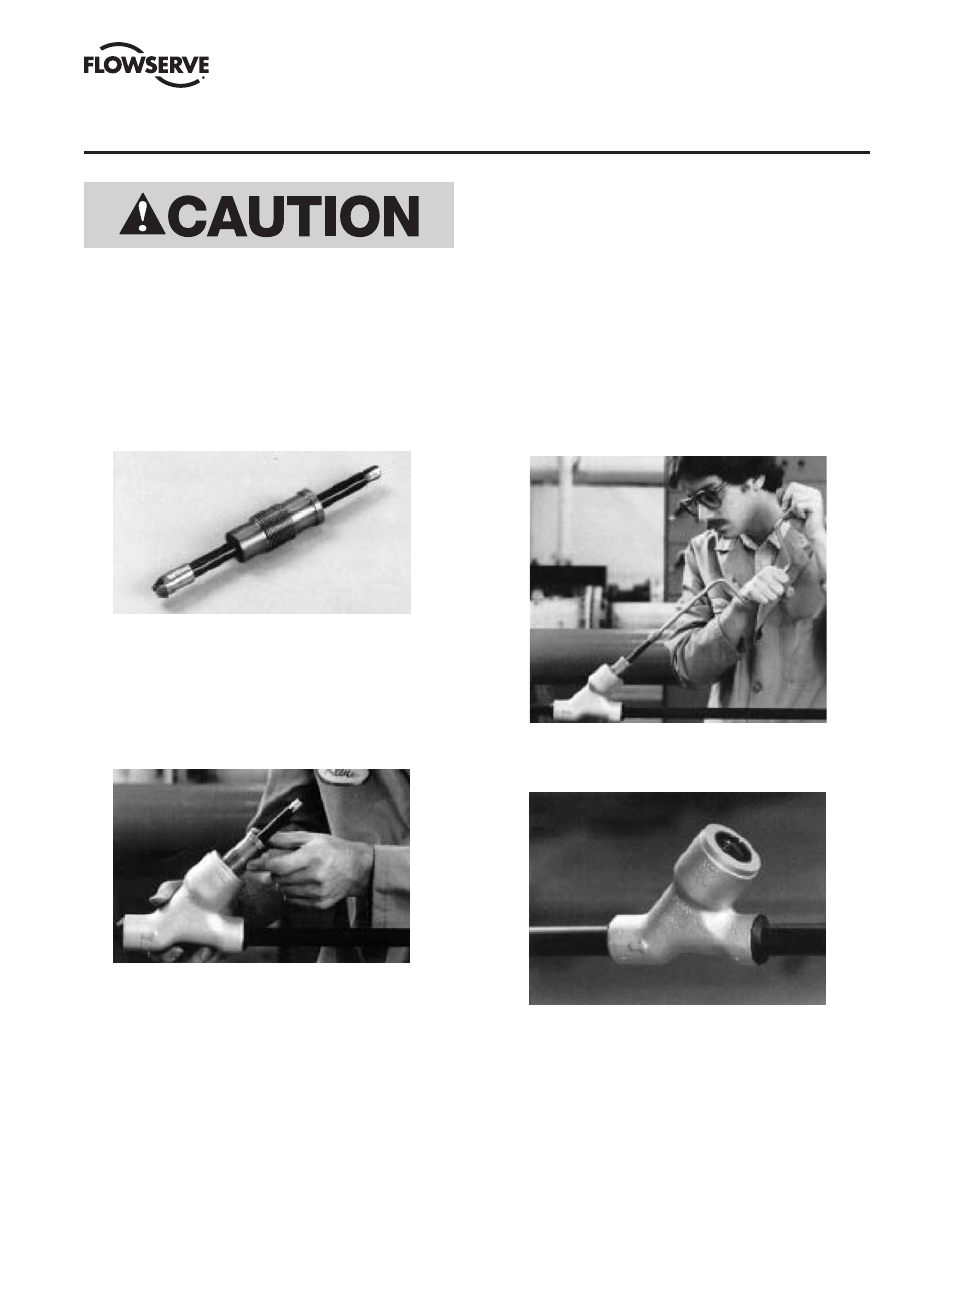
If seat damage has occurred, outlined below are step-by-
step procedures for fast, in-line repairs using the Edward
Seat Refinishing Tool.
1. See pp. 4–5 for proper disassembly procedures before
performing repairs on the Univalves. Then, using the
charts on pp. 10–13, select the proper Seat Refinishing
Tool Arrangement for performing repairs on the seat area.
2. Take appropriate caution to make sure the inlet and
outlet valve ports are blocked to prevent removed seat
material from entering the line. Then, screw the Seat
Refinishing Tool Assembly into the body while holding
the shaft up to prevent tool and seat contact. The guide
needs only to be hand-tightened. Do not damage the
cutters by dropping the tool on the stellite seat.
SERVICING EDWARD UNIVALVE STOP AND STOP-CHECK VALVES
Line pressure must be relieved before making any
repairs.
3. The Seat Refinishing Tool is now ready for operation.
Use a speed wrench to operate the tool. Because this
manual process is fast, a special air or electric motor
should not be used. The tool assembly can be easily
removed to inspect the seat and determine if more seat
refinishing is required. Turn the tool clockwise using
light pressure only on the stellite seat.
Univalves can be reseated several times, assuming
nominal amounts of stellite are removed each
time. A typical resealing operation removes several
thousandths of an inch of stellite; severe seat defects,
of course, would remove more. A total of about
.03 inch of stellite can be removed before the stellite
becomes too thin, or approximately five average
refinishing operations.
4. When a repair of the seat is finished, use a portable
vacuum to remove loose chips.