Flowserve TX2 Triple Offset High Performance Butterfly Valve IOM User Manual
Page 17
Flow Control Division
17
SECTION XVI
TROUBLESHOOTING GUIDE
In the event of valve difficulties you may try the following procedures before contacting Flowserve. If your
valve doesn’t operate properly before or after trying these trouble- shooting ideas, you may contact your
Flowserve representative for assistance
.
16.1 LEAKAGE FROM STUFFING BOX
If leakage around the stuffing box is discovered, first tighten the nuts on the gland follower to stop the
leakage. Do not over tighten the gland follower (more than 2/3 compression) as this may reduce packing
life. If the leakage still persists, replace the packing according to the proce
dure in the “ Stuffing Box
Maintenance Procedure” section.
16.2 LEAKAGE BETWEEN SEAL RING AND SEAT
Inspect Seal Ring for damage or excessive wear. If necessary, the Seal Ring may be lightly hand
polished using wet 400grit sandpaper. If leakage persists, or if not damage is evident, open and close the
valve 4 to 5 times, shutting it TIGHTLY each time. Re-check for leakage. If the valve still leaks in this
area, strike the back of the disc near the perimeter with a lead bar (or similar soft headed instrument to
prevent damaging the disc) to firmly seat the disc. Be sure to apply the force in a direction that will assist
in closing, not opening the disc. If leakage in this area persists, check the Seal Ring for roundness. If the
Seal Ring is out of round greater than its diameter times 1.00 x 10⁻³ (D x 0.001), orient the seal ring with
the longest dimension perpendicular to the valve shaft, and re-test for leakage. If leakage still preexists,
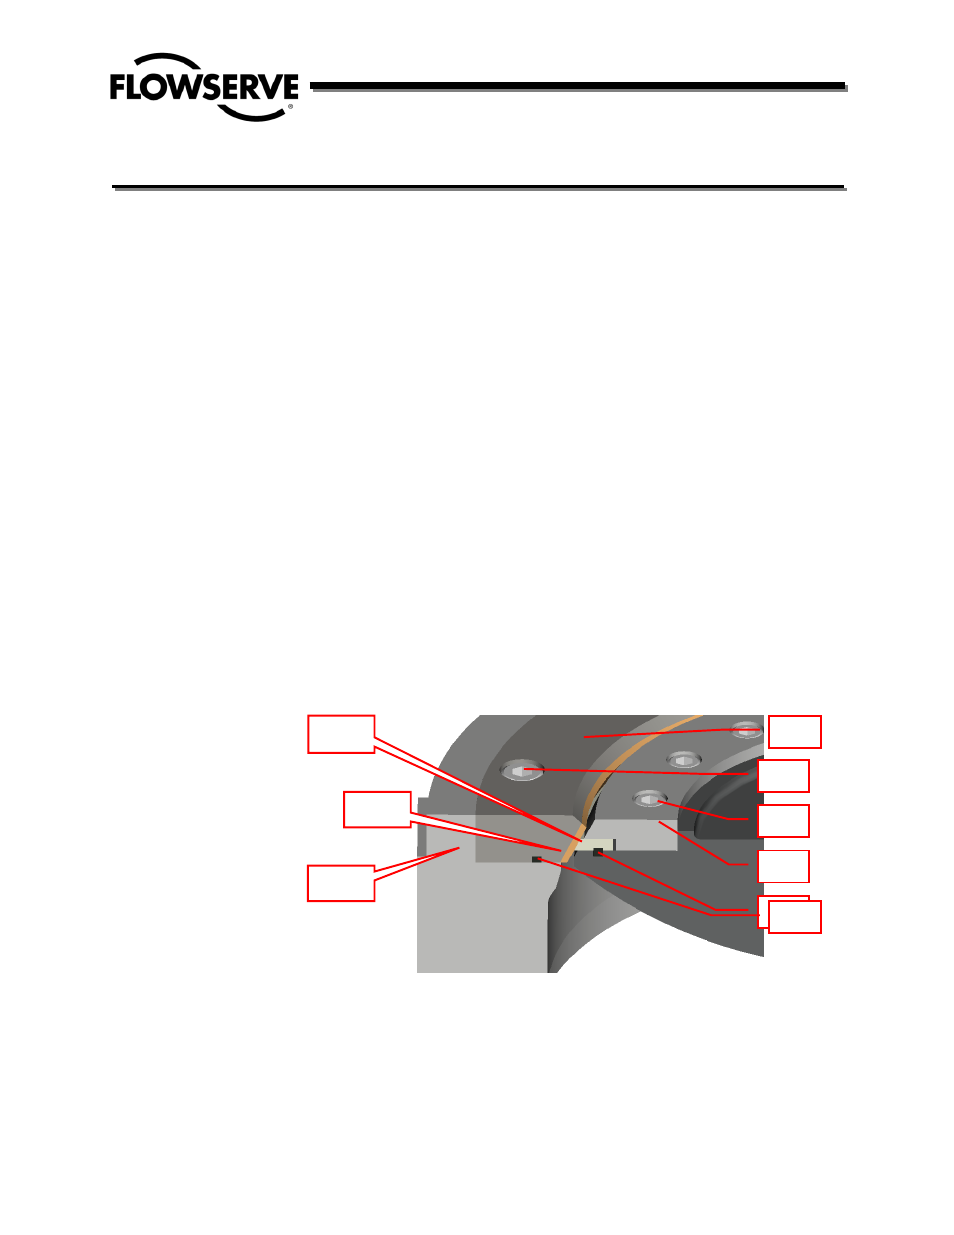
contact Flowserve for repair. (Fig.22)
16.3. LEAKAGE BETWEEN SEAL RING RETAINER AND SEAL RING (19) OR DISC
Firstly, ensure the bolts of retainer (20) were tightened in a diagonal sequence. If leakage persists, please
disassemble the retainer (19) and inspect the gasket (17). If found to be damaged, please replace the
gasket. (Fig. 22)
Fig.22
16.4. LEAKAGE BETWEEN BODY SEAT AND BODY (LOCKED DESIGN).
Firstly, ensure the bolts of body seat (22) were tightened in a diagonal sequence. If leakage persists, please
disassemble the body seat (23) and inspect the gasket (21). If found the damage, please replace the gasket. (Fig. 22)
16.2
16.3
20
19
17
23
22
21
16.4