Flowserve RG Series Standard Actuator User Manual
Page 6
6
®
User Instructions RG Series Standard Actuator - AXENIM0122-00 12/09
needs to be brought in to workshop, with suitable
facilities to carefully remove the bearing without
damaging the housing and to press new bearing
with proper pressing tools per manufacturer’s in-
structions and a press.
Do not attempt to pry out any of the bearings in the
actuator with sharp tools, or hammer in a replace-
ment bearing.
4.5.3 Clean thoroughly and grease all Torque Module
components with NLGI grade 2 multi-purpose
grease. Use Shell Alvania EP2 for Standard Actua-
tors. For low temperature units, use Dow 55 grease
or equivalent.
4.5.4 Reverse the disassembly procedures to reassem-
ble. Apply recommended torque, refer torque
chart, on the Tie Rod Locknuts, the Mounting Flange
Nuts, the Body Cover & Top Plate bolts, the Piston
Rod / Pull Rod (see tables on pafe 7.
The Tie Rod and Mounting Flange Stud threads
should be lubricated with Locktite Antiseize, 77164
or equivalent.
The Pull /Piston Rod threads and cover bolts to be
tightened with thread lock compound, Loctite 243
or equivalent.
4.5.5 Refer to parts and materials drawings for all re-
quired spare parts (see pages 9 + 10).
Test the actuator for smooth operation and air
leakage at service pressure before reinstalling into
service.
5
Field Conversion from Fail CW to Fail CCW
(For Spring Return Actuators)
The RG spring return actuator can be converted from
fail CW to fail CCW easily, without having to remove the
Torque Module, mounting bracket, stem adaptor and
the shaft driven accessories, mounted on the centre
body . Simply switch the positions of the Pressure and
Spring Modules.
Actuator Designation needs to be suitably changed on
the name plate.
Follow steps below, if operating the valve is permitted:
5.1
Apply enough air pressure to the actuator to relieve
spring load on the stopper bolt.
5.2
Back off both the stopper bolts on the Torque Module
and depressurize the actuator.
5.3
Remove Spring Module end cover, unscrew and dis-
connect the Spring Pull Rod.
5.4
Pressurize rod end of Pressure Module, to end of
stroke. Depressurize and remove the end cover/plug
on the Pressure Module. Use a tube/socket spanner,
loosen piston rod by one turn, fit back end cover/plug
and pressurize cap end, enough to stroke to end. De-
pressurize, remove end cover/plug and fully unscrew
and disconnect the piston rod from the Torque Module.
5.5
Remove the Pressure and Spring Modules off the Torque
Module by removing the mounting flange stud nuts.
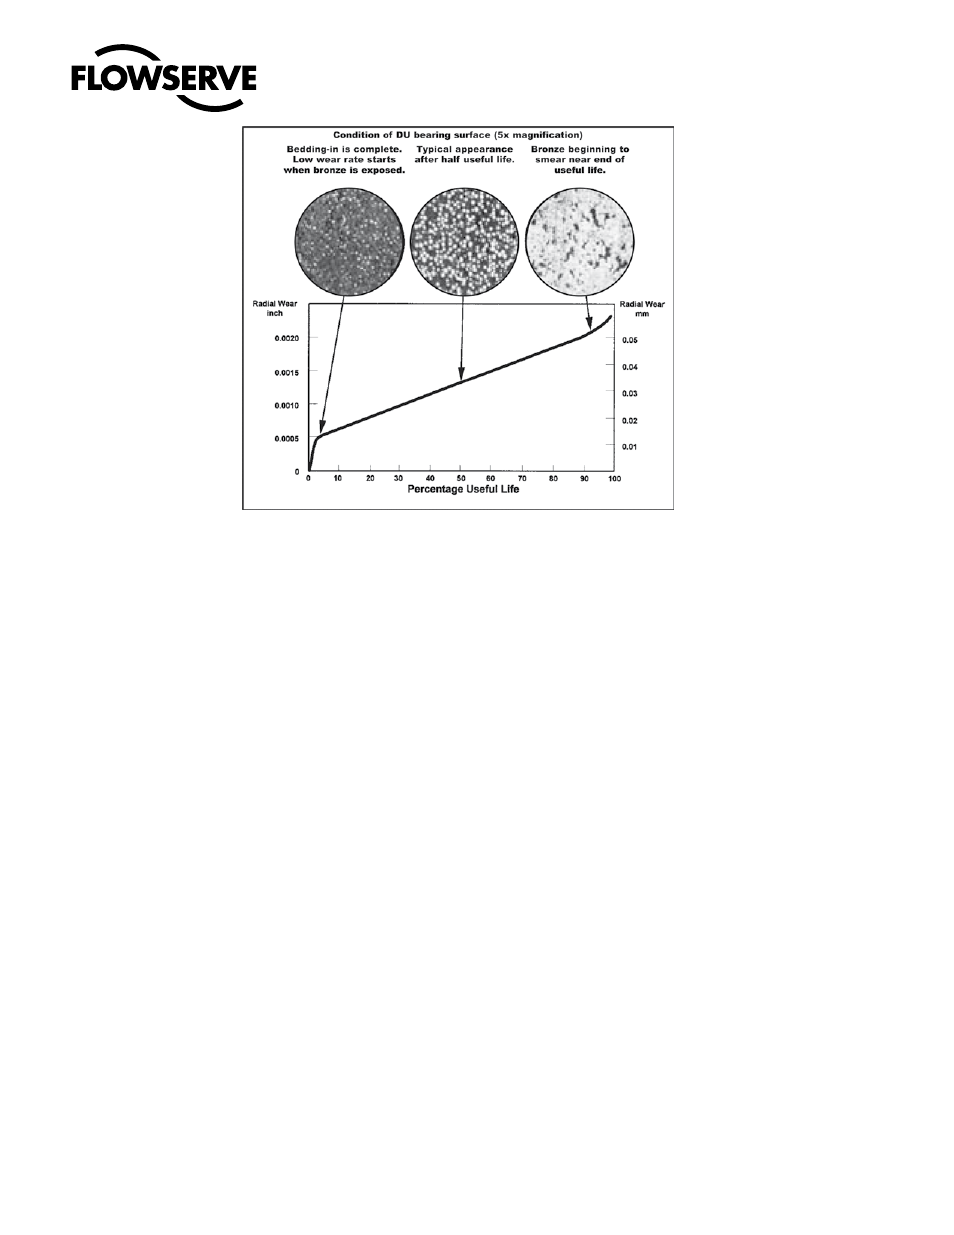
Fig.: 2 Residual Life Guide