Network overview, Default ip address, Initial setup – Geist Watchdog 100 User Manual
Page 6
GM1118 - Watchdog 100 Series User Manual
6
Revision Date: 2/16/2015
Network Overview
This product comes preconfigured with a default IP address set. Simply connect to the
Environmental Monitoring Unit and access the web page with your browser.
Default IP Address
Watchdog 100 units have a default IP address for initial setup and access to the unit if the
assigned address is lost or forgotten. Once an IP address is assigned to a unit, the default IP
address is no longer active. To restore the default IP address, press the reset button located
beside the network connector and hold for approximately 20 seconds. The idle and activity lights
near the network connector will both light up when the IP address has been reset.
Note: Pressing the reset button will restore the default IP address and will also clear all password
settings.
The Configuration page allows you to assign the network properties or use DHCP to connect to
your network. Access to the unit requires the IP address to be known, so use of a Static IP or
reserved DHCP is recommended. The default address is shown on the front of the unit:
IP Address:
192.168.123.123
Subnet Mask:
255.255.255.0
Gateway:
192.168.123.1
Initial Setup
Connect the Watchdog 100 to your computer using a crossover cable or hub/switch.
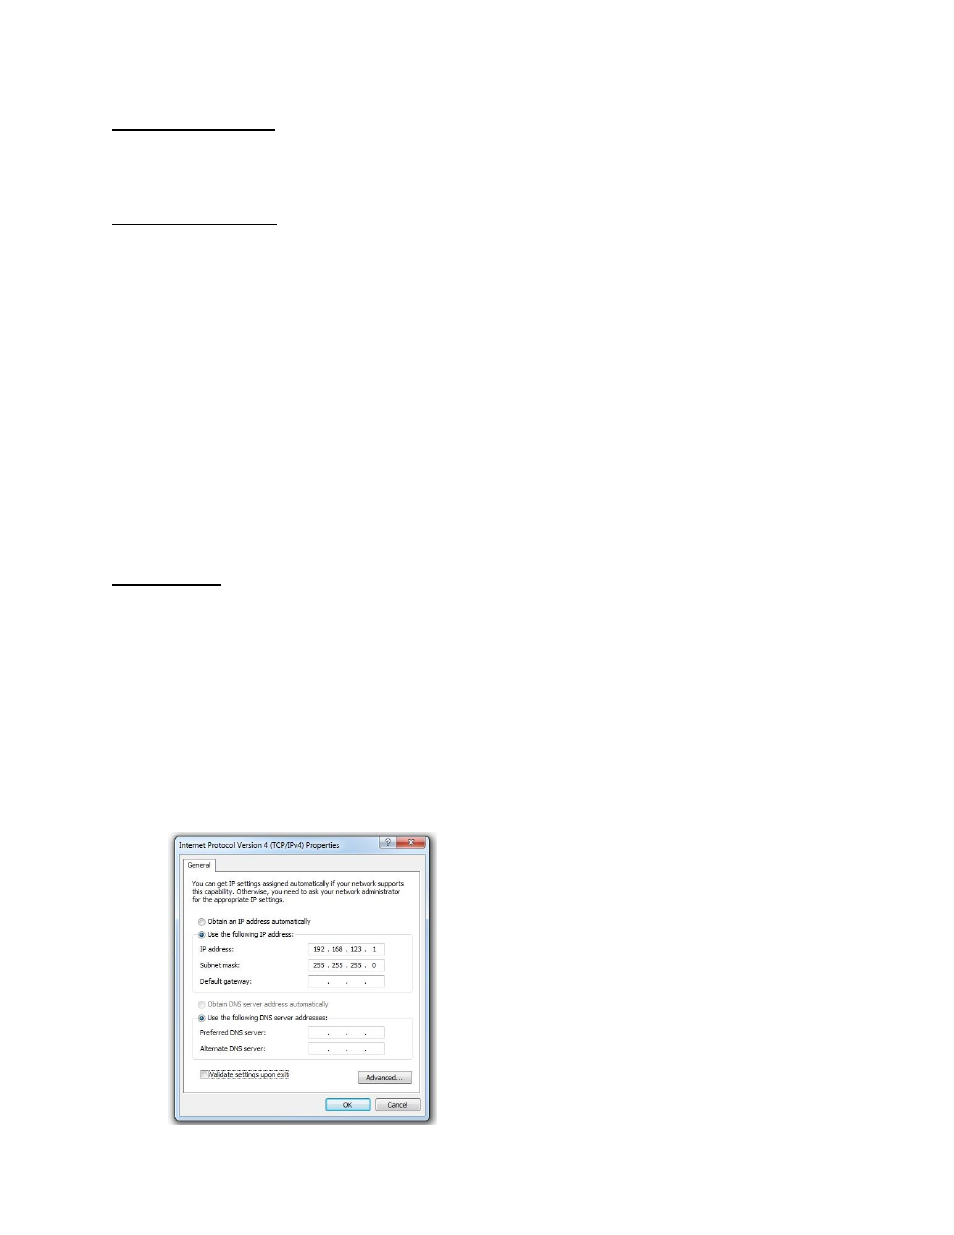
Windows OS
Navigate to the Local Area Network Adapter Connections Properties and change the Internet
Protocol Version 4 (TCP/IPv4) Properties. Select “Use the following IP address”. Use these
settings:
IP Address:
192.168.123.1
Subnet Mask: 255.255.255.0
Gateway:
Leave blank
Figure 2: Network settings for initial setup. Images varies depending on Windows versions.