Mount the project caddy to the wall, Warranty – Gladiator GAWUXXPTTG Project Caddy User Manual
Page 3
3
7.
Using the two Phillips-head screws (F3b) and two acorn
nuts (F10) fasten the project caddy shelf to the sides.
8.
Holding each screw in place with a screwdriver, completely
tighten the acorn nut with the nut driver.
9.
Insert the threaded studs on each double-hook end piece into
the two holes in each side piece.
10. Using two acorn nuts (F10) per side, attach the double-hook end
pieces to the sides. Completely tighten with a
³⁄₈" nut driver.
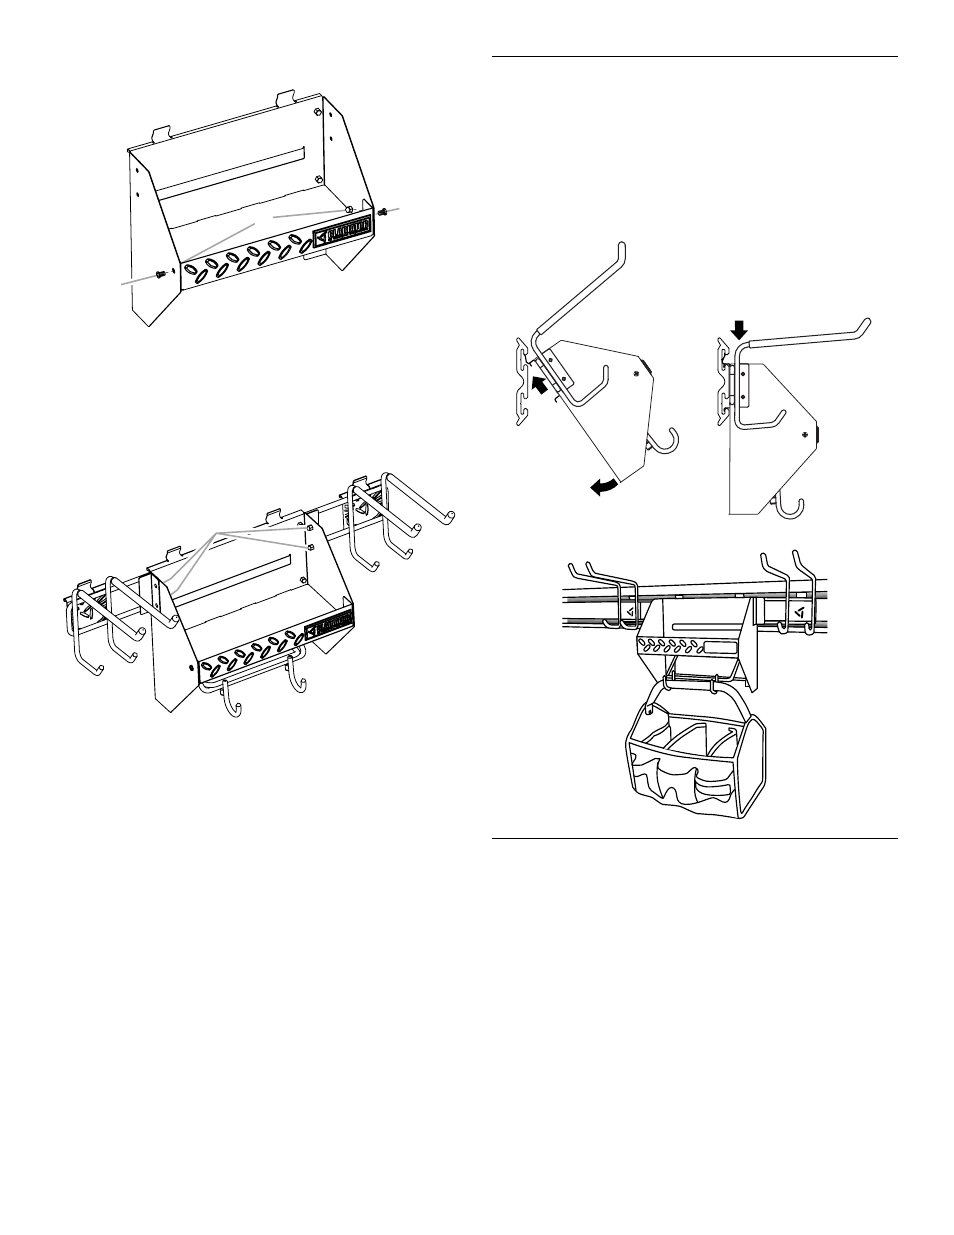
Mount the Project Caddy to the Wall
IMPORTANT: Be sure the GearWall
®
panel or GearTrack
®
channel is
installed with mounting screws in every slot and at every stud
location with a maximum of 24" (60.96 cm) horizontally between
screws.
1.
Engage the bracket rims located on the back of the project
caddy into the slots in the GearWall
®
panel or GearTrack
®
channel
by lifting up, pushing toward the wall and lowering the rims into
the slots.
2.
Inspect the project caddy from the side to ensure the bracket
rims are fully engaged in the slots as shown.
3.
Place the tool bag on the tool bag hook, as shown.
Warranty
For warranty information:
In the U.S.A. call 1-866-342-4089 or visit our website at
www.GladiatorGW.com
In Canada call 1-800-807-6777 or visit our website at
www.gladiatorgarageworks.ca
A. Phillips-head screws (F3b)
B. Acorn nuts (F10)
A. Acorn nuts (F10)
A
A
B
A