Ils21hl instructions manual – ILS ILS21H User Manual
Page 5
ILS21HL INSTRUCTIONS MANUAL
ILS21 HL
Page 4
Find more information about the use of Sho-Q in this ILS21HLUser manual. For software
installation see the Installation manual section.
ILS21HL Presentation System preparation
F
IGURE
2
After switching on and establishing a VGA or HDMI connection with a projector or a second
monitor, the lectern is ready to be used. Figure 2 shows the
front side of the lectern where the power button is located and
the multiple card readers.
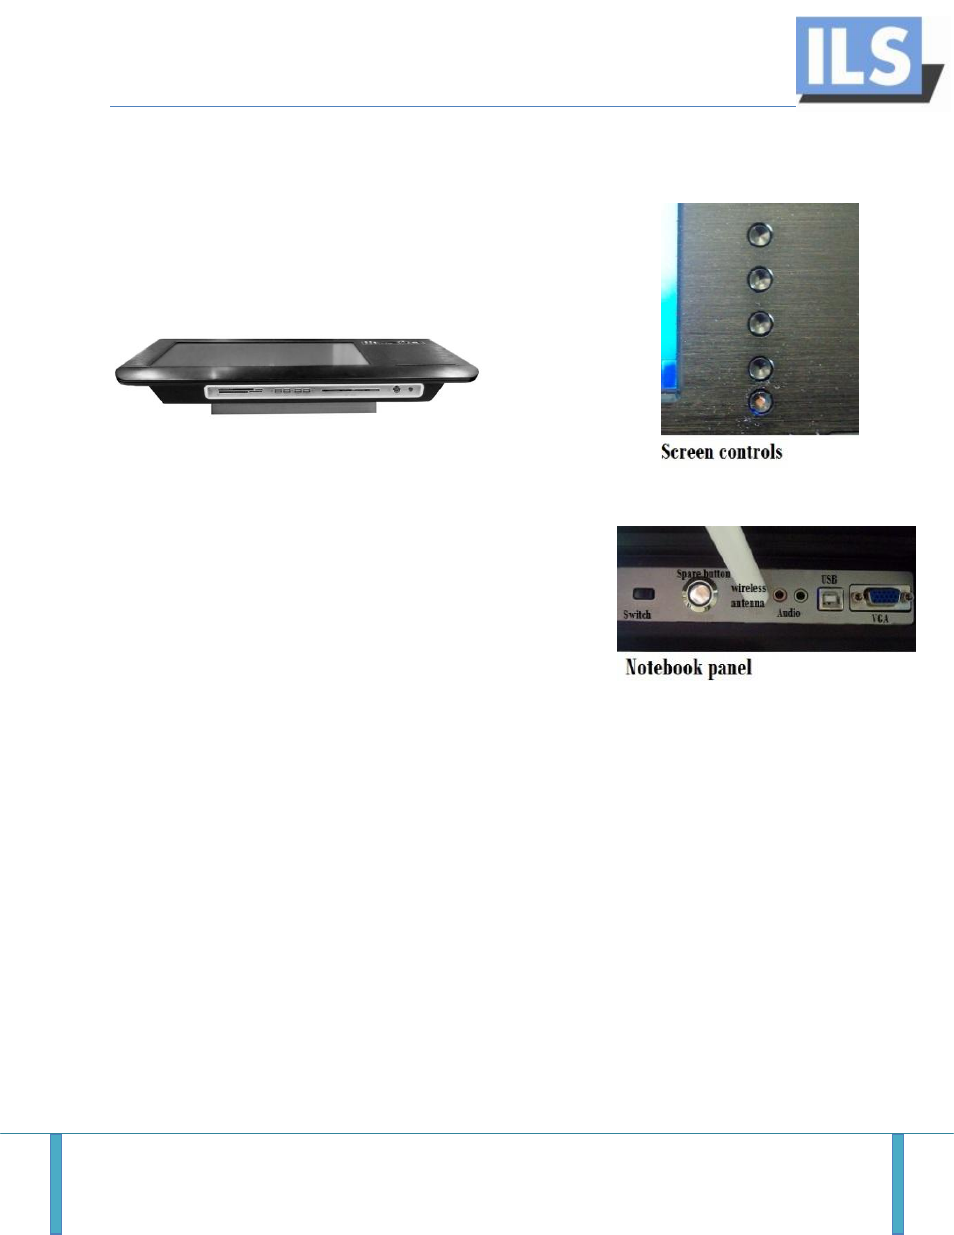
The system is equipped with the option of switching between
two types of control: the internal ILS21 PC, or if the client
prefers – an external control such as a notebook, other laptop
or a PC. This feature is restricted to use of the VGA
connections. Multiple cable connections are provided in order
to fit the specified scenario. Figure 3 illustrates the multiple connectors.
The cables have to be connected to the lectern’s VGA and USB plugs on the notebook panel, as
well as to the VGA and USB port which belongs to the notebook. After this is done, a single
switch operates between the lectern and the external control. Note that the switch will only
function when the USB cable is attached, the switcher draws its 5V from the notebook, when
removed, the ILS21HL automatically returns to the default connection and shows the ILS21 PC
information.
Internal monitor control:
The ILS21HL features a state-of-the-art DELL monitor with ultra wide viewing angle.
5 buttons are implemented for the screen adjustment. The lower one is a switch off and on
button and the user should be careful not to switch off the monitor by mistake while using
these controls. On request this feature gets blocked. Figure 4 is a snapshot of the controls.
F
IGURE
3
F
IGURE
4