Interactive Toy Concepts B2 Spirit User Manual
Instruction manual, Pre-flight
INSTRUCTION MANUAL
Congratulations on the purchase of your Airtech R/C
Aircraft. These planes are designed to fly great and be
easy to "learn how to fly". But remember, these are aircraft,
so you must spend a bit of time reading through this
manual so you can learn what to do, and what not to do.
For any questions or problems with this
product please call 1-866-214-2220.
Visit our website: www.interactivetoy.com
or E-mail us at [email protected]
PLEASE DO NOT RETURN THIS
PRODUCT TO ANY RETAIL STORE!
INSTRUCTION MANUAL
®
Tip!
Look for these symbols for extra help!
Kit Includes: R/C plane, Radio-Control, Quick-Charger System, Repair Kit and Instructions.
Continued next page...
INS-33811-40623-US
TM
TM
TM
PRE-FLIGHT
PRE-FLIGHT
Don’t forget
Before leaving home to fly the aircraft don’t forget to take with you –
-Remote control unit (with antenna), charger, rechargeable battery, repair kit and
Aircraft (5 items altogether).
-Fresh new Alkaline batteries (not included): 8 ‘AA’ (for remote) and 8 ‘D’ (for charger).
-Little screwdriver (not included) to unscrew the protective cover of the
rechargeable battery on the belly of the aircraft.
Charging flight battery
-Slide the charger’s cover open, insert 8 fresh ‘D’ Alkaline type batteries
(not included) in the marked orientation and between the white separators.
Note: The white separators aid in the insertion of the batteries in the correct orientation.
Verify that the connector at the end of the charging cable is clean and ready.
-Find the rechargeable battery inside the box and verify that the connector
at the end of the charging cable is clean and ready. Plug the rechargeable
battery connector to the connector of the charger until you hear the ‘click’ of connectors locking.
The correct orientation of the connectors is when the red /black wires from one side
match the red /black wires from the other side.
-the LED should begin blinking in red indicating that charging has begun.
When charging is complete the LED stops blinking and stays solid red.
Note: Battery heats up during charging. A properly charged battery should be warm to
the touch but not overly hot.
-When charging is complete, disconnect the connectors. To disconnect, depress
the clip and gently pull the two connectors apart. Do not use excessive force as you may cause damage.
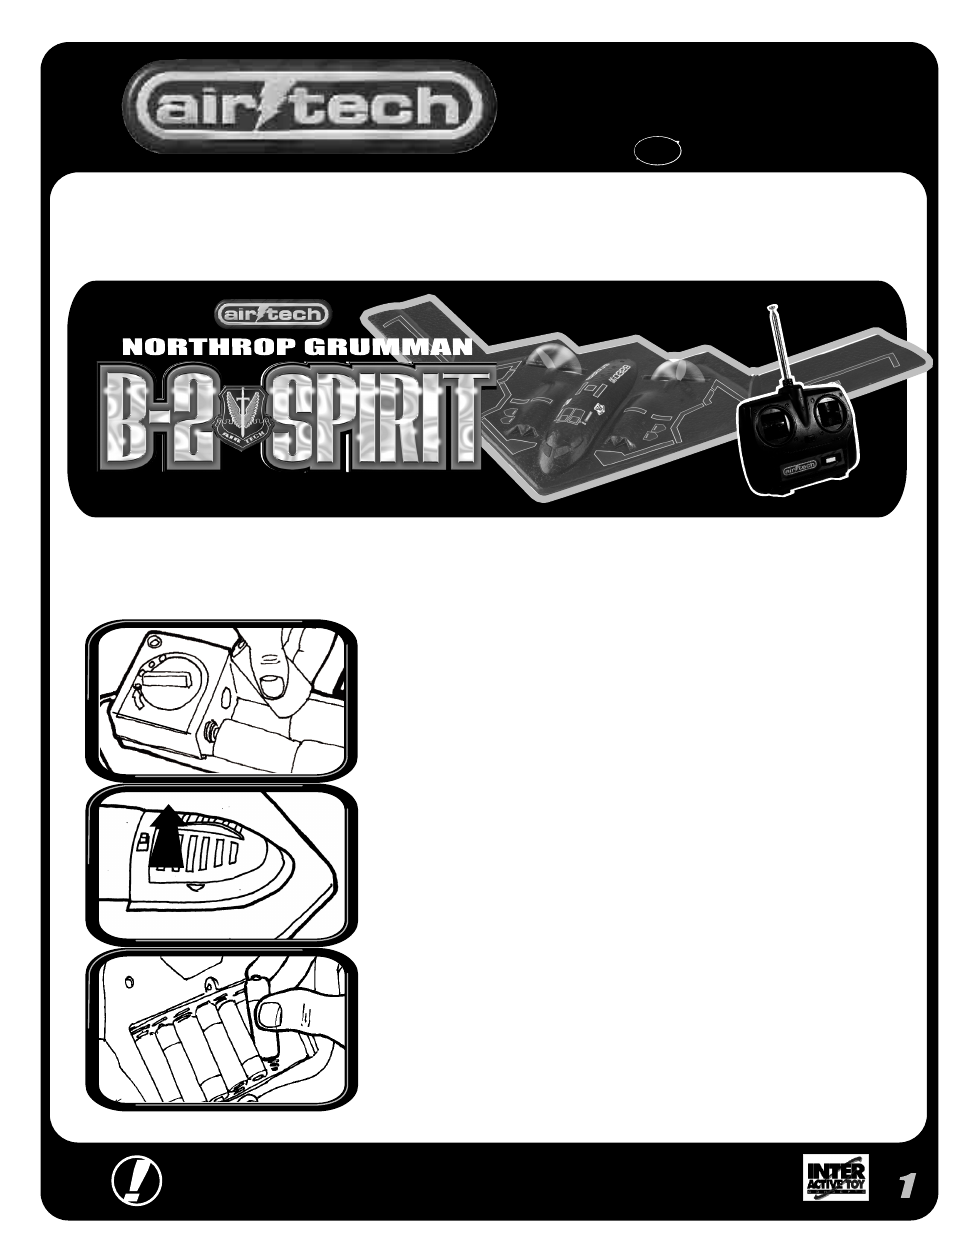
Prepare the aircraft
On the belly of the aircraft identify the battery compartment and the on/off switch.
Slide the switch to the OFF positions.
Unscrew, release and remove the cover.
-Connect the rechargeable battery to the connector inside the aircraft (in a similar way
as you just did with the charger). Then insert the battery carefully and gently in place,
making sure not to break the wire and not to position the connectors on the top, where
it may block the cover from closing.
-Put protective battery compartment door in place and secure with the screw.
Prepare the remote control
-Remove the battery cover located on the rear of the transmitter by sliding it downward.
-Insert the 8 AA’ batteries. Ensure correct orientation as marked. Slide the cover back in place.
-Insert antenna into position and screw it clockwise to secure in place. Do not over tighten.
-Switch to ON, verify that both LEDs light up, and then switch back to OFF.
ON