Maintenance of welding unit – Kemppi Kempomat 1701 User Manual
Page 9
© KEMPPI OY
KEMPOMAT 1701, KEMPOMAT 2100 / 0531 – 9
4. MAINTENANCE OF WELDING UNIT
4.1. Daily maintenance
Be careful of mains voltage when handling electric cables!
Clean wire passage in gun and check contact tip regularly.
Always check condition of mains and welding cables before use, change damaged ones.
Note! Mains cable can be changed only by a qualified electrician!
Mains cable is changed as follows:
Kempomat 1701
1.
Detach back plate of wire reel.
2.
Connect mains cable to main switch pins with flat clamps.
3.
Connect green and yellow earth to the body plug marked as earth.
4.2. Regular maintenance
KEMPPI service workshops make service contracts with customers about regular mainte-
nance. All parts are cleaned, checked, and if necessary, repaired. Also the operation of welding
machine is tested.
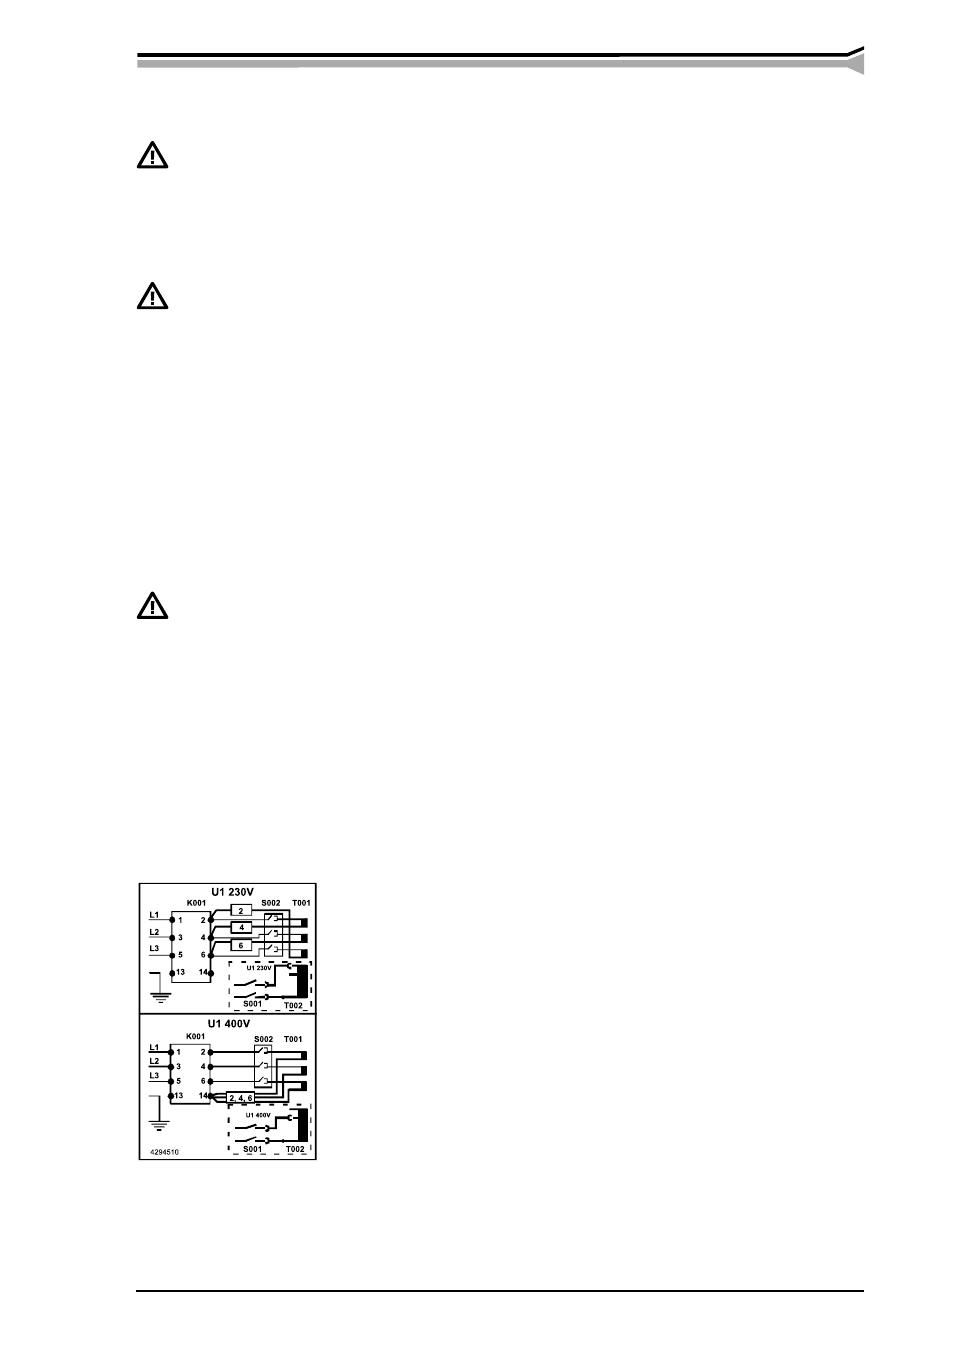
Kempomat 2100
By delivery from the factory the Kempomat machine has
been connected for mains voltage3~400V.
In order to change the mains voltage loosen the right side
plate of the machine, change the connections according to the
enclosed diagram.
3.10. Welding
Never look at the flame arc without a face shield for arc welding! Protect yourself
and your surroundings from the flame arc and hot spatter!
You can start welding, when selections and adjustments demanded by the work have been done.
Welding begins when wire is pressed to the work piece by pressing the gun switch. Arc forms,
shield gas starts to flow and wire feed inches welding wire out of the gun nozzle.
Note! It is advisable to test welding first on something else than the work piece.
Welding fumes are a possible health hazard, make certain there is sufficient
ventilation during welding!
3.11. Storage
Store the unit in a clean and dry place. Shield it from rain and at temperatures exceeding 25 °C
from direct exposure to sun. There must be sufficient free space in front and back of the unit for
air circulation.