4 operating functions – Kemppi LT 250 User Manual
Page 12
EN
3.4
Operating functions
W006859
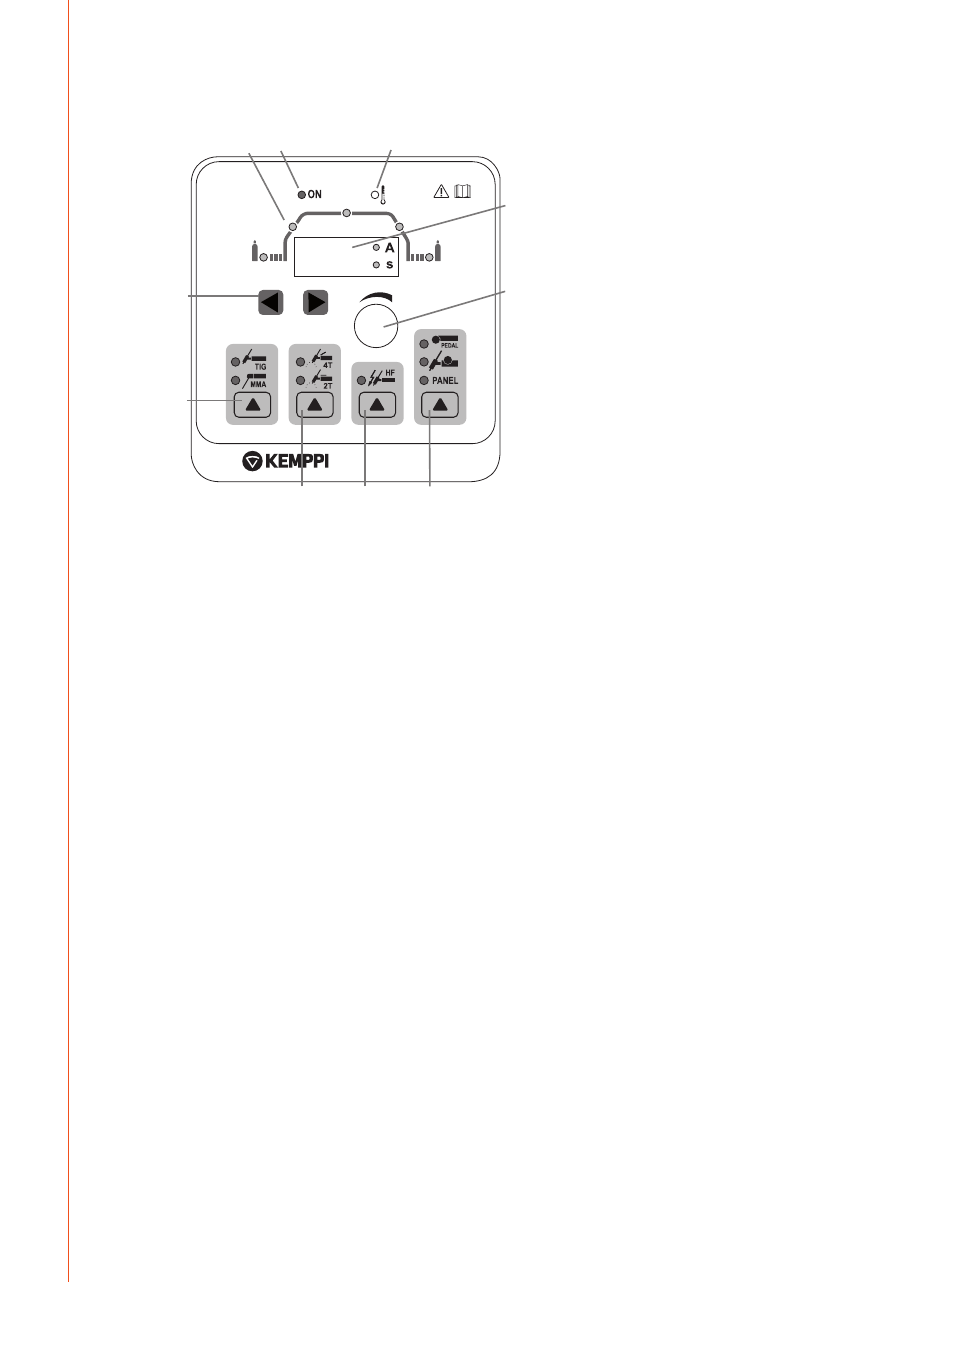
1.
2.
3.
4.
5.
6.
7.
8.
9.
10.
1. Machine ’ON’ green light
2. Pre/Post gas, upslope/downslope and main current parameter indicator.
3. Welding parameter selector arrow keys.
4. Welding process selection button (MMA or TIG).
5. 2T or 4T TIG torch switch selection button. Select 2T for short welds or 4T for long welds.
6. Ignition method selection button.
7. Current adjustment selector: panel control, TIG Torch remote or foot pedal or hand remote.
8. Welding current and parameter value control knob.
9. Welding current and parameter value display: time and amperes.
10. Overheating indicator.
Switching the machine on
When you power on the machine, the green standby indicator and panel are lit. Make sure that
there is enough space around the machine to allow the air to freely circulate and flow into and out
off the machine. If the supply cables at the back of the LT 250 are connected in reverse order the
machine will not work and the panel will not illuminate.
3.4.1 Welding current regulation and remote control
The welding current can be adjusted steplessly with the control knob, if panel adjustment (PANEL)
is selected.
If you want to adjust the welding current with the remote control, connect the remote control to
the machine and then select remote control with selector (7). The following remote control options
are available: RTC10, RTC20, R10 and R11F. The remote foot pedal R11F can only be used with TIG
welding in 2T operation mode.
3.4.2 MMA welding settings
MMA welding is selected when the indicator next to the MMA symbol is lit. If needed, press the
process selection button to select the MMA process (4). The machine automatically sets suitable
values to the ignition time, ignition pulse and arc dynamics.
MasterTig LT 250
10