Legrand Wallduct Medical Raceway System Bodies User Manual
Page 3
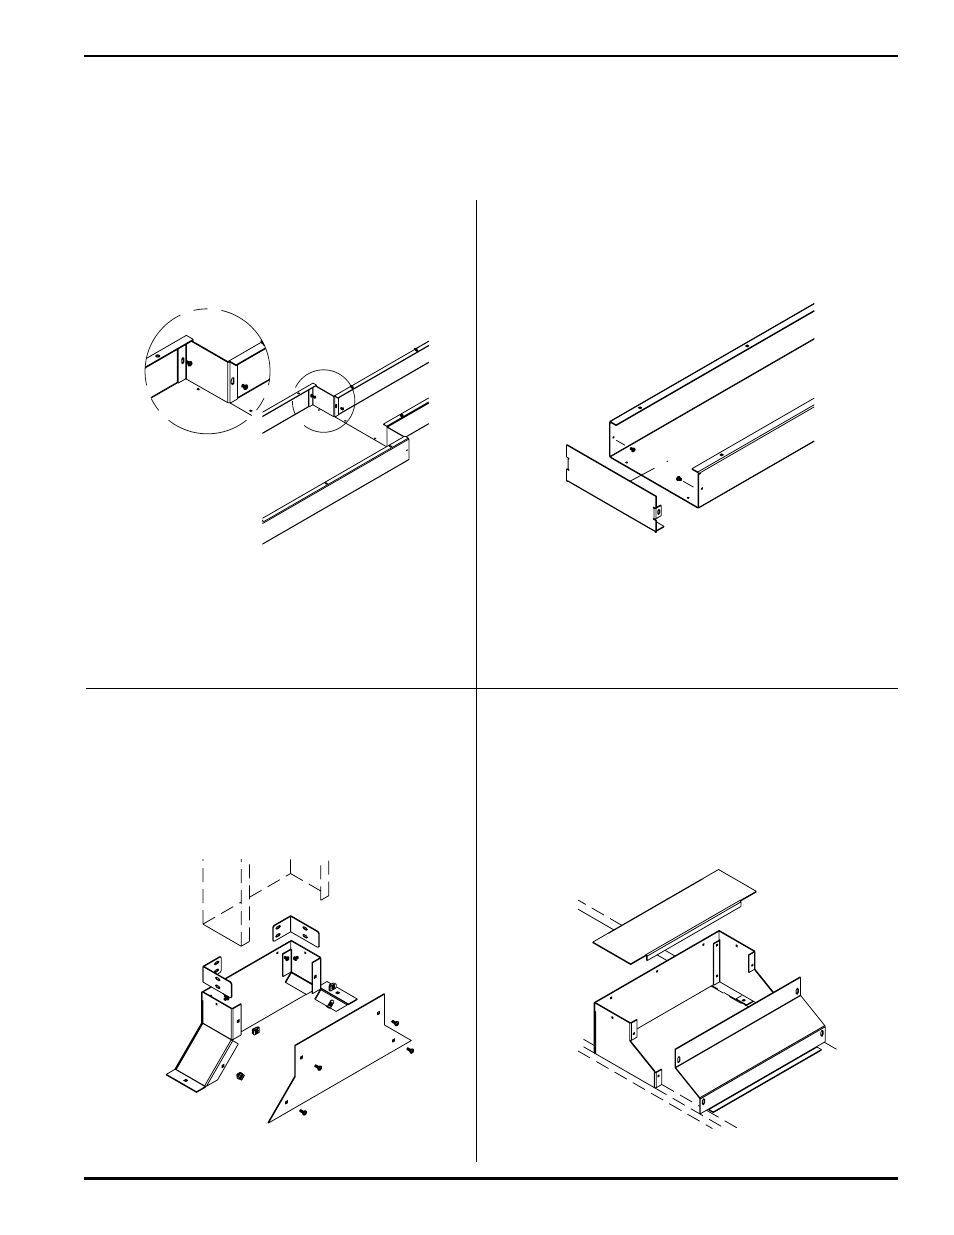
Step 1 For Reducer Couplings – Place one reducer
onto the inside of the duct and attach as you
would a coupling angle. Repeat for the other
reducer coupling as necessary.
Step 1 For End Closures – Fasten closure to body of
duct using screws provided. The closure should
be attached just like a coupling angle.
Step 1 For Flanged Cabinet Connectors –
Connect flanged cabinet connector using
coupling angles and screws provided
(similar to connecting two pieces of straight
wallduct). Attach to cabinet using holes
provided and approporiate screws (provided
by others).
Step 1 For VA Risers – Attach riser to duct body using
coupling angles provided with duct body and
attach to trench body using screws provided
through tabs provided with the VA body.
SPECIFIC INSTRUCTIONS: REDUCER COUPLINGS, END CLOSURES, FLANGED CABINET CONNECTORS,
AND VA RISERS.
Reducer couplings are used for transitions from a larger to a smaller width duct of the same depth. End closures
are used to close end of duct. Both are attached using #10-32 taptite screws. Flanged cabinet connectors connect
duct bodies to cabinets of various sizes. VA Riser transition trenchduct to wallduct. All screws are required for
proper electrical bonding.
NOTE: This should be done prior to installation of any wires,
coverplates, and wire retainers.
NOTE: When transitioning from a larger duct body to a smaller
duct body, follow all wire fill requirements according to
UL and the last page of this instruction sheet.