Humidistat lcd display, Optional outdoor temperature reset function, Sensor calibration – Nortec On Digital Wall & Duct Humidistat User Manual
Page 2
2 | Introduction
2
1
3
4
5
Humidistat LCD Display
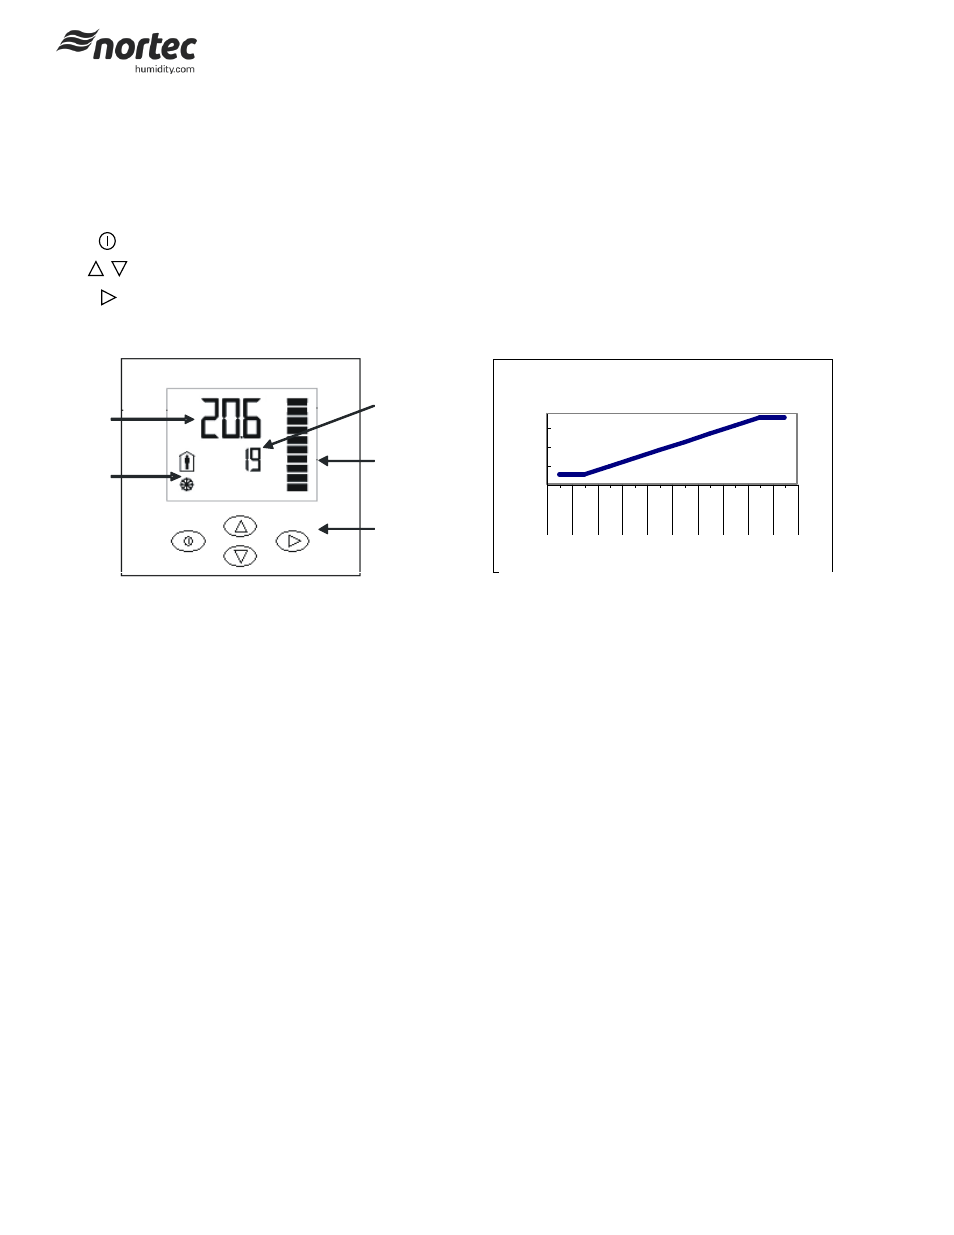
Legend for Figure 1.
1. Display of current humidity value.
2. Snowflake indicates outdoor temperature setback for winter compensation is in effect.
3. Setpoint display.
4. Graphical display of output value with increments of 10%.
5. Buttons for operating the humidistat:
POWER button: No function.
UP/DOWN buttons: Adjusts calibration value.
OPTION button: Used for accessing the sensor calibration routine.
Optional Outdoor Temperature Reset Function
1. Order Outdoor Temperature Sensor Separately, Part # 2520263
2. Each humidistat is equipped with an integrated reset function that will lower the setpoint during cold weather operation. This will prevent
condensation on windows and building structures. The diagram below illustrates how the setpoint reset feature operates.
3. When the outdoor temperature setback feature is in effect, the humidistat will normally display the calculated setpoint limit based on the
outdoor air temperature. A snowflake will also be displayed to indicate cold weather operation. When any key on the controller is pressed
the LCD screen will display the customer specified setpoint for a short duration.
4. This feature is enabled by removing the jumper from terminals 8 and 1 on the humidistat, and wiring the outdoor temperature sensor to
these terminals.
Sensor Calibration
1. The humidity sensor is factory calibrated, however, it can be field recalibrated. The calibration routine can be accessed by pressing and
holding down the option button for five seconds. A new screen will appear with the calibration adjustments.
2. Press the up or down buttons until the text calH appears on the LCD screen. To adjust the calibration, press the Option button. The screen
should load to display the current calibration trim. The calibration trim can be adjusted by pressing the up or down buttons to the desired
level and then pressing the option button to confirm the settings. Press the Power button to return to the normal display.
Figure 2: Outdoor Temperature Setback
Setpoint Versus Outdoor Temperature
10
20
30
40
5
0
-5
-10
-15
-20
-25
-30
-35
-40
41
32
23
14
5
-4
-13
-22
-31
-40
Outdoor Temperature
S
e
tp
o
in
t
L
im
it
(
rh
)
Figure 1: Wall Sensor LCD Display
Figure 2: Outdoor Temperature Setback