Installing the inner rail extensions, Installing the outer rack rails, Installing the n2 into a rack – OpenEye OE5 N-Series User Manual
Page 21
30723AC
21
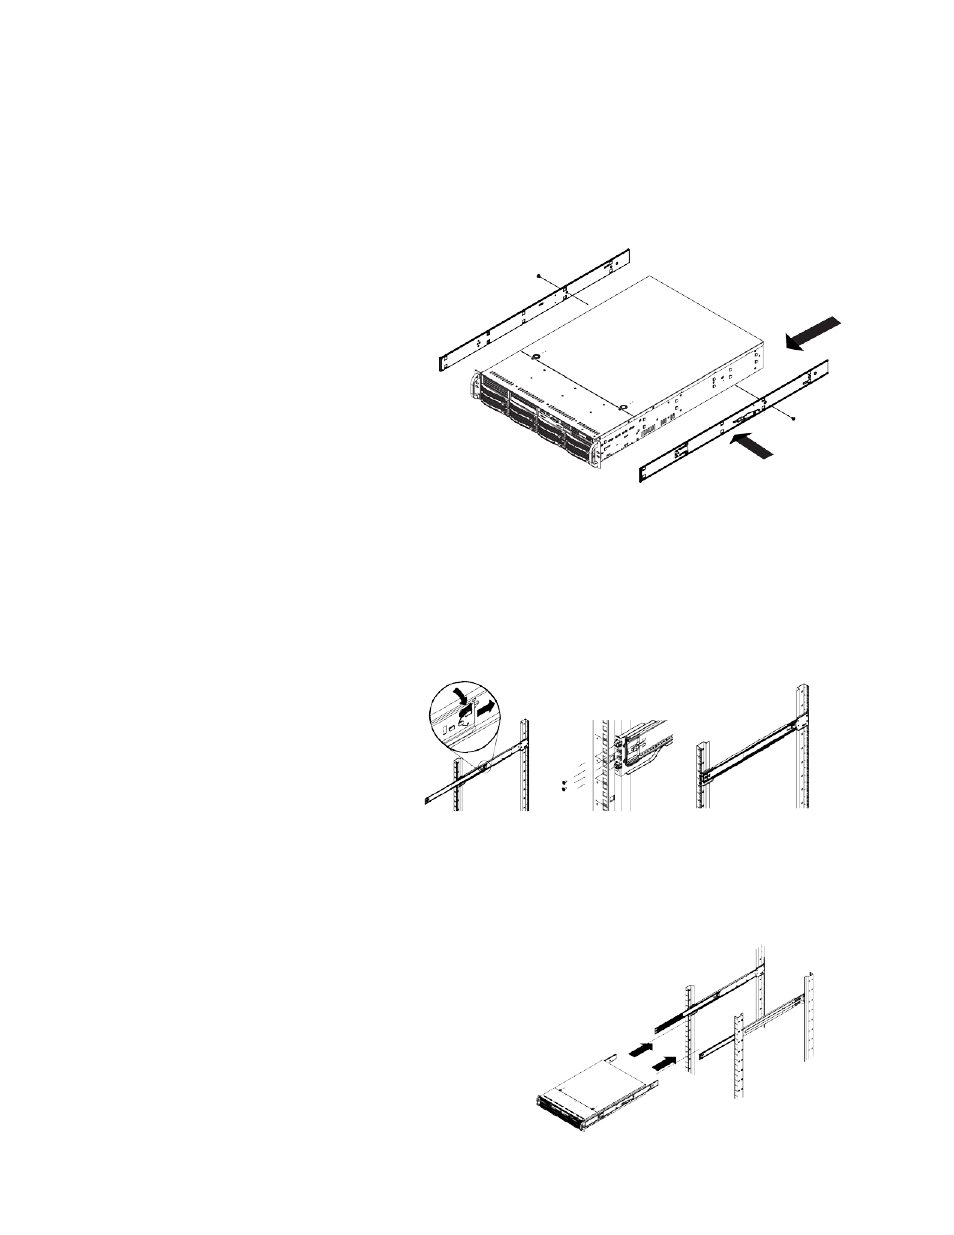
Installing the Inner Rail Extensions
Each rackmount kit includes a set of inner rails in two sections: inner rails and inner rail extensions. The
inner rails are pre-attached to the chassis, and do not interfere with normal use of the chassis if you
decide not to use a server rack. The inner rail extension is attached to the inner rail to mount the
chassis in the rack.
1. Place the inner rail extensions
on the side of the chassis
aligning the hooks of the
chassis with the rail extension
holes. Make sure the extension
faces "outward" just like the pre-
attached inner rail.
2. Slide the extension toward the
front of the chassis.
3. Optional: Secure the chassis
with 2 screws as illustrated. (4
screws are provided on N4
models.)
4. Repeat steps for the other inner
rail extension.
Installing the Outer Rack Rails
Outer rails attach to the rack and hold the chassis in place. The outer rails will extend between 30
inches and 33 inches.
1. Secure the back end of the
outer rail to the rack, using
the screws provided.
2. Press the button where the
two outer rails are joined to
retract the smaller outer rail.
3. Hang the hooks of the rails
onto the rack holes and if
desired, use screws to
secure the front of the outer rail onto the rack.
4. Repeat steps for the other outer rail extension.
Installing the N2 into a Rack
1. Extend the outer rails.
2. Align the inner rails with the outer rails on the
rack.
3. Slide the inner rails into the outer rails, keeping
pressure even on both sides. When pushed all
the way into the rack, the rails will click into a
locked position (preventing removal without
pressing the quick-release tabs).