Before recording, Recording, Recording (1) – Teac CD-RW890 User Manual
Page 17
17
Before you start recording, make sure that you understand
the following points:
Up to 99 tracks can be recorded according to the CD standards.
<
When a 100th track is about to be recorded, recording will stop
automatically.
A track less than 10 seconds in length on an audio CD cannot be
<
recorded .
If the Stop
<
(
H) button or Pause (J) button is pressed within 10
seconds from the beginning of a track, the unit continues to record
no signal and stops when the track’s length reaches 10 seconds.
When recording is finished, “PMA WRITE” blinks for a few seconds,
<
and then the unit goes into the stop mode. Do not apply shock or
vibration to the unit while recording or “PMA WRITE” blinks.
When the available recording time reaches 0, recording will stop
<
automatically.
If a half-way recorded disc is inserted, recording continues next to
<
the last recorded track.
You can add tracks to an unfinalized recordable disc. Once
<
finalized, a CD-R disc is “fixed” and behaves in the same way as a
CD. Finalized CD-RW discs, however, can be unfinalized, erased and
re-recorded.
When the auto track function is used, the tracks are separated
<
based on the specified level. Therefore, if a silent part is contained
at the beginning or in the middle of a track, the playback time may
not be the same as the actual length of the track.
When track numbers are added to continuous music such as live
<
performances, the sound is cut a moment.
If a disc recorded with this unit is played with another player, noises
<
may occur when the track changes.
Before Recording
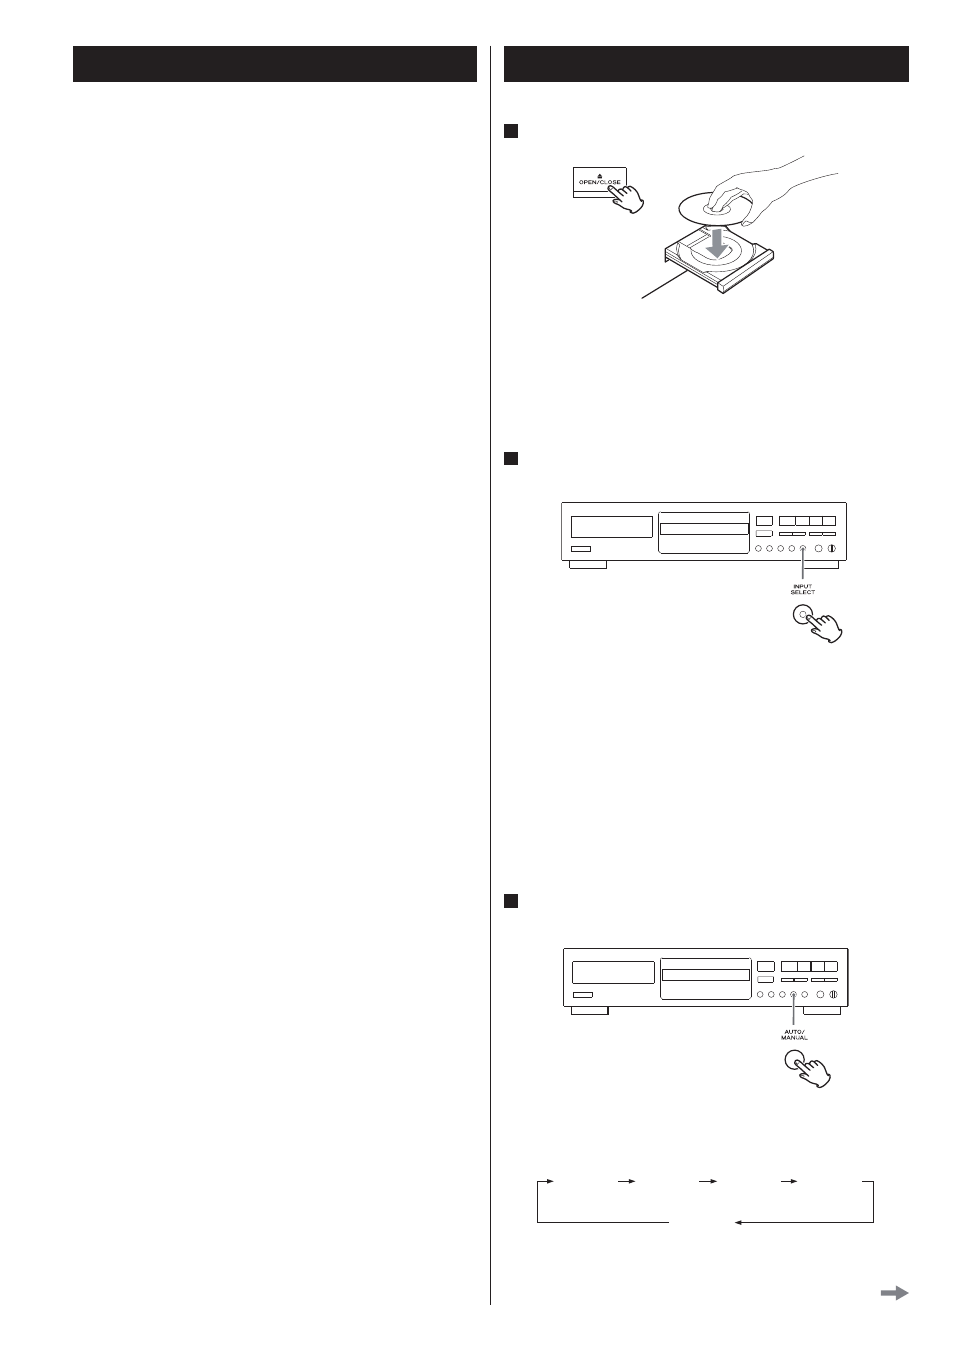
1
Load a recordable CD-R or CD-RW disc into the unit.
Press the OPEN/CLOSE (
L) button, place a disc on the disc tray
with the disc label side up, and then press the OPEN/CLOSE (
L)
button to close the disc tray.
Make sure “NO TOC” and “CD-R” (or “CD-RW”) indicator lights on
the display.
2
Select the source to be recorded using the INPUT SELECT
button.
Each time the INPUT SELECT button is pressed, the display changes
as follows:
DIGITAL (OPTICAL IN)
Select this to record a source connected to the DIGITAL IN terminal.
ANALOG (ANALOG IN)
Select this to record a source connected to the ANALOG IN
terminal.
The input source cannot be changed during recording.
<
3
Select the mode of track number assignment using the
AUTO/MANUAL button.
When the AUTO/MANUAL button is pressed once, the current
increment level is displayed. Press the AUTO/MANUAL button
repeatedly to select another setting.
After 2 seconds have passed, the display returns to the track/time
<
display.
S-LVL -60
S-LVL -50
S-LVL -40
S-LVL -30
MANUAL
Recording (1)
Continue to the next page
CD-RW890_E_vA_unlocked.pdf 17
10/09/08 17:17