Tascam dr file transfer – Teac DR File Transfer User Manual
Page 5
TASCAM DR FILE TRANSFER
5
X
TASCAM DR FILE TRANSFER
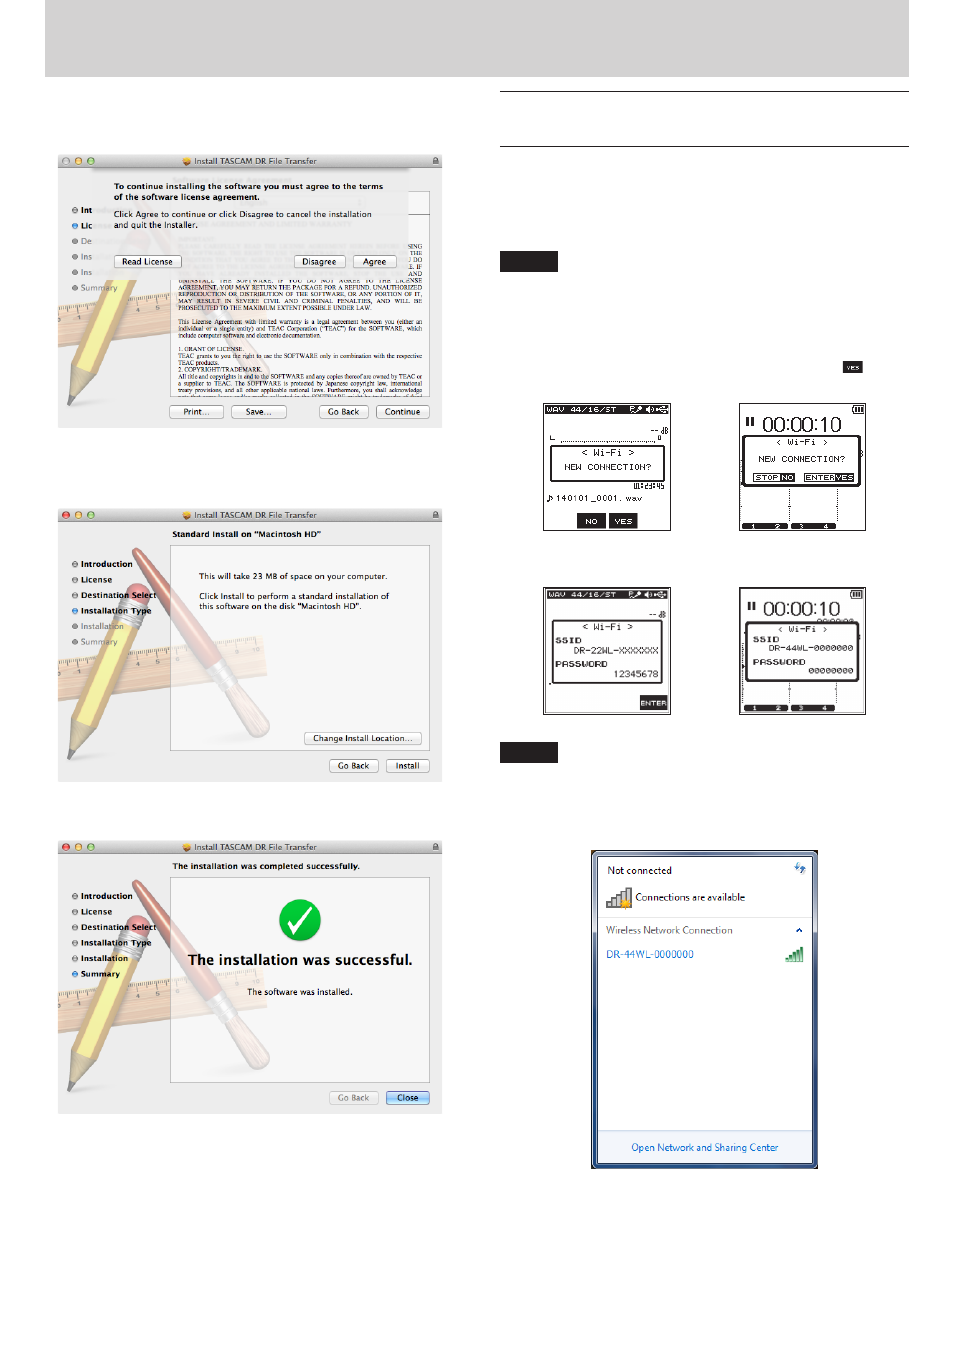
6. If you agree to the contents of the license, click “Agree”. If you
want to read the end user license agreement again, click the
“Read License ” button.
7. Next, click the “Install” button to start installation. To change the
installation destination, select the “Change install Location... ”
button.
8. The following screen appears when installation has completed.
Click the “Close” button.
This completes installation of the software.
Connecting the DR-22WL/DR-44WL to
the computer by Wi-Fi for the first time
Since the Wi-Fi connection between the DR-22WL/DR-44WL (hereafter,
“DR unit”) and the computer is direct, there is no need for a Wi-Fi router
or other external equipment, nor for a Wi-Fi network.
The DR unit and the computer can be connected without anything
else.
NOTE
When the DR unit and the computer are connected by Wi-Fi, the
computer cannot be connected to other Wi-Fi networks.
1. Press the Wi-Fi button on the DR unit. The Wi-Fi indicator blinks.
A “NEW CONNECTION?” pop-up message appears to confirm
whether or not it is a new connection.
2. Since this is the first time connecting, press the F3
button
on a DR-22WL or the ENTER/MARK (YES) button on a DR-44WL.
DR-22WL
DR-44WL
3. The SSID and a password appear on the display.
DR-22WL
DR-44WL
NOTE
The SSID is the name of the wireless LAN access point (wireless
LAN device).
4. Click the wireless connection icon in the computer task bar
(Windows) or menu bar (Mac) to open a list of wireless networks.
On Windows