Transferring from the dr unit to the computer, Tascam dr file transfer – Teac DR File Transfer User Manual
Page 7
TASCAM DR FILE TRANSFER
7
X
TASCAM DR FILE TRANSFER
6
COPY button
Checked files will be transfered to the computer.
Folders cannot be transferred even if they are checked.
7
SETTINGS button
Click this to show the SSID input and file saving settings.
8
Move to new directory
Move to the previous folder.
9
Check all button
Click to check/uncheck all the files that are shown.
0
Name button
Click to reorder the files in name ascending/descending order.
q
Date button
Click to reorder the files in date ascending/descending order.
w
Size button
Click to reorder the files in size ascending/descending order.
e
Check buttons
Select files for transmission.
r
Folders
This shows folders on the DR unit.
Double-click to open the folder.
These are not shown when there are no folders on the DR unit.
t
Audio files
This shows files on the DR unit.
These are not shown when there are no files on the DR unit.
y
File format
This shows the audio file type as WAV/MP3.
u
File details
Click a file to show details about it here.
Name :
File name
Size :
File size
Date :
Date and time updated
Format :
File format and sampling rate
Music Length :
File time
Transferring from the DR unit to the
computer
1. Launch the TASCAM DR FILE TRANSFER application on the
computer you are using.
2. When the application launches, a screen like the following will
appear on the computer.
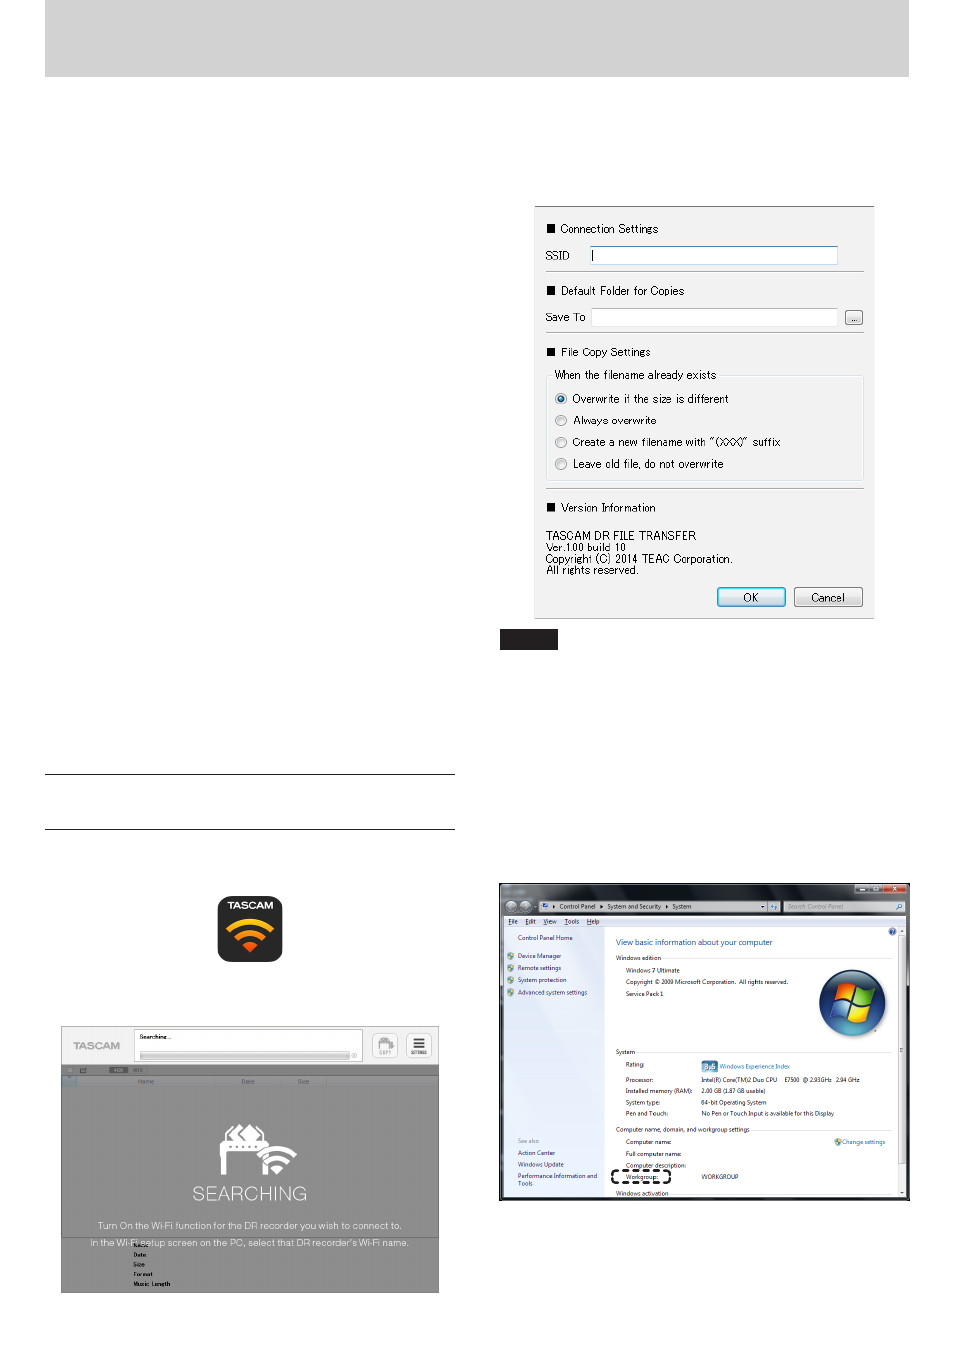
3. Click the “SETTINGS” button at the top right of the screen to
open a screen like the following. Input the SSID of the DR unit
connected by Wi-Fi to the computer, and click the “OK” button.
(You only need to do this the first time it launches.)
You can check the SSID with the DR unit's MENU/TOOLS/Wi-Fi
item or the computer Wi-Fi connection screen.
NOTE
WhenusingaWindowscomputerthatispartofaworkgroup,input
“.local“aftertheSSID.
Example : Enter “DR-44WL-0000000.local” in the SSID field.
How to check whether or not a Windows computer is part of a
workgroup
Using Windows 7
Right-click “Computer“ in the Start menu and select “Properties“
to open the following screen.
Using Windows 8 (including 8.1)
Move the mouse cursor to the bottom left of the desktop screen
and right-click to show an options menu. Select “System” from
this menu to open a screen like the one below.
Windows 7 example
If the area indicated by the dashed line is “Workgroup“ rather
than “Domain“, it is part of a workgroup.