Start-up & commissioning – WattMaster VAVBOX User Manual
Page 10
Technical Guide
VAVBOX Controller
10
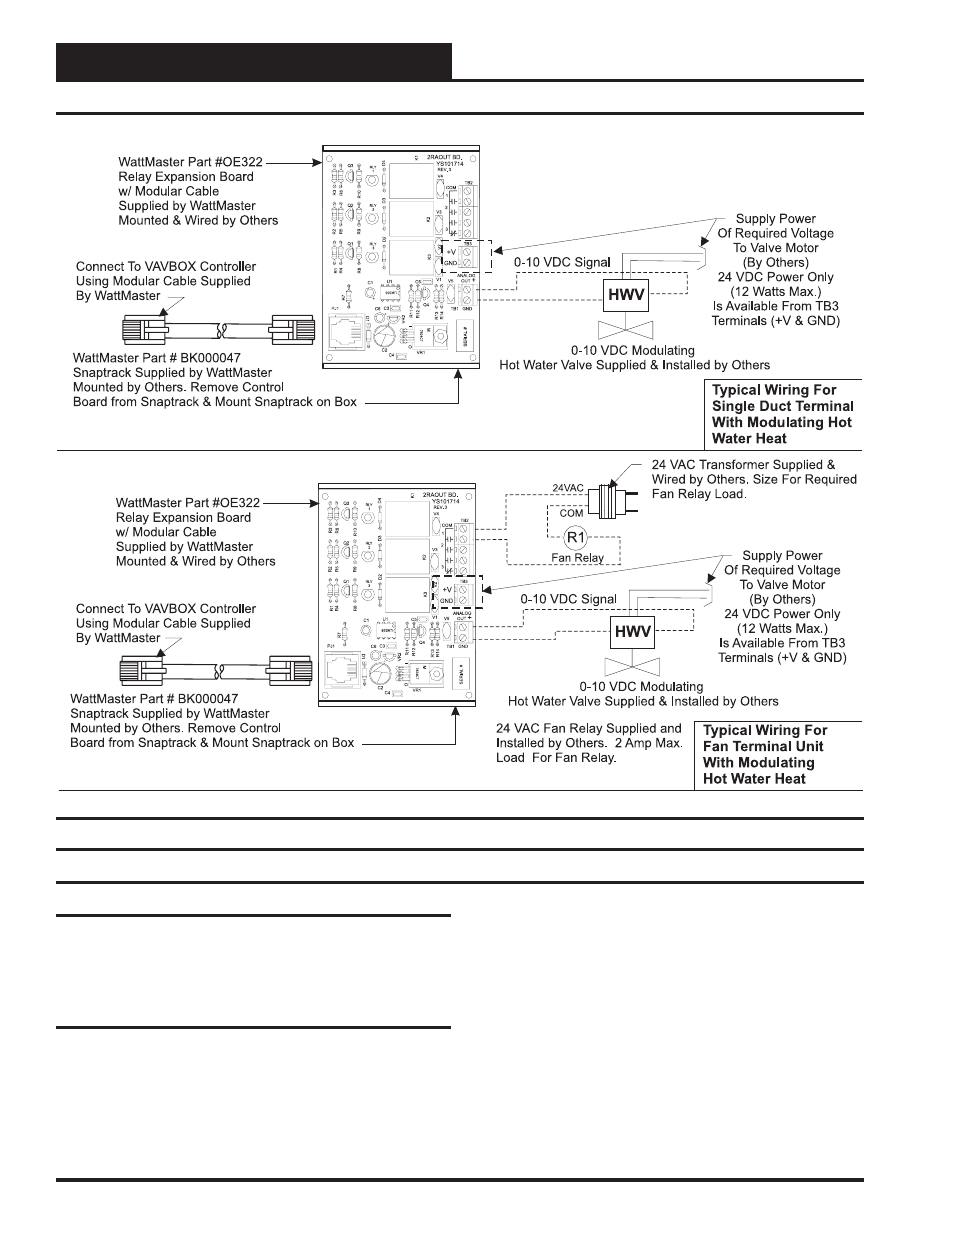
Figure 8: Expansion Board Wiring For Modulating Hot Water Heat Applications
Start-up & Commissioning
General
In order to have a trouble free start-up it is important to follow a few
simple procedures. Before applying power for the first time it is very
important to correctly address the controller and run through a few simple
checks.
Controller Addressing
All VAVBOX controllers are equipped with address switches. If the
VAVBOX controller is to operate as a Stand Alone controller (not con-
nected to any other HVAC unit or VAVBOX controllers) the controller
address switch should be set for address 1. When the VAVBOX con-
troller is to be connected to other controllers on a communication loop,
each VAVBOX controllers address switch must be set with a unique
address between 1 and 58.
When programming the VAVBOX controller and asked to enter the Unit
ID you would first enter the MiniLink loop address for the loop the
controller is connected to and then enter the VAVBOX controllers ad-
dress. See Figure 10 for a diagram depicting address switch settings.