Basic installation, Back of hdbridge module, Hdbridge rack chassis – ZeeVee HDbridge Module User Manual
Page 5
HDbridge Get Going Guide
Page 5 of 8
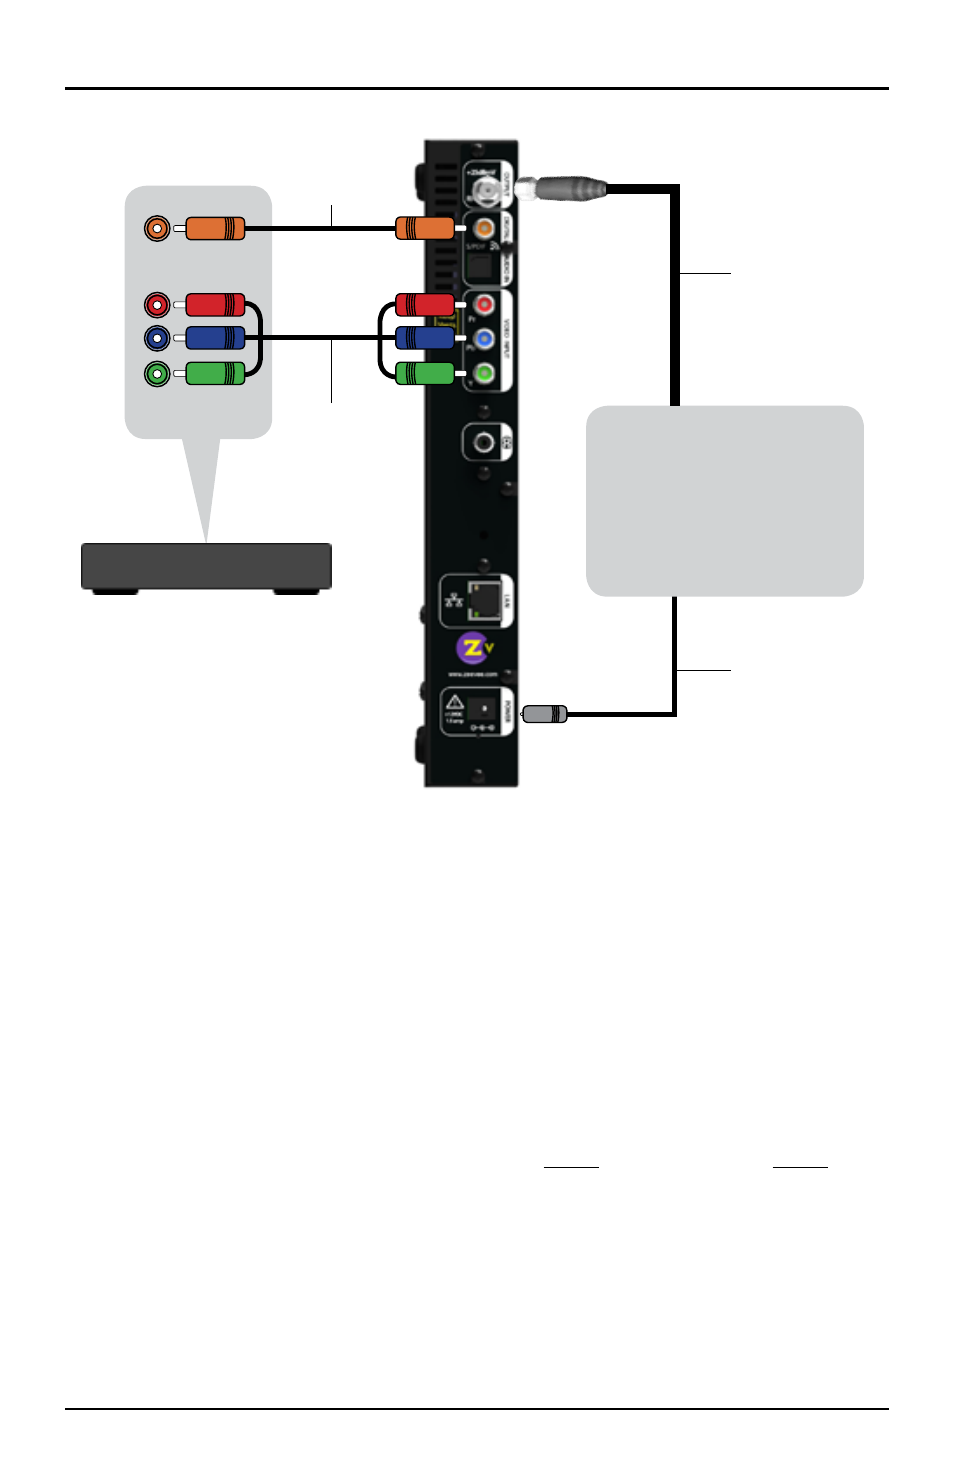
Basic Installation
F
actory default settings allow your module to broadcast a component HD source with
digital audio on Channel 2.1, over coax cabling, for reception at connected HDTVs.
Connect DC power from the rack chassis into the module.
1.
Connect Component Video and Digital Audio of an HD source.
2.
Connect Coax output to the HDTV RF input.
3.
Tune the HDTV to channel 2.1 to view your new Zv channel.
4.
Configuration and firmware updates are done via a web interface. Connect the LAN port
directly to a PC using a standard Ethernet cable. In a few minutes, your PC will recognize
the device and will present it under “Network” or “Network Places.” Double-click on the icon
(its name will be the unit’s serial number). The web interface will open up in your browser
and display the login page. The default Username is “admin” and Password is “admin.” (You
can change the Password but not the Username.) Once you log in, the interface will take
you through the configuration. The broadcast channel also can be set via a front-panel
button as described on the next page. Note: Windows XP users must have UPnP installed
on their computer. Go to www.zeevee.com/FAQ for more information.
For help with installing your HDbridge Module onto a coax network, please see our
tutorials, found on the ZeeVee web site: www.zeevee.com/support/training.
Coax Cable
Back of HDbridge Module
HD Source
HDbridge
Rack Chassis
HDb-RK1
S/PDIF
Audio
Cable
Component
Video Cable
Audio Out
Video Out
Power