Setting up zyper4k in a point to point environment – ZeeVee ZyPer4K (10G-IP) User Manual
Page 5
ZyPer4K Configuration Guide
|
Page 5
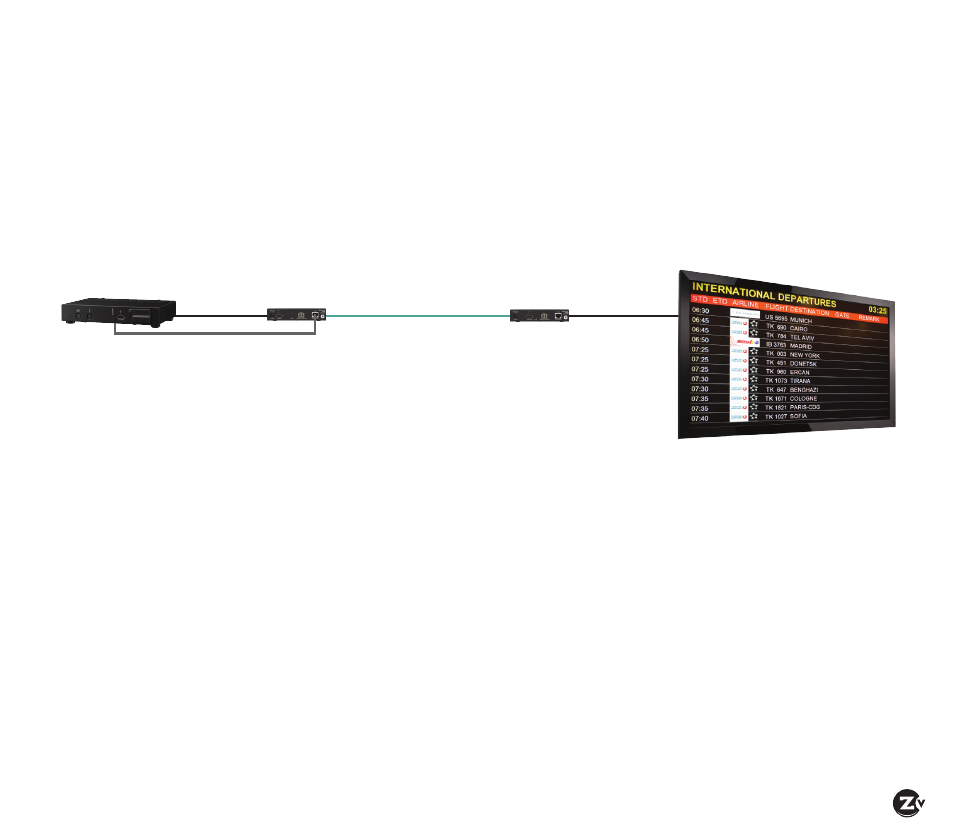
1. Connect HDMI cable from active source to Encoder (HDMI In port). Ensure Encoder is plugged
in and pwr LED light is illuminated. When HDMI cable is connected, the video (vid) light will
illuminate.
2. Insert SFP+ module into the 10Gb Optical Ethernet port on the Encoder. You should hear a
click sound when it is correctly inserted.
3. Insert fiber optic cable into the SFP+ module. Again, you should hear a click sound when fully
inserted.
4. Connect HDMI cable from active display to Decoder (HDMI Out port). Ensure Decoder is
plugged in and that pwr LED light is illuminated.
5. Insert SFP+ module into the 10Gb Optical Ethernet port on the Decoder. You should hear a
click sound when it is correctly inserted.
6. Connect fiber optic cable from the Encoder into the SFP+ module on the Decoder. Again, you
should hear a click sound when correctly inserted. The vid light on the Decoder will illuminate
and video coming from the source now appears on the display.
Setting Up ZyPer4K in a Point to Point Environment
A point to point, or one to one environment involves connecting one source directly to one display. A network
switch is not needed in this basic configuration. This environment also does not require configuration through
the ZyPer4K management software and is a true “plug and play” setup.
If using analog audio, RS232 or Infrared, you may need to configure the Encoder and Decoder with our
management software. See the Using the Tabs in ZyPer4K Management Software section for more information.
HDMI
Point to Point
Fiber Connection
(up to 30km)
HDMI
Digital Signage
Player
ZyPer4K Encoder
ZyPer4K Decoder