Installing the hard disk – ACTi XNR-4200 V1.02.13 User Manual
Page 9
Advertising
XNR-4200 User’s Manual 1.02.13
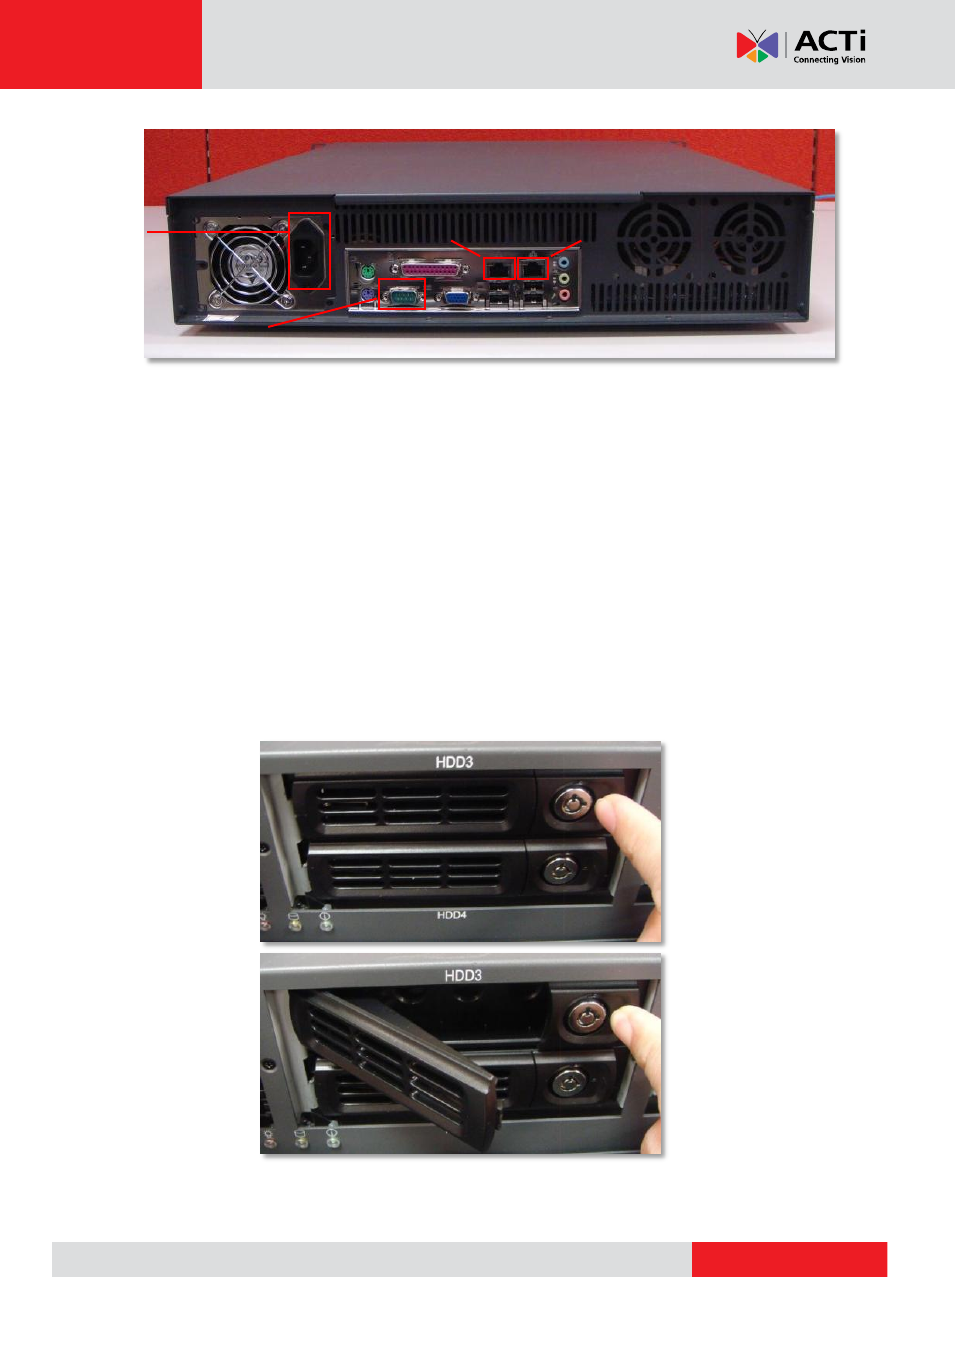
Back View
Installing the Hard Disk
Before removing the HDD trays, please make sure the device is turned off. Your hard disks may
be damaged if you move the HDD trays while the device is operation.
To remove the HDD tray, first slide the Slide Lock Tab to the right. The Hinged Insert Tab will
then pop out by itself. Pull the tab to 90 degrees from the front panel to disengage the internal
connection. Pull out the tray to insert or remove Hard Disk.
To insert HDD tray, slide the tray until it is stopped, then close the tab to connect Hard disk to
system.
Power
Socket
Ethernet Port 1 Ethernet Port 2
RS-232 Port (For Diagnostic Adapter Connection Only)
Advertising
This manual is related to the following products: