ARAG Mixer NIAGARA User Manual
Page 10
10
Since a large quantity of chemical product must be filled, it is
possible to pour the product directly in the Mixer with the lid
open during draining, with the valve (yellow lever C) open and the
Mixer valve open (Fig. 4) until the fluid is completely transferred
into the tank.
If a standard amount of chemical is needed, follow the procedure
described below:
-
WITH CLOSED LID, pour about five liters of water and lift the
yellow lever (
C, Fig. 5);
- Open the cover and add the required amount of chemical.
If all the chemical product has been used, flush the container:
- Place the chemical product container upside-down on the internal jet,
inserting it as much as possible in the container flushing nozzle (Fig. 6a);
- Keeping the container
IN POSITION, start the jet by lifting the black
lever (A, Fig. 5 + Fig. 6b) to flush the container.
Wash the container three times for about 15 seconds each time.
Check all valve gaskets and seals at regular intervals to
avoid accidental tank filling while operating the Mixer.
Check the two inner nozzles for proper operation at regular
intervals.
6.1
Problems and remedies
PROBLEM
CAUSE
REMEDY
Mixer empties slowly
Low Venturi nozzle
flow rate
• Replace nozzle with
another one having a
suitable flowrate.
• Check for nozzle
clogging.
Water into the Mixer when all
levers are in closed position
One or more manual
valves (
A, B or C,
Fig. 5) leaking.
• Check and clean or
replace valve gaskets and
seals as needed.
Operating either lever
A,
B or C (Fig. 5) difficulty in
water inlet through internal
nozzle is found
Internal nozzle clogging
• Clean or replace
the internal nozzle, if
necessary.
Tab. 3
Fig. 6a
Fig. 6b
6.2
Cleaning instructions
- Only clean with a soft and damp cloth.
- DO NOT use detergents or aggressive products.
7
END OF LIFE DISPOSAL
Dispose of in compliance with current local laws.
Dispose of the container in compliance with current local
laws.
CAUTION!
After flushing the container, CLOSE THE LID BY TURNING
UNTIL IT LOCKS.
- Lift the
yellow lever C again (Fig. 5) to pour the necessary amount of
water for a correct premixing.
- Lower the
yellow lever C (Fig. 5).
5.2
Feeding the tank with premixed product
Open the ball valve on the lower Mixer area (Fig. 4): by doing so,
the Mixer internal area is connected to the main tank loading circuit.
Once Mixer draining has been checked, close the lid and continue
with the next step:
Lift all the three levers (A, B and C, Fig. 5): by doing so, all the
nozzles will be started to flush the internal walls.
The operation shall have a duration of about 30 seconds.
Now stop any water flow inside the Mixer by lowering
all the three
levers (A, B and C, Fig. 5).
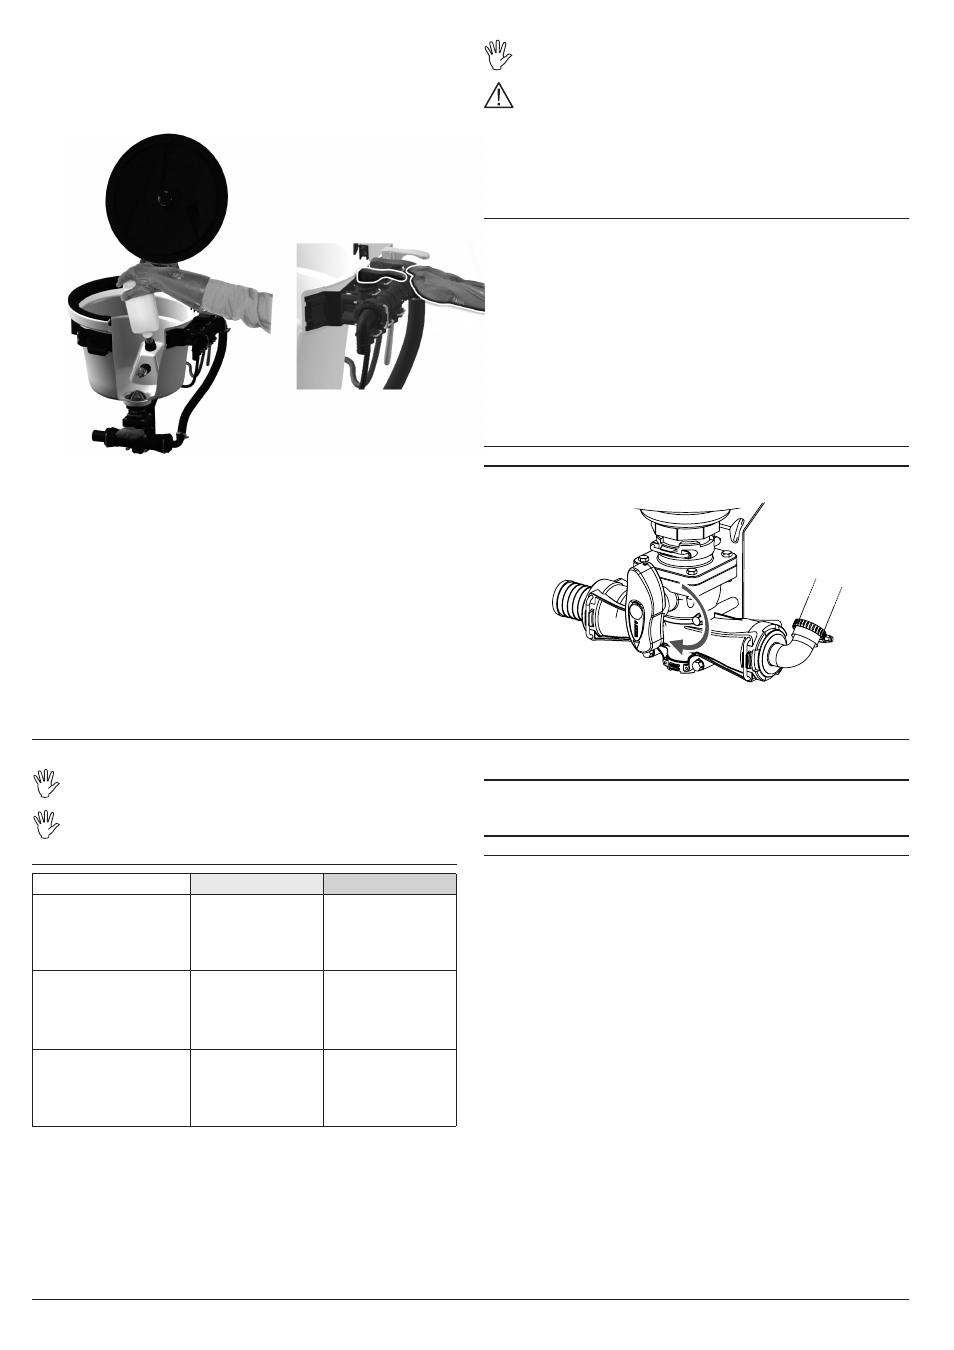
Wait for the Mixer to completely drain, then close the two-way ball
valve on the lower mixer area by rotating the knob clockwise (Fig. 7).
The procedure is finished.
6
MAINTENANCE / TROUBLESHOOTING / REPAIR
Fig. 7