Using the kaleido-rcp2 with default settings – Grass Valley Kaleido-X16 Quick Start v.7.80 User Manual
Page 23
11
Kaleido-X16
Quick Start Guide
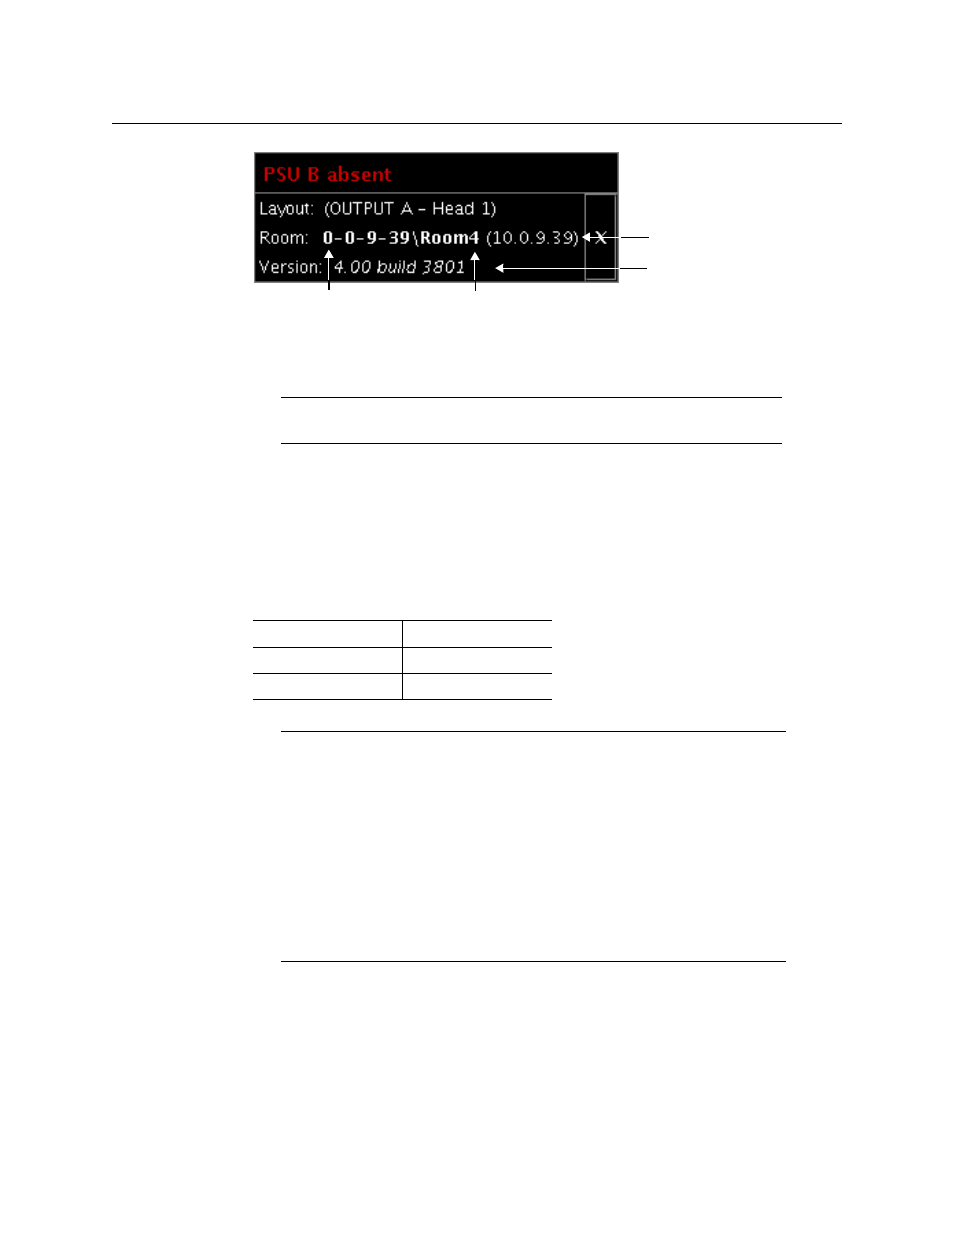
Enlarged view of dashboard.
Using the Kaleido-RCP2 with Default Settings
To start using the Kaleido-RCP2 with its default settings
1 Physically connect the Kaleido-RCP2 unit to the network using an Ethernet cable (see
By default, the Kaleido-RCP2 is configured with DHCP enabled, so it will automatically
be assigned an IP address by a DHCP server. If no DHCP server can be found, the
Kaleido-RCP2 will fall back to its default static IP address, subnet mask, and gateway
settings:
2 On the Kaleido-RCP2 unit, press the ENTER button and hold it until the ESC button
lights up.
The following message appears on the LCD display:
Configuration
ROOM SELECTION
Application version
Frame IP address
System name
Room name
Note:
The Kaleido-RCP2 unit is optional and is not included in the standard
Kaleido-X16 package.
Default IP address
10.0.3.191
Default subnet mask
255.255.0.0
Default gateway
0.0.0.0
Notes
• If you need to operate with a fixed IP address, you must use the
Configuration menu to disable DHCP and set up the correct IP address,
Network Mask, and Gateway (see the “Enabling or Disabling DHCP” and
“Setting an IP Address, Subnet Mask and Gateway” sections in the Kaleido-
RCP2 Guide to Installation and Operation, available on the DVD that shipped
with your system.)
• To access rooms located in other subnets, the Kaleido-RCP2 must be
configured with the appropriate unicast IP addresses (see the “Configuring
Unicast IP Addresses” section in the Kaleido-RCP2 Guide to Installation and
Operation, available on the DVD that shipped with your system.)