Advanced features, Package content, Recording into sx9500 from a pc – Invotel SX9500 User Manual
Page 2: Volume settings for recording, Specifications
ii
If your unit is already pre-recorded, audio playback starts automatically as soon as
the powers are connected and the Green and RED LED lights dance ON.
Advanced Features:
Tone control for supper BASS
Automatic Output 8Ω or 600Ω
Visual playback indicator with dancing multi-color LEDs
2000 mili watt amplifier
Package Content:
SX9500 2.4 GHz. Wireless Transmitter and Receiver
Two Power Adapters (110v-220v AC to 8V DC 500 ma)
RCA to RCA audio cord 6 feet long
“Y” patch audio cord 6 inch long
3.5mm Male to 3.5mm Male audio cord 6 feet long
User’s Manual
Recording into SX9500 from a PC:
1.
Make sure your PC is not playing any audio then connect one end of the recording cord
into the free female end of “Y” patch cable and connect the other end into SX9500
transmitter audio IN jack as shown in page one. Green LED and Red LED both turn off
now and playback stops in the receiver.
2.
Start your audio on your PC, the RED LED turns ON solid to indicate recording is in
progress.
3.
Wait till RED LED turns OFF on the SX9500 (it turns OFF about 10 seconds after audio
finished playing on your PC) then unplug the recording cord from the SX9500(you may
leave the other end remain connected to the “Y” patch cable
4.
Audio play back now resumes from receiver and LEDs on Transmitter start to dance.
Volume settings for Recording
The recording volume is directly effected by the volume setting on your PC, we recommend you
set the media player volume to about 50% level. Also double click on Speaker symbol (located
on lower right hand side of your screen)
set Volume control and Wave both to about 100% (all the way up), and also be sure speaker is
not muted.
Recording into SX9500 from a CD player, iPOD
etc.
SX9500 can also be recorded from a PC CD ROM drive or a CD player, or iPOD ,
etc. Just connect the recording cord into it and follow the steps in the page 2.
Adjusting Output VOLUME If the On Hold audio volume is too low turn the
VOLUME control on the receiver clockwise; If it is too loud turn the VOLUME control
counter clockwise to desired level.
Adjusting Output TONE Use the TONE control on the receiver to adjust the output
frequency. This is an important function and it could make the audio sound better.
Turning the TONE control clockwise amplifies the high frequencies while turning it
counter clockwise increases the low frequencies and provides supper BASS.
Automatic Output RCA 8Ω
Ω
Ω
Ω to 600Ω
Ω
Ω
Ω The Red output RCA jack on the SX9500
receiver provides 8 to 600 ohms at 2000 miliwatts.
Specifications
File Formats supports any sound file format such as Windows .wav, MP3, WMA, etc.
Frequency response 20Hz to 20 KHz.
Frequency range: 2.4 GHz.
Operation: Wireless from transmitter to Receiver up to 100 feet (clear line of sight)
Sampling rate 8-bit/16-bit uncompressed PCM @ 8, 11, 12, 16, 22, 24, 32, 44 & 48 KHz
Distortion less than 0.1% THD
Audio Quality supports better than CD Quality at 188 KB/s
Special effects: supports Windows Media Files and SRS WOW Effects
Memory Capacity 1 to 16 minutes (8 minutes 40 seconds @ full 188 KB/s sample rate).
Memory Type Multi-level Flash, 100 years retention time at no power, 100K re-recordable
Playback auto-repeat
Message loading Email load, automatic via playing the email; CD load automatic
Power supply 110V-220VAC50-60 Hz. To 8VDC 500ma
Audio output 2000 mili watts, Mono RCA , 2V p-p @ 8Ω 4V p-p @ 600Ω, 8V p-p @1200Ω
Size 4.5” x 2.5” x 2.2” (L x W x H) x two pcs Color: Bone
Weight 0.42 pounds (0.60 pounds with power supply) x two pcs
please note: use the royalty-free music titles to avoid annual licensing
payments to ASCAP and BMI for playing those titles on-hold
3
Volume control Wave
Volume
50
Not Mute
Windows Media Player
Volume setting
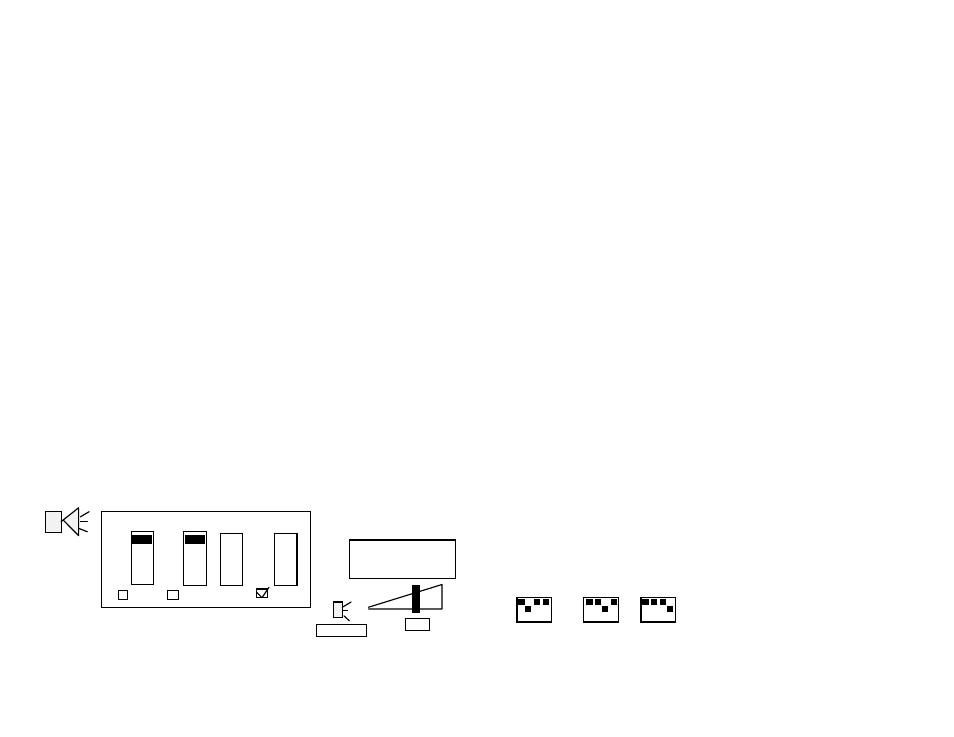
Note on CHSELECT dip switch: In order to keep the interference low, the analog
portion of both transmitter and receiver is in a separate enclosure than the digital
2.4GHz. frequency portion; the two section need to be set to same channel (default
is channel 1 -where dip switch 1 is turned ON) If you have other 2.4 GHz. devices in
your office and having any interference problems you can change the dip switch on
both transmitter and receiver to other channels as shown:
1 2 3 4
1 2 3 4
1 2 3 4
Channel 2 Channel 3 Channel 4