Linx Technologies MDEV-xxx-DT User Manual
Page 9
– –
– –
12
13
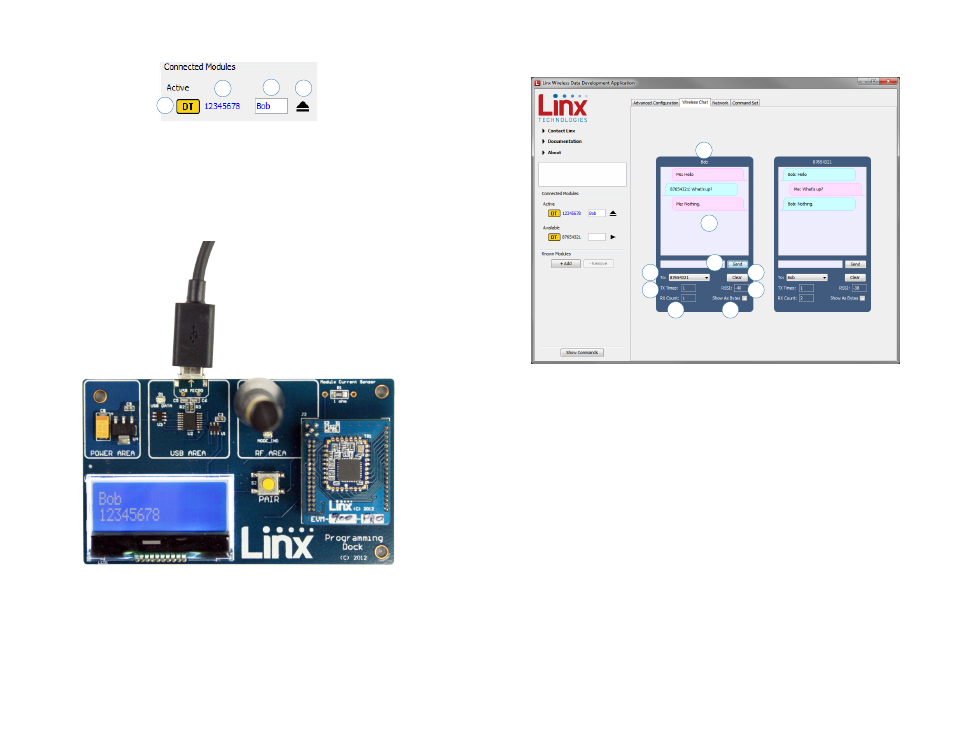
The Wireless Chat tab (Figure 14) offers a demonstration of sending data
between two modules. There is a window for each connected module.
1. The top of the window shows the address of the associated module.
2. The chat screen shows the chat messages that have been sent and
received.
3. The Send box is where the message text is entered. The message is
transmitted when the Send button is pressed.
4. The To menu selects the address of the connected module that is to
receive the message (the destination address).
5. The TX Times box shows how many times the module has transmitted.
6. The RX Count box counts the number of messages that the module
has received.
7. The Clear button clears all of the messages from the chat window.
8. The RSSI box indicates the signal strength of the last received
message.
9. When the Show As Bytes box is selected the messages are shown as
bytes in the chat window.
The modules are shown with four identifiers as shown in Figure 12.
1. The type of module (HumDT™ Series)
2. The module’s local address.
3. A custom name that can be given to the module. Type a name into
the box and press Enter to apply it. This name is shown on the LCD
display on the programming dock.
4. The active module has an eject symbol that disconnects the software
from that module when clicked. The Available modules have a play
symbol that makes that module active when clicked.
Figure 14: The Master Development System Software Wireless Chat Tab
7
4
1
2
3
6
8
5
9
Figure 12: The Master Development System Software Module Identifiers
1
2
3
Figure 13: The Master Development System Programming Dock with Name and Address Displayed
4