Casio CTK-860IN User Manual
Page 53
Recording Your Keyboard Play
EN-52
1.
Record the first part to Track 1.
To record to Track 1, perform steps 1 through 4 under
“Recording and Playing Back Keyboard Play” (page
EN-50).
2.
Press
cs
.
This will enter record standby.
3.
Press a button from
bt
to
cn
to select the track
number of the next track to which you want to
record.
This will enter record standby for the track you selected.
• If you want to use a different tone than the one you
used in Track 1, press
bn
(TONE) and then use
br
(10-key) to input the tone number.
4.
Press
bk
.
This will start playback of what you recorded up to this
point in other tracks and record what you play on the
keyboard to the currently selected track. Play the notes
you want on the keyboard.
5.
To stop recording, press
bk
.
• To play back what you have recorded, press
bk
again.
Each press of
bk
starts and stops playback.
6.
Repeat steps 2 through 5 to record the other
tracks.
7.
After you finish recording all of the tracks,
press
bk
.
• This will start playback of the recorded tracks. Press
bk
to stop or restart playback.
• At this time you can turn off playback of specific tracks
using buttons
bs
to
cn
. Pressing a key toggles
playback of each track on (track number displayed) or
off (track number not displayed).
• If you want to re-record a track, press
cs
. This will
return to step 2 of the above procedure. Only the tracks
that are turned on (displayed) above will play as you
re-record.
8.
Press
cs
twice to exit the recorder mode.
■
To delete a recorded track
After step 3 of the above procedure, do hold down
cs
(without pressing any keyboard key) until the message
“Tr.Del?” appears on the display. Press [+] (YES) to delete the
track, or [–] (NO) to cancel the delete operation.
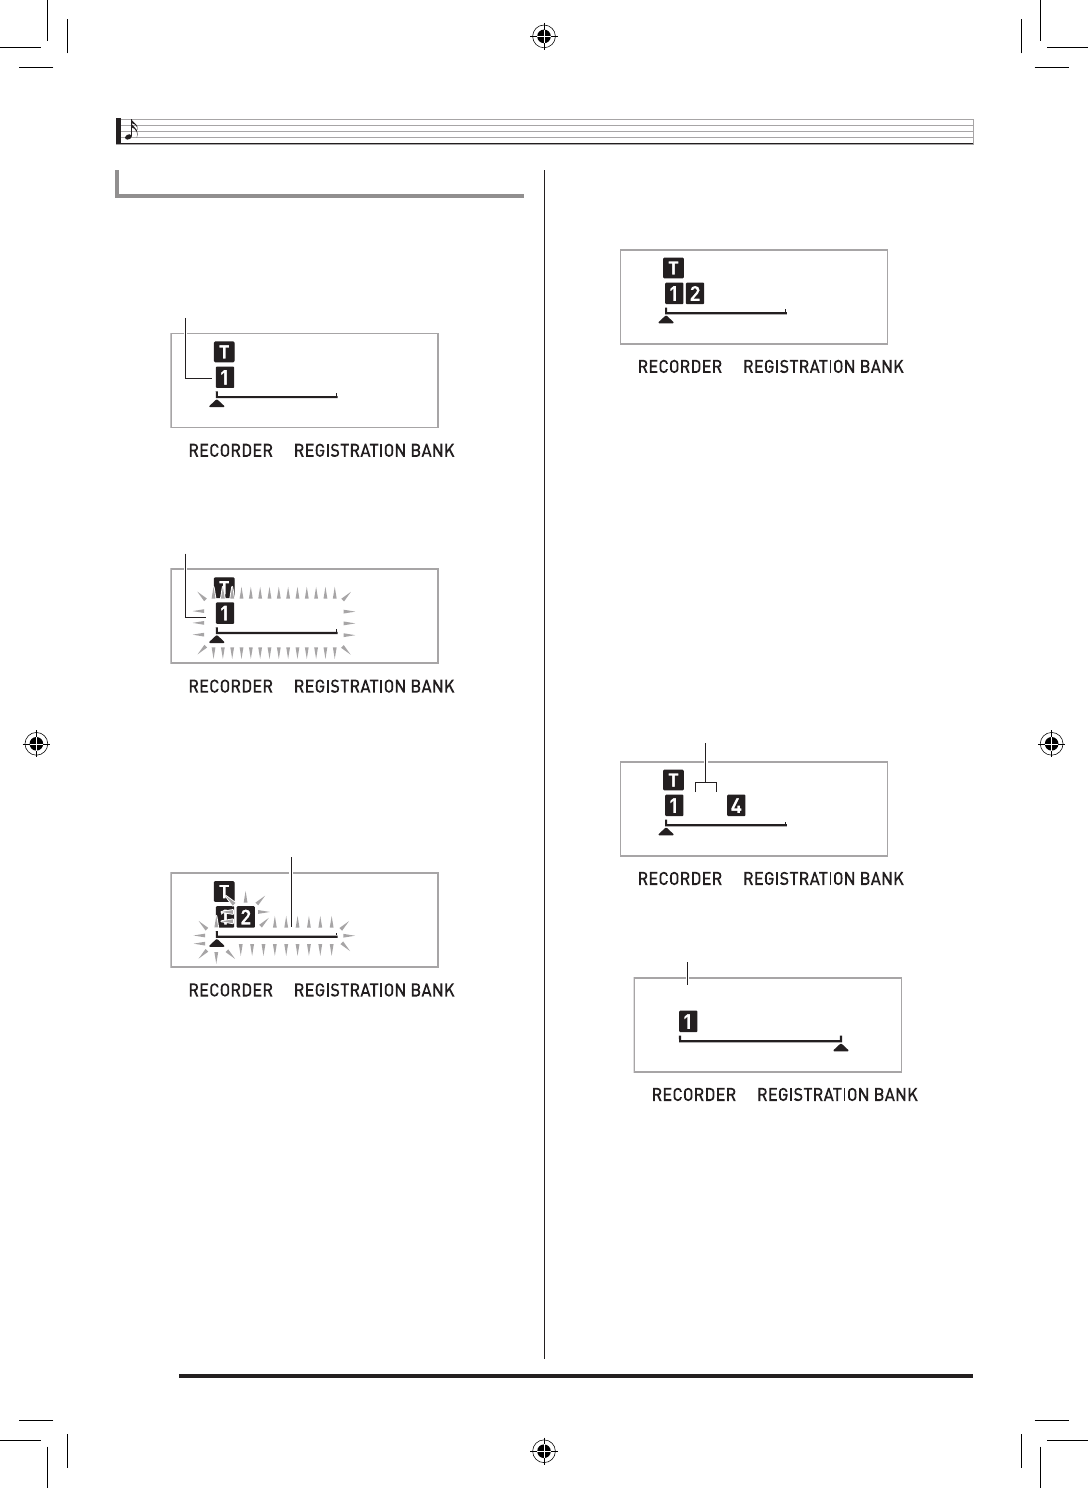
To record to Tracks 1 through 6
Example: Track 2
Lights
Flashes
Flashes
Example: Tracks 2 and 3 selected
Disappears
Disappears
CTK860IN_A5_x1a_EN.indd 54
2014/07/10 18:06:46