Casio Logo Transfer User Manual
Page 4
4
To transfer a user logo to the projector
Important!
Using the procedure below to transfer a user logo to a projector will delete any existing logo data
currently in projector memory.
1.
On the computer you plan to use for user logo transfer, visit the CASIO website
(page 2), and download CASIO Projector LOGO Loader and the required header
data (both as zip format files).
z After file download is complete, unzip the files and then place the unzipped files into the same
folder on your computer.
2.
Place a copy of the image file you want to use as a user logo in the same folder
as the above files.
3.
Unplug the projector power cord from the power outlet.
4.
Connect the projector to the computer.
z Connect the projector’s firmware update USB port or ROM update port to a USB port on your
computer. See your projector’s User’s Guide for detailed information about where ports are
located.
5.
Plug the projector power cord back in and turn on the projector.
z This will cause the projector’s POWER indicator to flash amber (lit one second, unlit one
second).
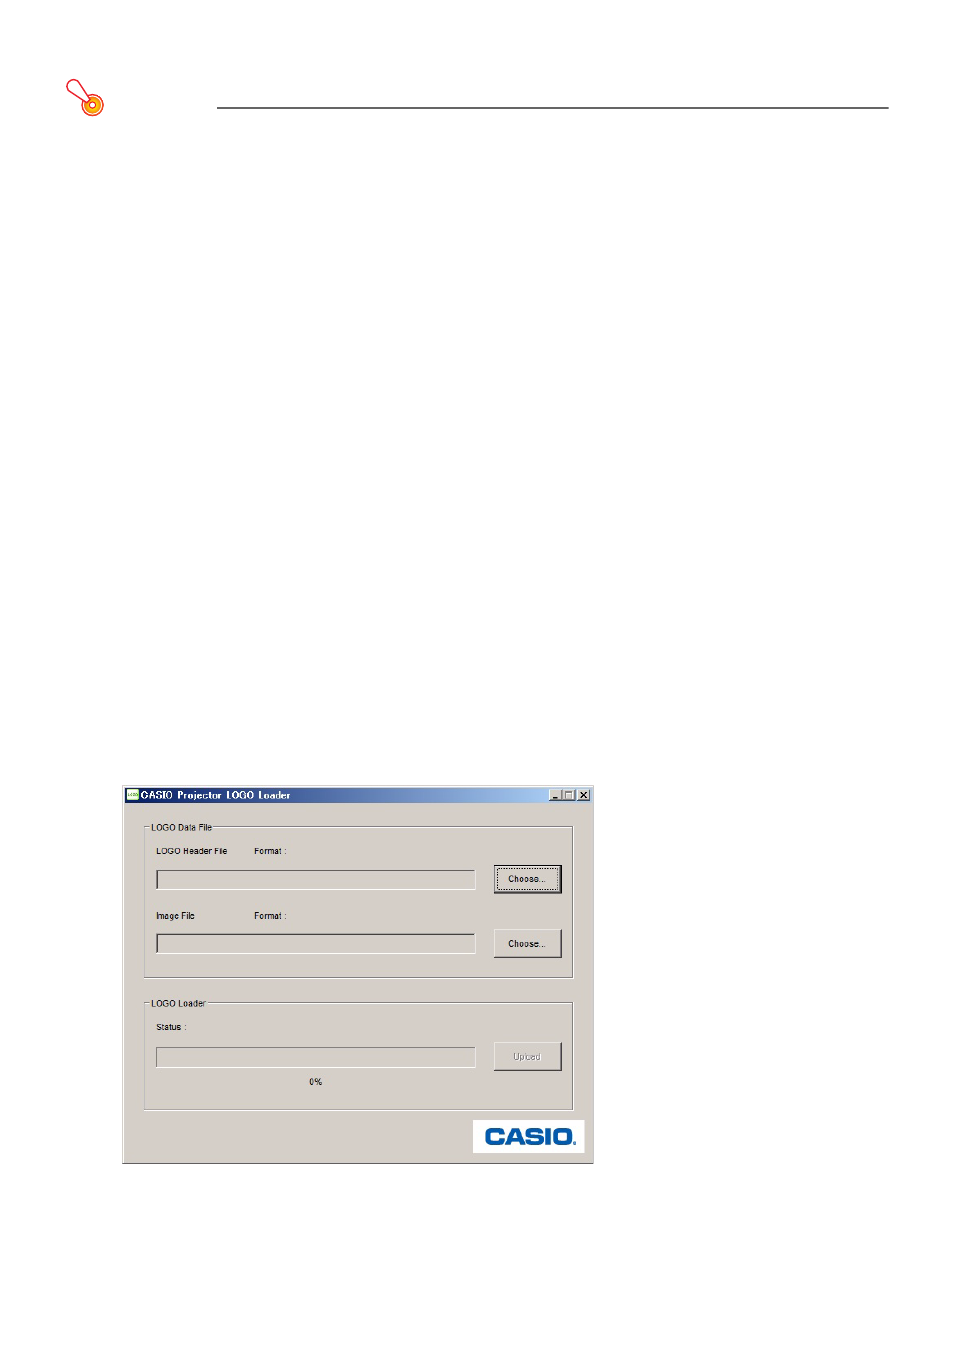
6.
On your computer, exit all other applications that are running.
7.
Double-click the CASIO Projector LOGO Loader file (PjLogoLoader_EN.exe) you
downloaded in step 1.
z This will display the CASIO Projector Logo Loader window.
8.
Click the [Choose] button next to “LOGO Header File”.