Chicago, Hanging the fan, Fig. 7 fig. 5 fig. 6 fig. 8 – Kichler 300001 User Manual
Page 5
4
Chicago
TM
Fig. 7
Fig. 5
Fig. 6
Fig. 8
Screw
shipping block
Fan assembly
Washer
120V wires
Mounting screw
Electrial box
Mounting
bracket
Set Screw
Cross Pin
Hanger Ball
Downrod
Downrod
Lock pin
Set screw
Hitch pin
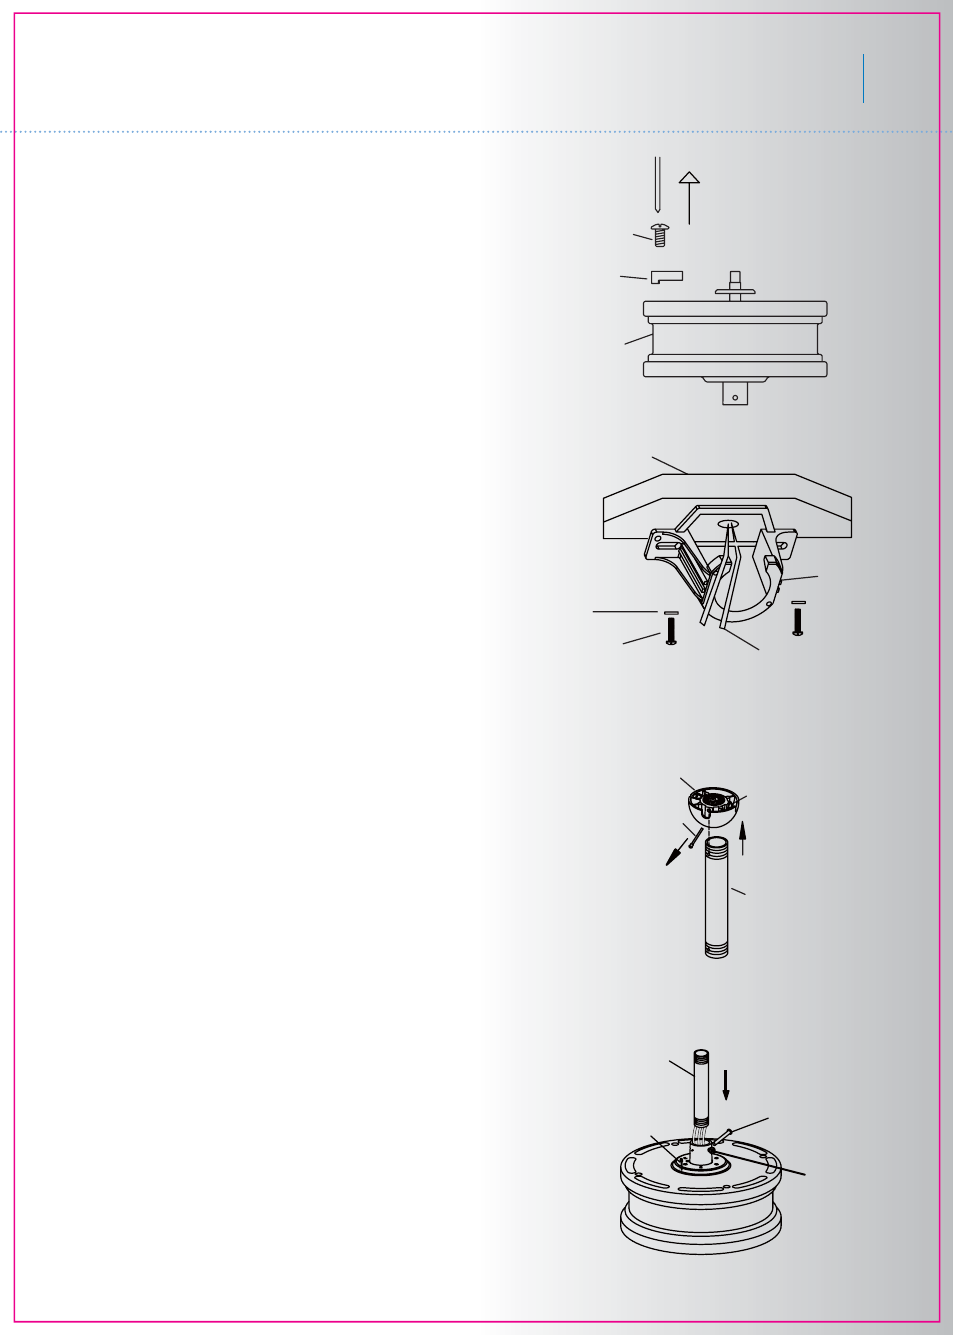
5. HANGING THE FAN
REMEMBER to turn off the power. Follow the
steps below to hang your fan properly:
Step 1. Remove the fan motor and housing
assembly from the protective plastic bag and
take the lower styrofoam packing pad out of
the carton. Place the styrofoam pad on the
floor, then place the fan assembly into the
styrofoam pad with the bottom of the motor
facing up. (The styrofoam pad serves as a
holder for the fan during the first stages of
assembly). Remove the plastic motor shipping
blocks and discard. (Fig. 5)
Step 2. Secure the mounting bracket to the
ceiling outlet box using screws and washers
provided with the outlet box. (Fig. 6)
Step 3. Use a screwdriver to loosen the cross
pin and remove it from downrod assembly.
Loosen the set screw and rotate the hanger
ball off the downrod. (Fig. 7)
Step 4. Loosen the two set screws and
remove the hitch pin and lock pin from the
motor coupling assembly. (Fig. 8)
Step 5. Carefully feed fan electrical wires up
through the downrod. Thread the downrod
onto the motor coupling until the hitch pin
holes are aligned. Next, replace hitch pin and
lock pin, and tighten both set screws. (Fig. 8)