Medal Sports SMUS1442121 User Manual
Page 11
A4
A8
A3
A7
A6
X 16
X 4
X 8
X 4
X 4
X 8
A1
A3
A4
A7 A4
4
8
A6
A8
A4
A3
A4
7
3
www.themdsports.com
1442121
10
(Continúe en la siguiente página.)
(Continued on the next page.)
Español
English
FIG.6
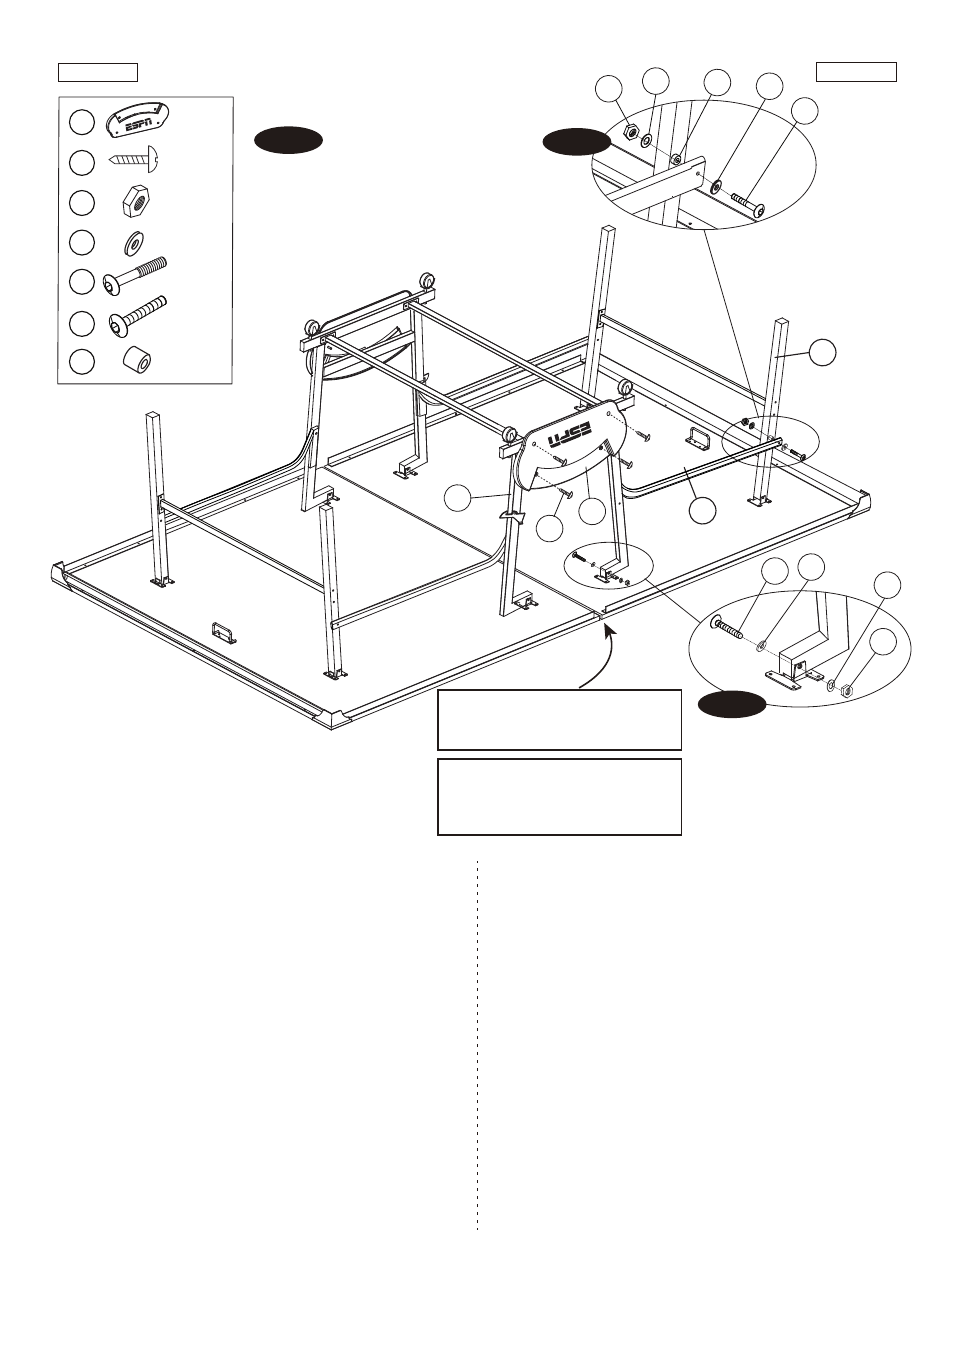
17. Turn over the pre-assembled Caster Frame
(see FIG. 6), then attach it to the table surface using
two Bolts (#A7), four Washers (#A4) and two Nuts
(#A3) per Table Surface.
See FIG. 6A.
Note: At least three adults are required to move
the table halves for safety.
18. Attach the Linkage Tube - 7 (#7) to the Leg (#3) using
one Bolt (#A6), two Washers (#A4), one Spacer (#A8)
and one Nut (#A3) per Linkage Tube - 7.
See FIG. 6B.
19.
Repeat the steps for another table half.
20. Attach Plastic Panel (#8) to the Caster
Frame (#4) using four Screws (#A1) per frame.
See FIG. 6.
Now go back and tighten all connections.
Note:
Please leave approximately 10mm
distance between table centers.
A1
Nota:
Por favor deje un espacio
aproximadamente de 10mm
entre los centros de mesa.
FIG.6
17. Coloque la superficie de mesa al Marco de Ruedecita
(pre-instalado, vea la FIG. 6). Luego adjunte la superficie
de mesa al Marco de Ruedecita usando 2 Cerrojos (#A7),
4 Arandelas (#A4) y 2 Tuercas (#A3) por Superficie de
Mesa.
Vea la FIG. 6A.
Nota:Por seguridad, se rquiere por lo menos 3 adultos
para voltear la mitad de mesa.
18. Adjunte el Tubo de Conexión - 7 (#7) a la Pierna Curvada
(#3) usando 1 Cerrojo (#A6), 2 Arandelas (#A4), 1
Espaciador (#A8) y 1 Tuerca (#A3) por Tubo de
Conexión - 7.
Vea la FIG. 6B.
19. Repita dichos pasos para la otra mitad de mesa.
20. Adjunte el Panel Plástico (#8) al Marco de Ruedecita (#4)
usando 4 Tornillos (#A1) por marco.
Vea la FIG. 6.
Ahora vuelva y aprete todas las conexiones.
X 2
8
FIG. 6
FIG. 6B
FIG. 6A