Step 3: low flow assembly, High flow, Tools required – Precision Medical HeliO2 Blenders User Manual
Page 21: Figure h, Figure i
Heliox / Oxygen Blender Service Manual
Page 19
HIGH FLOW
Step 3: LOW FLOW ASSEMBLY
Tools Required
Lint Free Swab (optional)
Pointed instrument for removing O-rings
Krytox GPL 106 or equivalent
Oxygen safe lubricant
#2 Phillips Screwdriver
1/2 in. Open End Torque Wrench
(Torque wrench(s) capable of 60 in-lbs and 10 ft-lbs)
11/32 in. Nut Driver
5/32 in. Long Hex Key
Small Retaining Ring Pliers
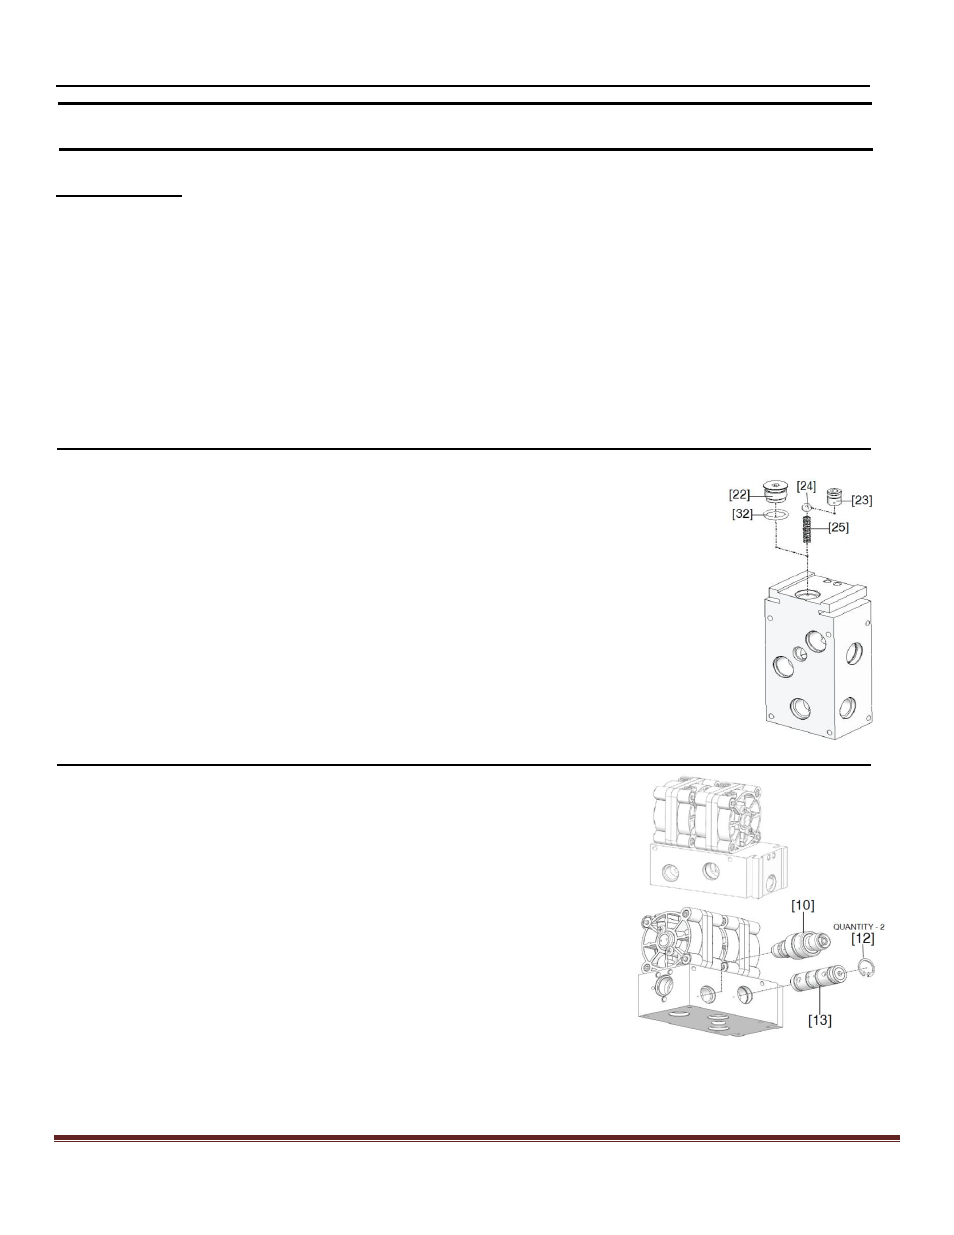
Figure H
1. Position manifold block so that the mounting bracket is facing up. The large
holes opposite the mounting locations of the diaphragm housing assemblies
are facing you.
2. Cover the alarm assembly thread location with thumb. Drop spring [25] then
ball [24] into alarm bypass orifice.
3. Place alarm bypass body [23] onto long shaft of 5/32 hex key. Guide the alarm
bypass body, threads first into the alarm bypass orifice, and screw into cavity.
Tighten until alarm bypass body is flush with bottom of center hole. Tighten
enough to clear center threads ONLY.
4. Replace O-ring [32] on plug [22]. Insert plug and tighten.
Figure I
5. Lubricate alarm bypass assembly bore on manifold block with Krytox
GPL 106.
6. Using retaining ring pliers install retaining ring [12] in one side of alarm
assembly bore.
7. Insert alarm assembly [13] into bore of manifold block.
8. Install remaining retaining ring.
9. Thread auxiliary outlet assembly [10] to manifold block, torque to 10 ft-
lbs (13.6 Nm).