Sony FE 2x Teleconverter User Manual
Page 48
SilverBack V Camera-Mountable Fiber Optic Transmission System
© 2021 MultiDyne, Inc.
Made in the USA
Page
48
To prevent possible IP address conflicts:
•
Initially isolate the SilverBack V base unit and your computer from the rest of your network by
unplugging all devices except the SilverBack V base unit and your computer.
or
•
Use an Ethernet cable to connect the SilverBack V base unit directly to your computer.
From your computer, launch a web browser.
•
Power up the SilverBack V base unit.
•
In the address bar of the web browser, enter the preset IP address indicated on the DIP switch.
•
Wait approximately 30 seconds while network communications are established.
•
Verify that the SilverBack V base unit dashboard web page displays in the web browser.
•
Should the web page fail to display after a minute or two:
o
Click the refresh/reload button in your browser.
o
Verify that the Ethernet cables are properly connected.
o
Ensure that the LEDs on the Ethernet connector registers activity.
o
Verify that you have properly performed each step of this procedure.
•
If you and your IT team cannot establish a connection, contact MultiDyne Technical Support.
Custom User IP Address (DIP Switch 2)
With network communications established, you may wish to configure a custom static IP address
through the Frame Ethernet Settings box on the web page dashboard.
•
Establish communications with the SilverBack V base unit by using one of the preset IP
addresses, DHCP, or previously configured User IP address.
•
From your computer, launch a web browser and enter the previously established IP address.
•
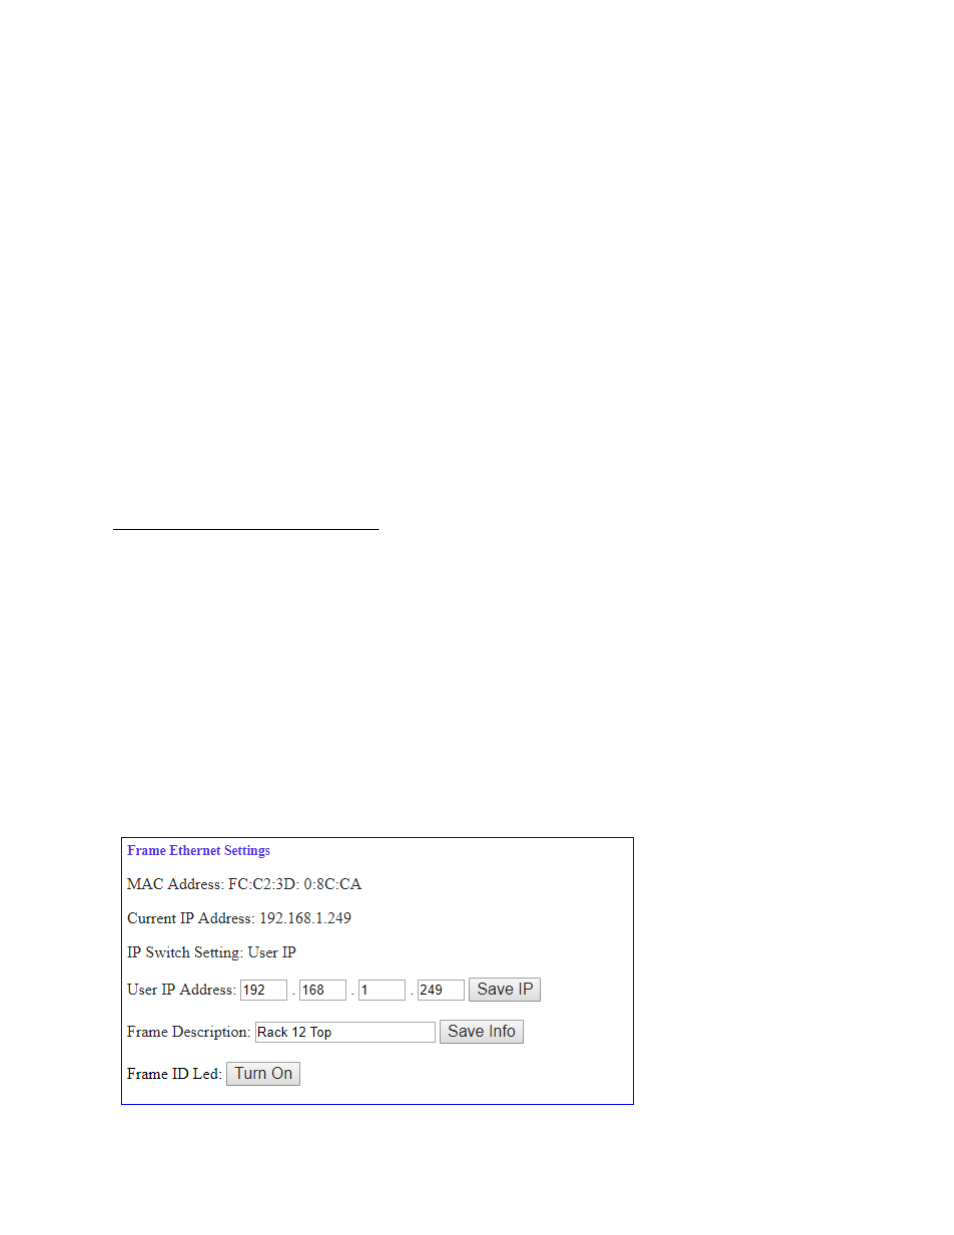
When the dashboard launches, enter the desired user IP address in the Frame Ethernet Settings
box. (Ensure that your computer and the SilverBack V base unit are on the same subnet. Contact
your IT Department if you need help determining or configuring the network settings of your
computer.)
•
Verify the IP address. Click "Save IP". (The IP address is stored in non-volatile memory.)
•
Switch the DIP switch #2 to ON. (If this switch is already on, you may need to toggle for the
address to take effect.)
•
Verify the new IP address by entering it into a web browser address bar.