Flexible arm installation, English, Remove the monitor stand for mounting – NEC E242N-BK 24" 16:9 IPS Monitor User Manual
Page 15: Mount flexible arm
English-13
English
Flexible Arm Installation
This LCD monitor is designed for use with a flexible arm. Contact NEC for more information.
To prepare the monitor for alternate mounting purposes:
• Follow the instructions provided by the manufacturer of the display mount.
CAUOINE:
To meet the safety requirements, the monitor must be mounted to an arm that supports the weight of the
monitor. See
for details. Remove the monitor stand before mounting.
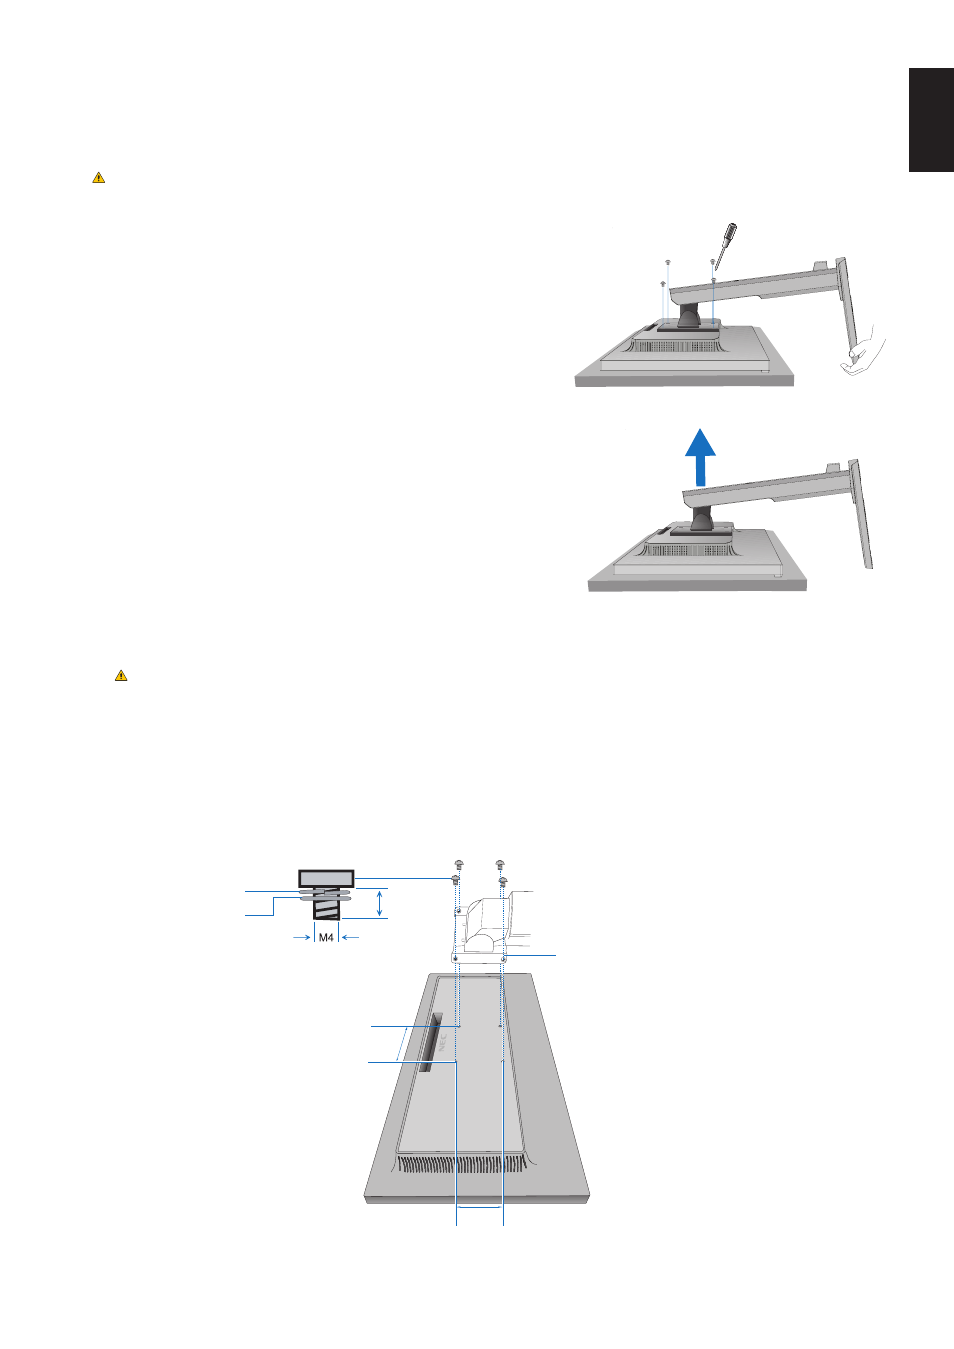
Remove the Monitor Stand for Mounting
To prepare the monitor for alternate mounting purposes:
1. Disconnect all cables.
2. Place your hands on each side of the monitor and lift up to the highest position.
3. Place the monitor face down on a non-abrasive surface (
Figure S.1
).
NOEE:
Handle with care when the monitor is facing down.
4. Remove the 4 screws connecting the monitor stand to the monitor
(
Figure S.1
).
NOEE:
Please securely hold the monitor stand while removing the screws
to prevent the monitor stand from falling.
5. Remove the monitor stand (
Figure S.2
).
NOEE:
Use only VESA-compatible alternative mounting method.
Handle with care when removing the monitor stand.
6. The monitor is now ready for mounting in an alternate manner.
Mount Flexible Arm
This LCD monitor is designed for use with a flexible arm.
1. Follow the instructions on how to
Remove the Monitor Stand for Mounting
.
2. Using 4 screws that meet the specifications listed below, attach the arm to the monitor
(
Figure F.1
).
CAUOINE:
• Only use the screws (4 pcs) that were removed from the monitor stand or the specified screws
(
Figure F.1
) to avoid damage to the monitor or monitor stand.
• To meet the safety requirements, the monitor must be mounted to an arm which guaranties the
necessary stability under consideration for the weight of the monitor. The LCD monitor should only be
used with an approved arm (e.g. TUEV NS mark).
• Tighten all screws (recommended Fasten Force: 98 - 137N•cm).
A loose screw may cause the monitor to fall off the arm.
• Attaching the flexible arm should be done by two or more people if the monitor cannot be placed face
down on a flat surface for installation.
3. Connect the cables to the rear side of the monitor.
Figure F.1
100 mm
100 mm
Thickness of Bracket (Arm)
2.0~3.2 mm
12 mm
Spring washer
Flat washer
Figure S.1
Figure S.2